Introducción
¿Está tu batería muerta o débil, impidiéndole a tu dispositivo encender? Si es así, aquí hay una guía para arreglar el problema quitando y reemplazando tu batería.
Qué necesitas
-
-
Asegúrate de que tu dispositivo esté apagado y desconectado de cualquier fuente de energía.
-
Para desconectar la tableta del teclado, abre el portátil y levanta la tableta del puerto del teclado.
-
-
-
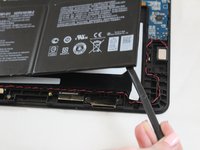
Empezando desde la esquina de la tablaeta, utiliza la herramienta Jimmy para crear un espacio entre la pantalla y la carcasa trasera.
-
Inserta una espátula de metal en el espacio que creaste con la herramienta Jimmy.
-
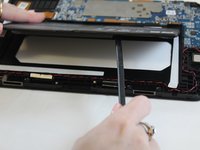
Lentamente desliza la espátula de metal a lo largo del perímetro de la tableta para levantar la pantalla y la carcasa trasera aparte.
-
Separa la carcasa trasera de la pantalla.
-
-
-
-
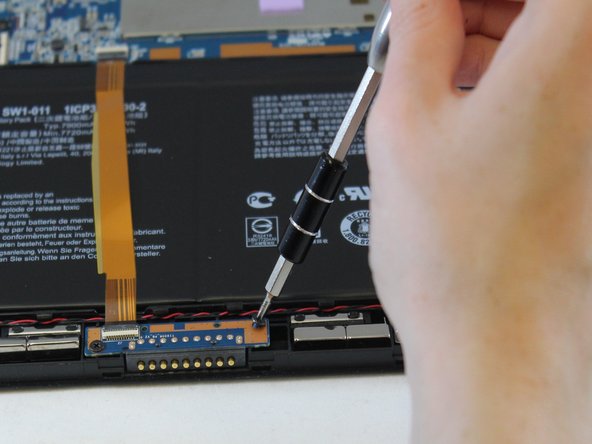
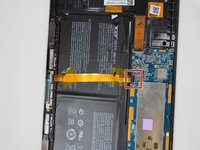
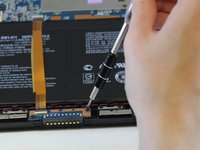
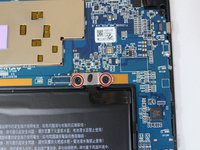
Utilizando el destornillador Philips #00 desatornilla los dos tornillos de 2mm en la parte inferior de la tableta y abre el cierre ZIF.
-
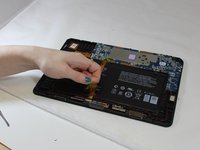
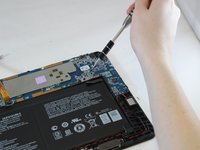
Con cuidado retira el cable plano dorado que cubre la batería y ponlo a un lado.
for removing the upper-end of the ribbon, one have to lift a little bit the connector, then it is very easy to extract the upper side of the ribbon
In step 4, the instructions say: "unscrew the two 2mm screws at the bottom of the tablet and open the ZIF latch". If you do it as described, you risk damaging the motherboard. Why?
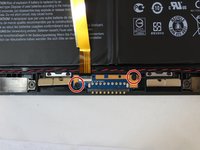
When you unscrew the screws, you release the metal bridge, fixing the connector. Although this part will remain glued to the battery cable, it is not fixed in any way, so it can fall on the circuit board at any time. But until you disconnect the battery from the PCB, the components on the board are powered and the metal part can cause a short circuit and irreversibly destroy the motherboard.
This is exactly what happened to me. Unfortunately, the manufacturer has not published service documentation with a diagram and layout of components, so the only solution (and expensive one) is to replace the motherboard. So I recommend holding the metal bridge while loosening the screws, carefully remove it and only then handle the ZIF connector. It is even safer to cover the PCB around the connector with insulating material.
-
-
-
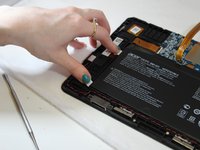
Retira la batería del dispositivo.
-


Para ensamblar tu dispositivo sigue estas instrucciones en orden inverso.
Para ensamblar tu dispositivo sigue estas instrucciones en orden inverso.
Cancelar: No complete esta guía.
5 personas más completaron esta guía.
Un agradecimiento especial a estos traductores:
100%

¡ Fuzzy_Pickles nos está ayudando a reparar el mundo! ¿Quieres contribuir?
Empezar a traducir ›

Equipo

Eastern Washington University, Team S1-G5, Carnegie Spring 2018 Miembro de Eastern Washington University, Team S1-G5, Carnegie Spring 2018
EWU-CARNEGIE-S18S1G5
Miembros de 4
6 Guías creadas
Nice guide, but warning!
If doing step 5, be very carefull. Guide says "unscrew the two 2mm screws at the top right of the battery", but not explains, what you are doing. So here is explanation: doing so you release the metal bridge, which is fixing the battery connector. After you unscrew the second screw, the bridge is not fixed in any way, and can sudenly fall on the circuit board.
I suggest to hold on this part and remove it carefully, because battery connector is still connected, so all components are powered. The metal part can cause a short circuit and demage motherboard. This is exactly what happened to me. Unfortunately, the manufacturer has not published service manual with a schematic and layout, so the only (really expensive) solution is to replace the motherboard. So watch out!!
Anthony - Contestar