Introducción
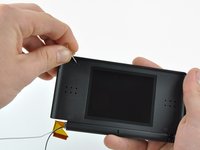
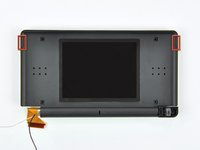
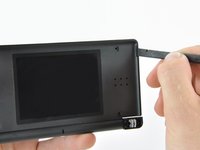
Vuelve a colocar la pantalla LCD superior en tu Nintendo DS Lite.
Qué necesitas
-
-
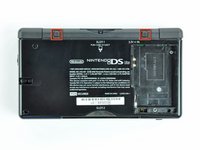
Desatornille el tornillo Phillips que sujeta la tapa de la batería a la carcasa inferior.
-
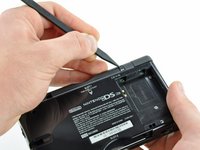
Haz palanca en la cubierta de la batería hacia arriba con un spudger o una uña y levántala para sacarla de la caja inferior.
-
-
-
Usa la punta de un spudger para levantar ambas patas de goma del DS Lite
-
-
-
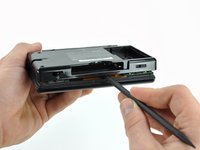
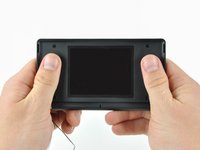
Inserta el borde de un spudger entre la caja inferior y superior cerca de la esquina superior derecha del DS Lite.
-
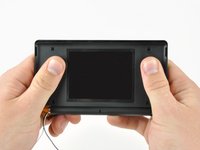
Pasa con cuidado el spudger a lo largo del borde derecho del DS Lite, creando una abertura en el proceso.
-
Continúa pasando el spudger por la parte trasera de la DS Lite hasta que la mayor parte de la caja inferior se haya separado de la caja superior.
-
-
-
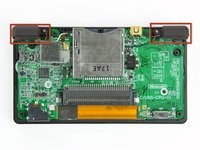
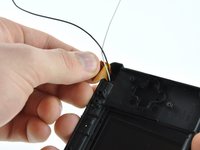
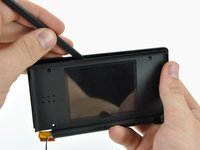
Usa el borde plano de un spudger para levantar el conector de la antena Wi-Fi de su zócalo en la placa Wi-Fi.
-
-
-
-
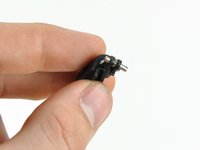
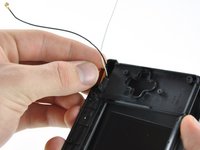
Usa el borde plano de un spudger para sacar el conector del micrófono de su zócalo en la placa base.
-
-
-
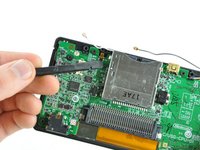
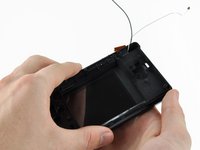
Coloca el cable de la antena con su conector hacia arriba y lejos de la placa base usando un spudger para sujetarlo ligeramente en el espacio entre los chips de la placa base.
-
Tira lentamente y con cuidado del cable de la antena hasta que el conector del cable quede debajo del lector de cartuchos de juegos DS Lite.
-
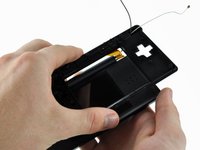
Continúa tirando del cable hasta que el conector del cable salga por debajo del lector de cartuchos de juego en el lado derecho.
-
-
-
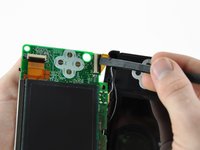
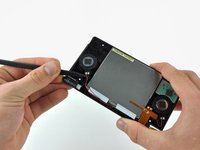
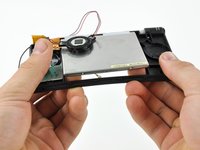
Usa la uña o el borde plano de un spudger para levantar con cuidado la solapa superior de retención del cable plano de la pantalla LCD.
-
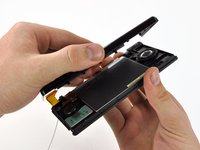
Retira la placa base del DS Lite para separar el cable de cinta LCD superior de su zócalo en la placa base.
-
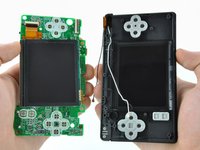
Retira la placa base del DS Lite.
-
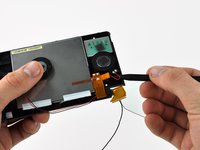
Ahora puedes abrir la solapa de retención de la pantalla LCD inferior de la misma manera y separar la pantalla LCD inferior de la placa base.
-
-
-
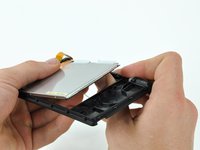
Retira los dos tornillos Phillips de 8,3 mm que sujetan la carcasa superior al ensamblaje de la pantalla.
-
-
-
Usa un alfiler para quitar las cuatro cubiertas de plástico para tornillos en el bisel frontal.
-
-
-
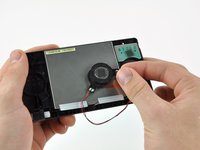
Usa la punta de un spudger para levantar ambos altavoces de su alojamiento y colócalos en la parte posterior de la pantalla LCD.
-
-
-
Comenzando en la esquina superior derecha, usa ambas manos para separar lentamente la pantalla LCD del bisel de la pantalla frontal.
-
Continúa separando a lo largo de los bordes superior e izquierdo de la pantalla LCD.
-
Finalmente, empuja la pantalla LCD hacia arriba y hacia afuera del bisel de la pantalla frontal.
-
-
-
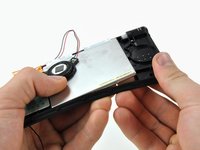
Desuelda los altavoces de la pantalla LCD superior calentando las uniones soldadas con un soldador y, al mismo tiempo, tirando de los cables de los altavoces para separarlos del cable plano.
-
La pantalla LCD superior permanece.
-
-
-
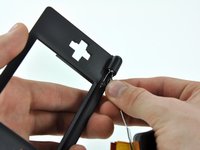
Usa un gancho pequeño para ayudar a enrollar el borde delantero de la cinta a través de la bisagra de la pantalla. Una pieza de soldadura como esta (que se muestra) funciona bien.
-


Para volver a armar tu dispositivo, sigue estas instrucciones en orden inverso.
Cancelar: No complete esta guía.
105 personas más completaron esta guía.
Un agradecimiento especial a estos traductores:
100%


Estos traductores nos están ayudando a reparar el mundo! ¿Quieres contribuir?
Empezar a traducir ›

10Guía Comentarios
This is a very concise and accurate guide! I found this repair to be very difficult, especially so due to the aftermarket Chinese screen I installed that required me to solder on the speaker wires. Ugh! If you can, get a replacement with the speakers attached. I also can't stress enough how annoying threading the ribbon cable through the case is. DS is a great platform, but product design left a lot to be desired.
This repair is somewhat difficult. There are a couple of points to be careful about:
1) The display ribbon cable is fairly easy to remove from the hinge, but somewhat difficult to route through it once the new display is in place. It is easier to do if the antenna/microphone wires are out of the way.
2) The ribbon connector is fairly short and difficult to manipulate so that it mates securely to the socket on the motherboard. If it isn't seated properly the DS will not boot. So test it first (by temporarily pressing the battery against the battery connectors and turning power on) before re-assembly.
Make a note of where the Wi-Fi antenna connector, microphone, and speaker wires are positioned in the DS Lite housing. If they are not placed back in the correct location, the case will not close. If you force it closed you will squash the wiring which could lead to problems later on. Also be sure the speakers are placed back in correctly. If you can see metal through the speaker holes in the case then you've done it wrong (flip the speakers over). Lastly, when trying to maneuver the antenna connector back under the game cartridge reader, make sure the connector head is face down so that it does not get stuck (happened to me). If you look at the picture in Step 7, it's a straight shot from right to left when running the wire through. Use a paperclip and a flashlight to help you if you get stuck and most importantly, do not try to yank it free!
Funny how these things give you instructions for taking things apart , but not for installing and putting back together. I found routing the screen ribbon through the hinge to be especially difficult and I think I might have damaged it in the process. I wish i would have known that its best to make sure this is done before trying lock the screen case back up.
This was a very difficult but fun and satisfying repair to do. The hardest part was definitely putting the display ribbon cable through the small tube to the bottom of the unit. One thing that could be done to make this easier, I would suggest having a small set of tweezers to help assist with pulling the cable through . One thing you can also do is to wrap the ribbon wire around the microphone and antenna wires a few time, then guide the orange ribbon cable about halfway out of the tube, and then attach the bottom part to it, and then pull the rest of the cable through with the tweezers. This helps a lot with preventing stress on those small, delicate cables, and can make life much easier.