Introducción
It is very important to pay close attention when replacing the cable chain. Observe for any damage to wiring, wire sleeves or any other components. Contact your seller with issues. If you puchased from TM3D, you can contact support@tinymachines3d.com and attach pictures of any concerns (please include your order number).
Qué necesitas
-
-
All work will be on the lower frame assembly so start by disassembling your Raptor 2 / T REX 3 machine and getting to the point in the picture.
-
Remove any filament that is installed.
-
Unplug all connections between upper and lower frame, including the LED, DB15 cables to each print head and X and Z axis connections. Unplug and remove the display.
-
Remove the chassis ground (if installed) then remove the control box.
-
Remove the 8mm socket head screws (2) that hold the upper frame to the lower frame and push the bed all the way forward.
-
Double check that no wires are attached and lift off the upper frame.
-
-
-
Disassemble the plug end
-
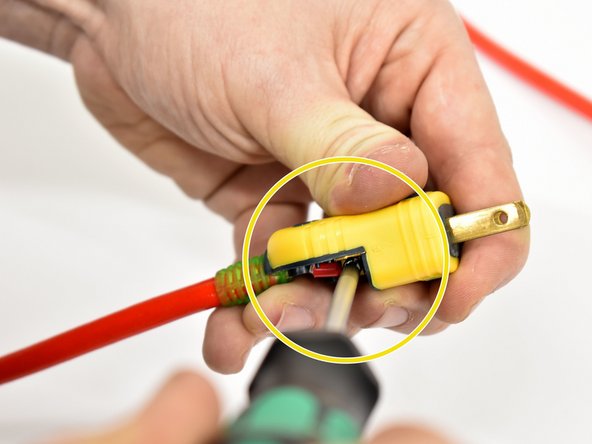
To disassemble the power cable plug, you'll need a #1 phillips screwdriver. First, remove the screw securing the blue cover and rubber strain relief.
-
Next, remove the plastic strain relief bracket screw.
-
-
-
Loosen the screw terminals to remove both cable ends. They are not polarity specific (side does not matter). The screws just need loosened, not removed.
-
-
-
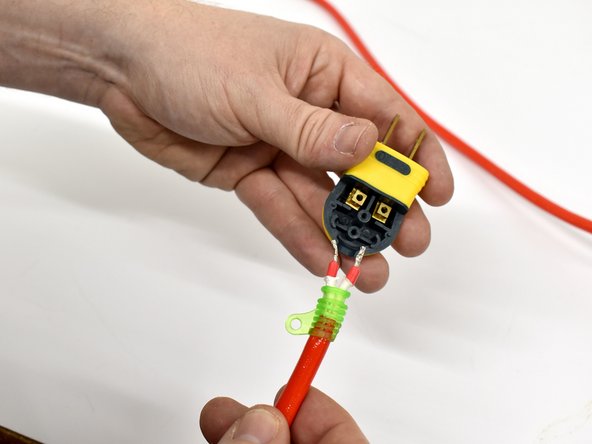
Remove the rubber strain relief collar. It will not fit through the chain.
-
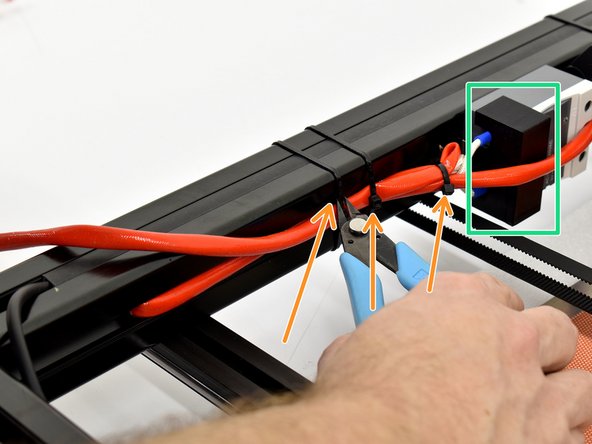
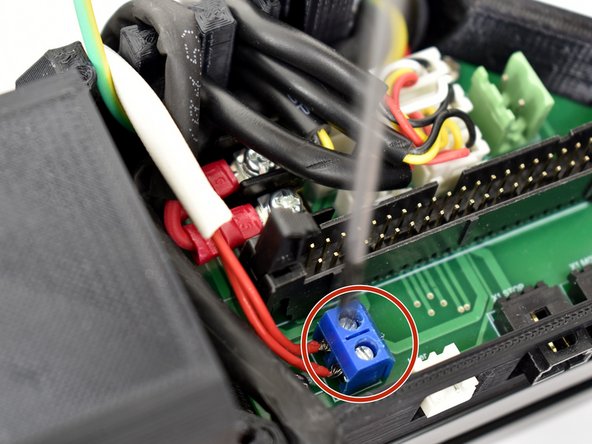
Remove A/C power cables from relay.
-
Cut 3 zip ties
-
Remove the printed relay cover
-
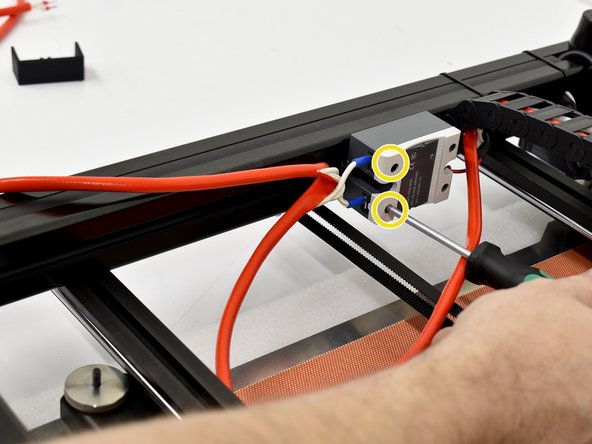
Using a #1 phillips screwdriver, loosen the 2 connections 1/2 to 3/4 turn on the AC side of the relay.
-
-
-
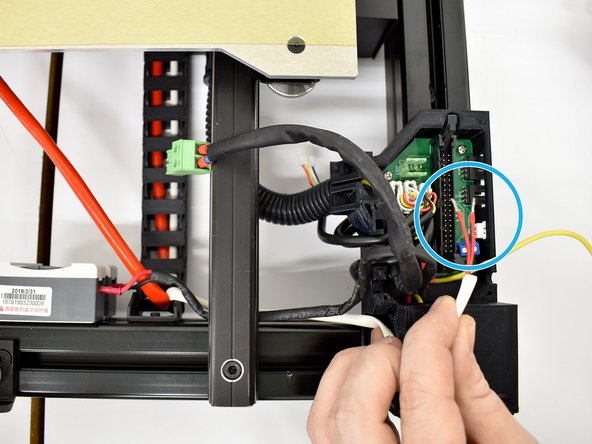
Remove the thermistor wires.
-
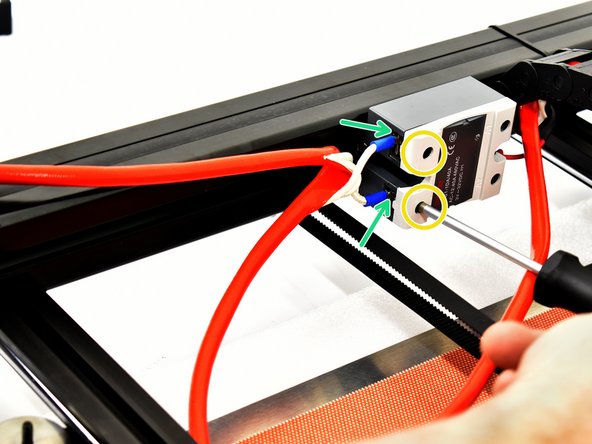
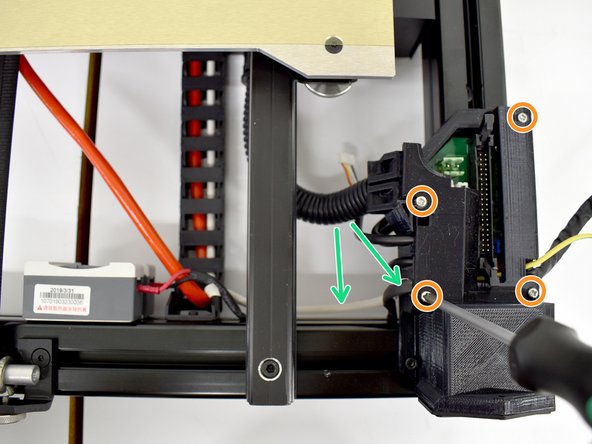
To access the thermistor wires, you must first remove the daughterboard cover. Using a #1 phillips screwdriver, remove all 4 screws and pull the cover off.
-
Remove the thermistor wires by loosening both sides of the blue phoenix connector with a small flat blade screwdriver then pulling the wires out of the blue connectors.
-
-
-
-
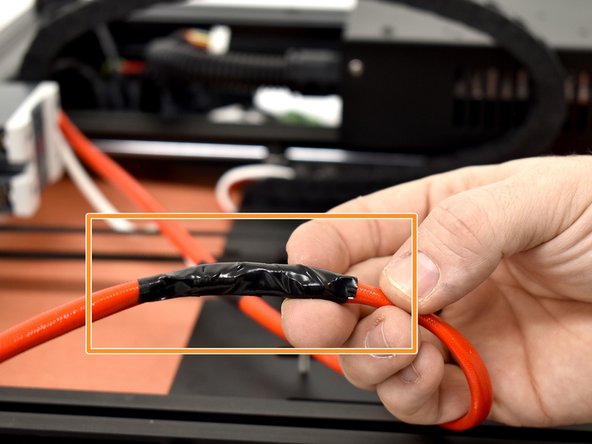
To prepare the wiring to fit through the old cable chain, you must tape loose ends with electrical tape.
-
Fold over the relay connections and tape so it is smooth and as small in diameter as possible.
-
Tape the power plug ends together
-
-
-
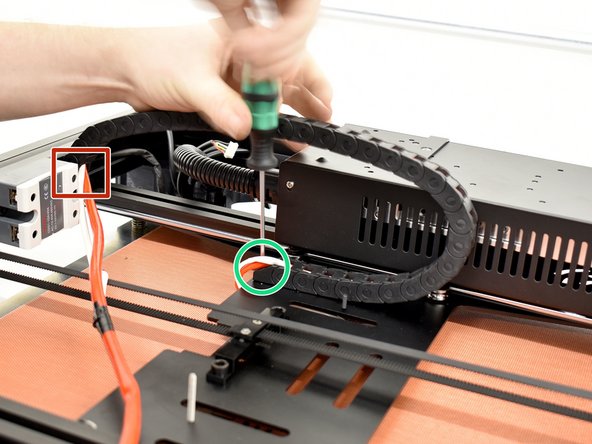
To remove the cable chain, you must cut a few more cable ties and remove some screws.
-
Cut any cable ties securing wires to the cable chain.
-
Remove the M3 socket head screw with a M2.5 hex wrench.
-
Loosen the M3 socket head screw to align the T Nut with a M2.5 hex wrench.
-
Remove the M3 socket head screw and T Nut and set aside. They will be installed on the new chain soon.
-
-
-
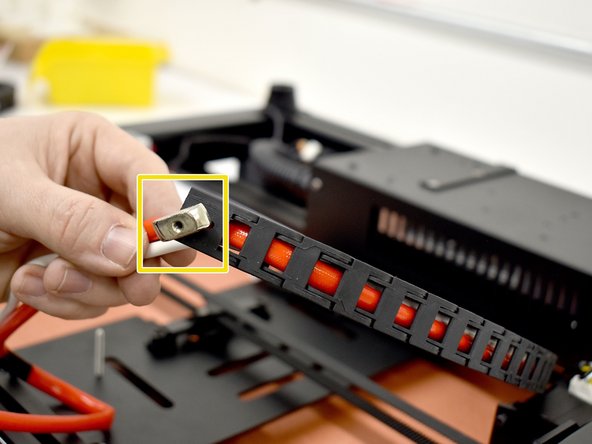
Tape the end of the thermistor wires to the orange sleeve. This will make install easier later
-
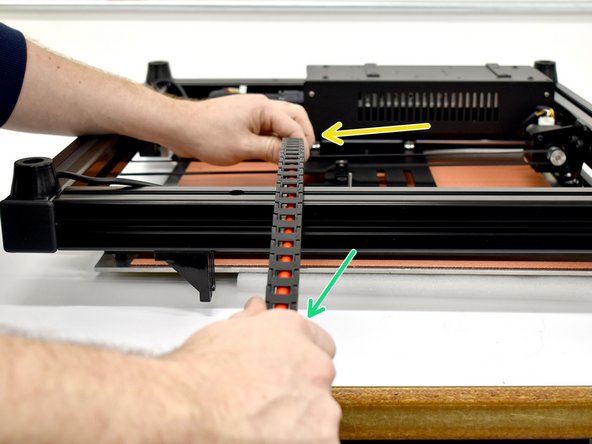
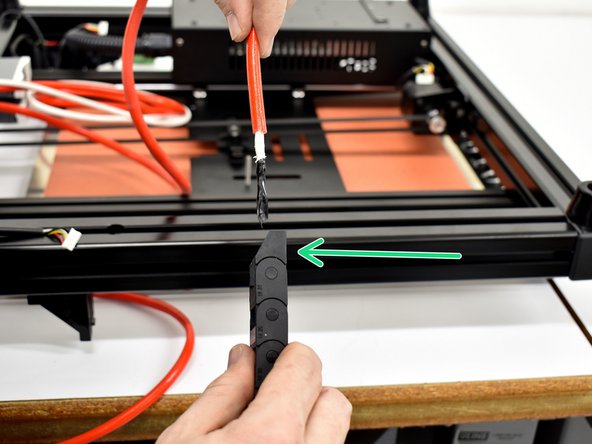
Pull the old chain off the machine.
-
Hold the wires on the bed side.
-
Start pulling the cable chain away from the bed.
-
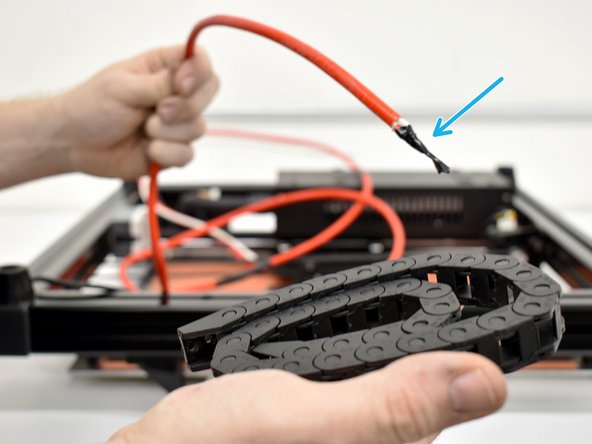
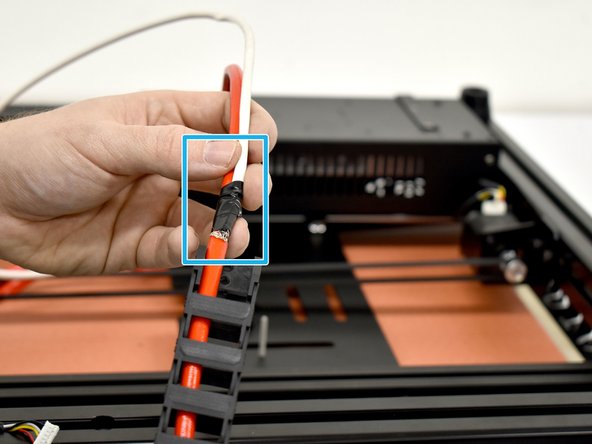
With the old chain fully removed, notice the taped end. This will make installing into the new chain much easier.
-
-
-
Make sure your tape job on all wires that go through the chain is still intact and get your replacement chain in hand.
-
Feed the wires through the new cable chain.
-
Insert the cables into the new chain with the correct chain end facing up.
-
Make sure you have tape here, securing the thermistor wires to the orange sleeve.
-
-
-
Pull the cables all way through the chain until the chain is close to the Y Carriage plate.
-
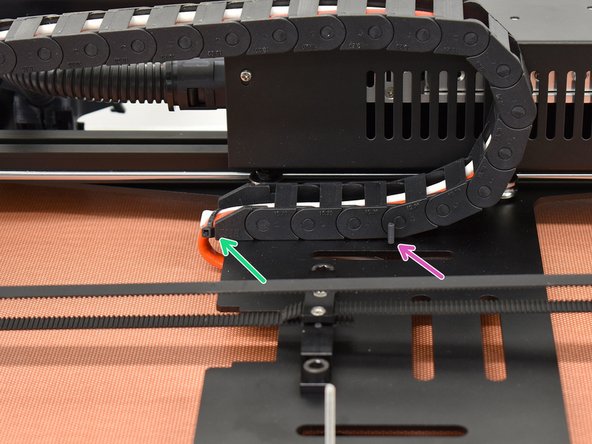
Leave a little length in the cables so they can be cable tied to the outside hole on the chain end. The M3 socket head screw will go through the inside hole. Tighten it with the M2.5 hex wrench.
-
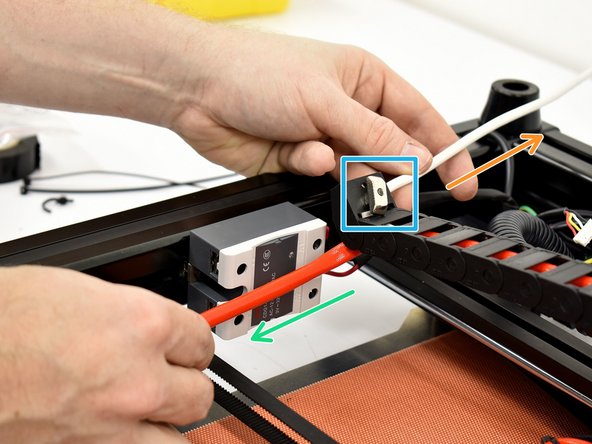
Route the cables to the correct side.
-
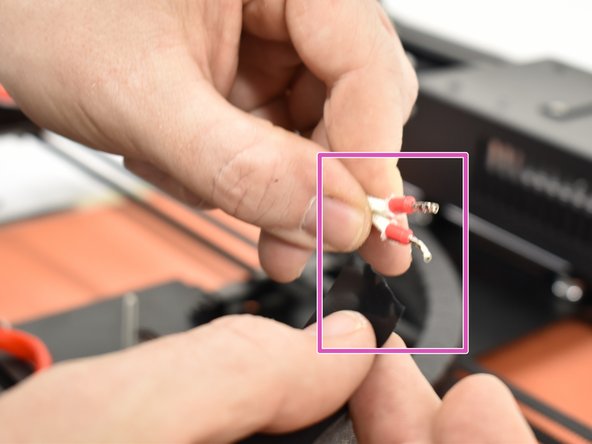
The orange sleeve bunch should go towards the relay side.
-
The thermistor wires (some will be red bare wires, some will be in a white sleeve) will go away from the relay.
-
Pre-install the M3 socket head screw and T Nut to the inside hole as the outside hole can be used to secure the wiring.
-
-
-
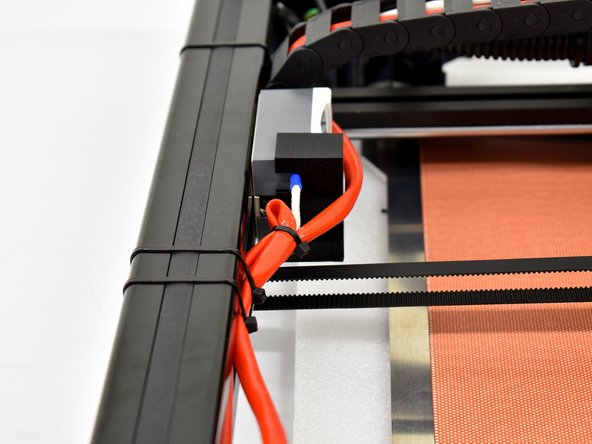
Resecure cables to the machine
-
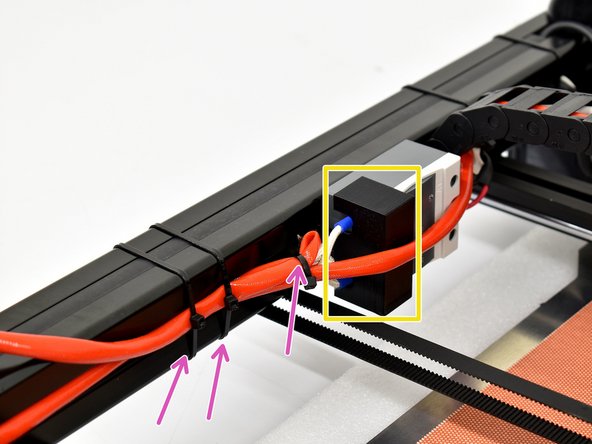
Make sure you secure the cable bundle on each end of the cable chain with a cable tie.
-
Be sure to trim cable tie ends off flush so they are not sharp.
-
Tighten up the frame side chain hold down with a M2.5 hex wrench. This side uses a T Nut and you need to make sure the chain is tight to the frame before proceeding.
-
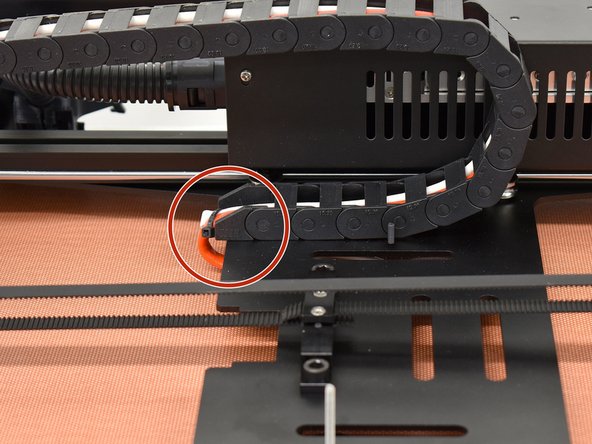
This screw triggers the end stop. Make sure you position the chain so that it is clear of this screw.
-
Reinstall bed heater connections to the relay. They are not polarity specific (side does not matter).
-
Using a #1 phillips screwdriver, tighten the screw terminals.
-
-
-
Reinstall thermistor wires
-
Insert thermistor wires and tighten screw terminals. Be sure to gently pull on them to make sure they are secure.
-
Install printed daughterboard cover with 4 screws.
-
Make sure cables are not pinched and push the cables back into the slot in the frame.
-
Reinstall relay connections and hardware
-
Install AC connection cover
-
Cable tie power wires
-
-
-
With everything hooked back up, you should be satisfied with your work!
-
After double checking that all wire connections are tight, it is a good time to test that both the thermistor work (in that order). You can plug in just the control box, display to test the thermistor.
-
If the thermistor is not plugged in (or broken), bed temperature will read -14.
-
If you have a normal ambient temperature reading on the display, you can plug the power cable in and test that the bed heats by going to manually setting the bed temperature to a low value of 50.
-


Some reasssembly has been left out to keep things smaller. Refer to earlier steps.
Some reasssembly has been left out to keep things smaller. Refer to earlier steps.
Cancelar: No complete esta guía.
Una persona más ha completado esta guía.

Equipo
