Esta versión puede contener ediciones incorrectas. Cambie a la última instantánea verificada.
Qué necesitas
-
Este paso está sin traducir. Ayuda a traducirlo
-
Grip the black plastic lever nub firmly and carefully remove it from the metal lever. Use one hand to hold the toaster in place while you pull the lever nub with the other.
-
-
Este paso está sin traducir. Ayuda a traducirlo
-
Flipping the toaster upside down, use a T7 Torx Screwdriver to remove the four 10mm screws that keep the outer shell attached.
-
Flip the toaster back over and slide off the shell making sure to slip the toaster lever (now without the black plastic nub) through the lever opening in the shell.
-
-
-
Este paso está sin traducir. Ayuda a traducirlo
-
Locate and remove the two 8mm screws that attach the circuit board (located inside of the shell) from the shell itself using the Phillips #2 screwdriver.
-
-
Este paso está sin traducir. Ayuda a traducirlo
-
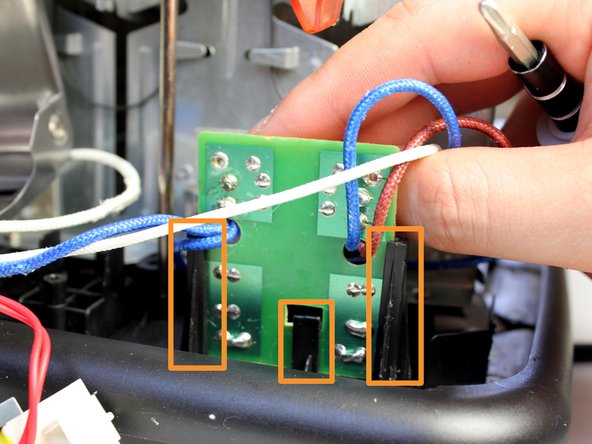
Locate the small circuit board attached to the base of the toaster.
-
To remove the circuit board, pull apart the two side tabs while releasing the middle tab simultaneously.
-
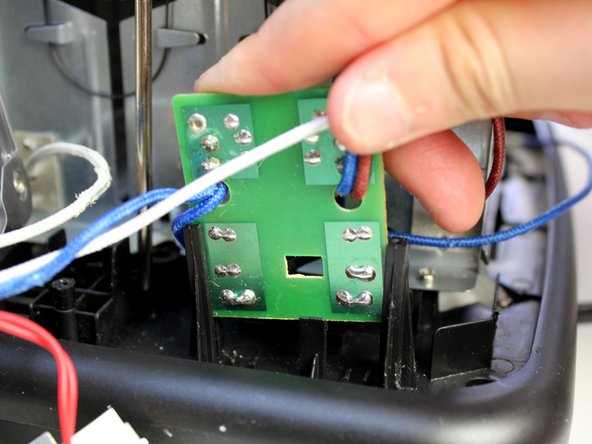
Pull the circuit board out of the slot.
-
-
Este paso está sin traducir. Ayuda a traducirlo
-
Using a Phillips #2 screwdriver, remove the front two 8mm screws attaching the chassis to the base.
-
Flip the toaster around and proceed to remove the two remaining 8mm screws.
-
The toaster chassis should now only be connected to the base via wiring.
-
-
Este paso está sin traducir. Ayuda a traducirlo
-
There are two phillips 8mm head screws holding the power cable to the base.
-
Remove these screws to release the power cable.
-
-
Este paso está sin traducir. Ayuda a traducirlo
-
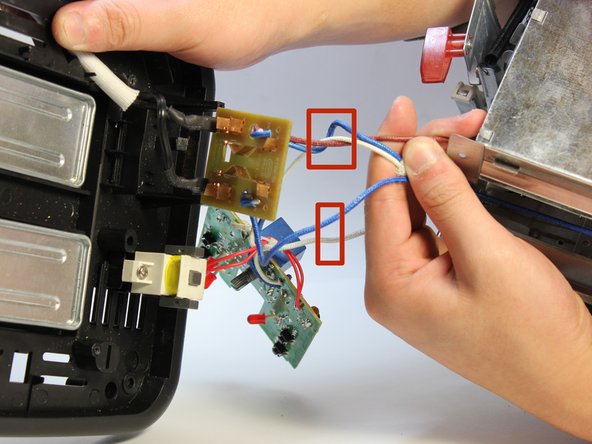
The following wires must be disconnected to be able to remove the chassis: Blue x2, White x2, Bronze x1
-


Equipo

Cal Poly, Team 10-36, Maness Winter 2014 Miembro de Cal Poly, Team 10-36, Maness Winter 2014
CPSU-MANESS-W14S10G36
4 Miembros
5 Guías creadas