Esta versión puede contener ediciones incorrectas. Cambie a la última instantánea verificada.
Qué necesitas
-
Este paso está sin traducir. Ayuda a traducirlo
-
Heat the left and top edges with hairdryer for one minute.
-
Move hairdryer back and forth to evenly heat up surface.
-
-
Este paso está sin traducir. Ayuda a traducirlo
-
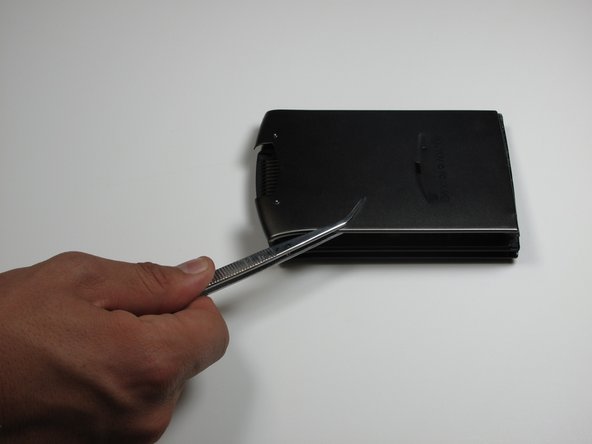
Use tweezers to hold Palm right side down on it's side.
-
Use a plastic opening tool to pry open front and back casing.
-
-
Este paso está sin traducir. Ayuda a traducirlo
-
Leave plastic opening tools in between front and back casing.
-
Rotate Palm and repeat steps 2 and 3 for right and back edges.
-
-
-
Este paso está sin traducir. Ayuda a traducirlo
-
Now pry open front and back casing with plastic opening tools.
-
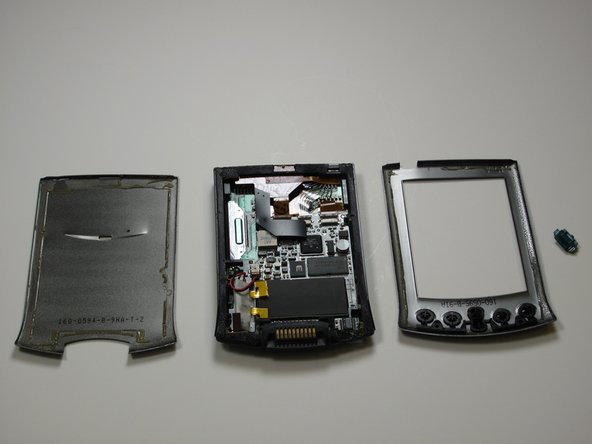
Separate front and back casing completely.
-
-
Este paso está sin traducir. Ayuda a traducirlo
-
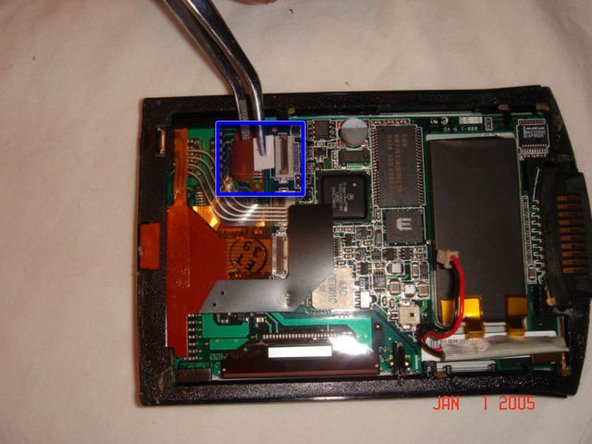
In order to seperate the screen from the motherboard you must disconnect the ribbon attached to the screen.
-
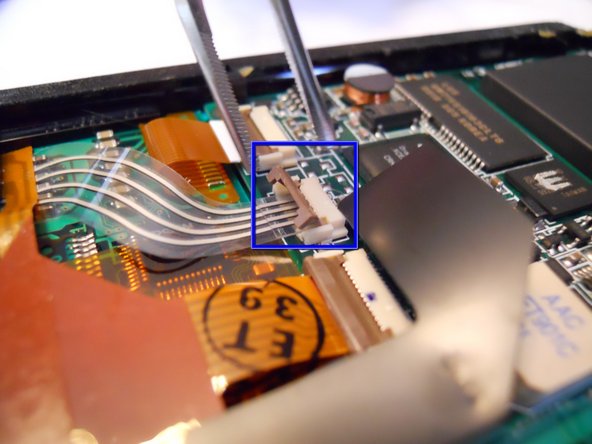
To do this, using tweezers, flip up the cable clamp that is connecting the ribbon to the screen.
-
Once the clamp is up you can use the tweezers to gently detach the ribbon.
-
-
Este paso está sin traducir. Ayuda a traducirlo
-
Now you must flip up the adjacent clamp as well, using tweezers like before.
-
After the clamp is flipped you can gently remove the second ribbon with tweezers.
-
-
Este paso está sin traducir. Ayuda a traducirlo
-
Before removing the screen you must detach one more wire, the battery connector.
-
Using the tweezers, squeeze the connector attached to the wire and genlty pull.
-
-
Este paso está sin traducir. Ayuda a traducirlo
-
Now that both ribbons and the wire are disconeccted, you can apply a downward pressure to the battery. You will have to carefully rotate the frame so that the battery can go through.
-
-
Este paso está sin traducir. Ayuda a traducirlo
-
Lift up the black flap covering the ribbon cable with your hand
-
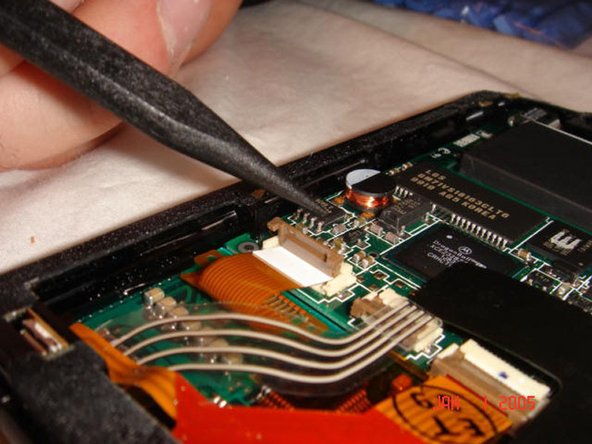
With the spudger, left green cable clamp
-
Gently remove ribbon cable from clamp
-
-
Este paso está sin traducir. Ayuda a traducirlo
-
With your hands, pop out the logic board from the casing
-


