Esta versión puede contener ediciones incorrectas. Cambie a la última instantánea verificada.
Qué necesitas
-
Este paso está sin traducir. Ayuda a traducirlo
-
Remove the battery cover by pressing on the small rectangular button located on the back of the phone.
-
-
Este paso está sin traducir. Ayuda a traducirlo
-
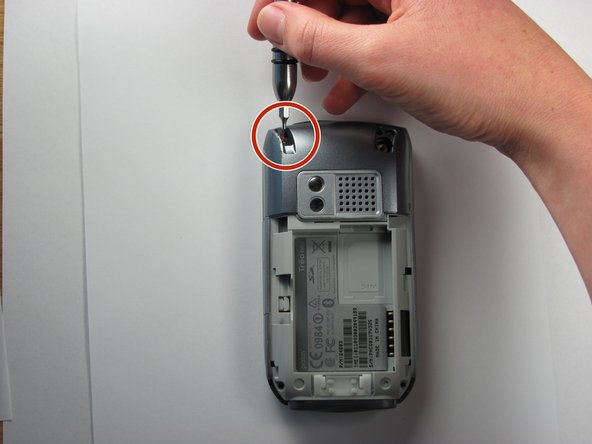
Remove the stylus in order to access the screw.
-
Remove the 27mm top-left screw using a T6 Torx screwdriver.
-
-
Este paso está sin traducir. Ayuda a traducirlo
-
Using the spudger, remove the rubber rectangular cover located in the upper rear, right-hand corner.
-
Remove the 27mm screw using the T6 Torx screwdriver.
-
-
-
Este paso está sin traducir. Ayuda a traducirlo
-
Remove the remaining two 27mm screws from the bottom using the T6 screwdriver.
-
-
Este paso está sin traducir. Ayuda a traducirlo
-
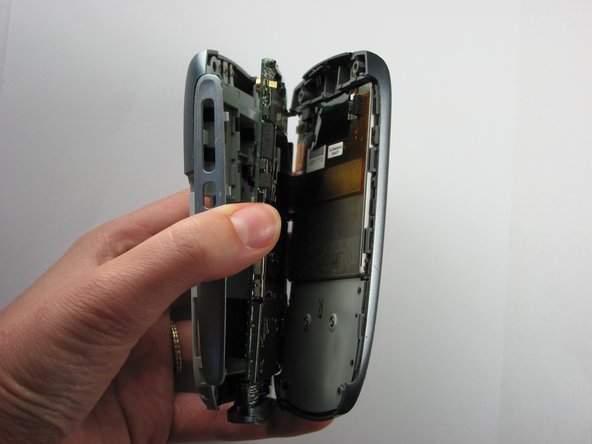
Turn the phone so the screen is facing the right side.
-
Use a spudger to carefully separate the back panel from the front panel to access components inside the phone.
-
Separate the covers from the left side of the device as indicated in the picture.
-
-
Este paso está sin traducir. Ayuda a traducirlo
-
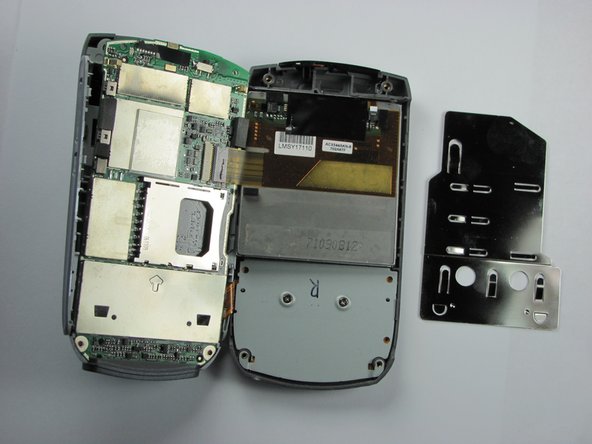
Slide the slim metal plate upwards until it disconnects from the motherboard.
-
-
Este paso está sin traducir. Ayuda a traducirlo
-
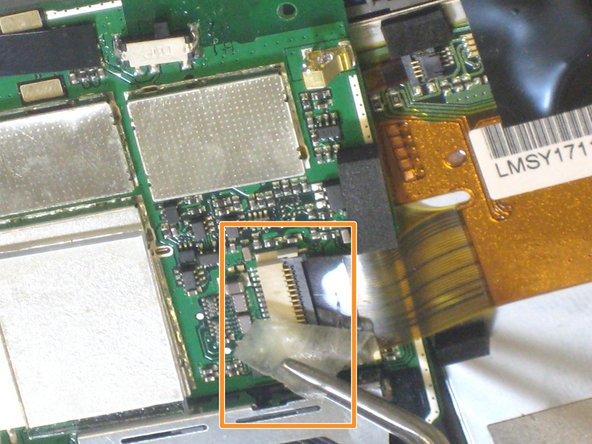
Locate the orange ribbon that connects the screen to the motherboard.
-
Use tweezers to peel off the small piece of tape over the orange ribbon connector.
-
-
Este paso está sin traducir. Ayuda a traducirlo
-
Slide the spudger between the orange ribbon and black connector. Flip the black connector upwards to release the orange ribbon.
-
Using the spudger, pull the orange ribbon away from the connector to confirm the wire is fully disconnected.
-
-
Este paso está sin traducir. Ayuda a traducirlo
-
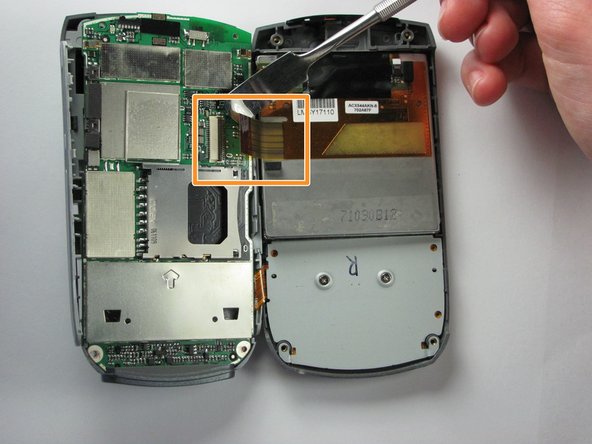
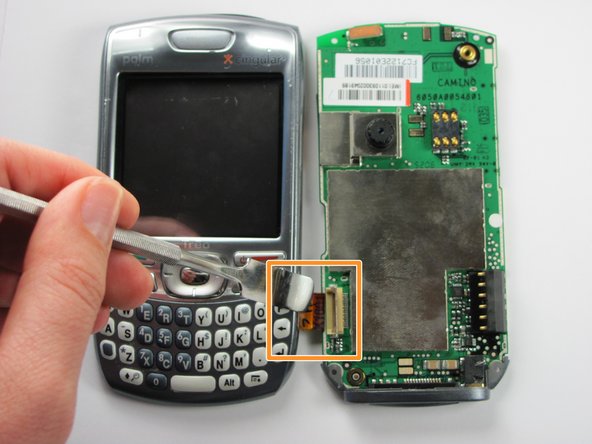
Carefully turn the phone over so the screen is face up.
-
Locate the other orange ribbon that connects the motherboard to the faceplate.
-
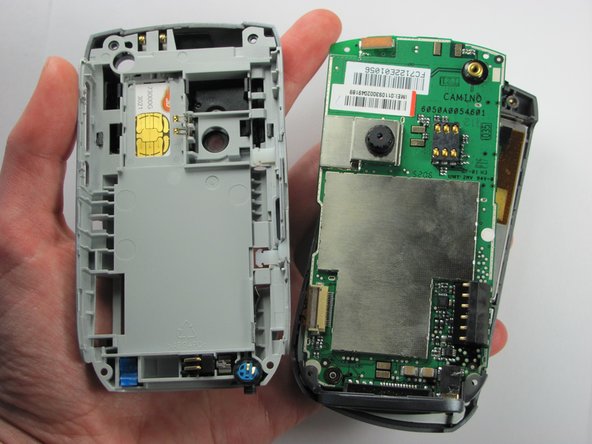
Slide the spudger between the orange ribbon and tan connector. Lift the tan connector up to release the orange ribbon.
-
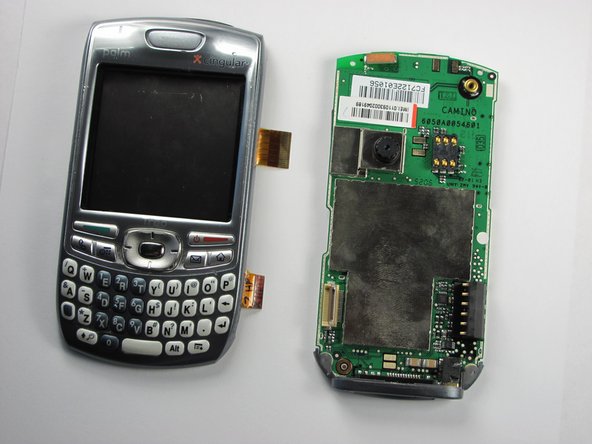
Separate the motherboard and faceplate of the Palm Treo.
-
-
Este paso está sin traducir. Ayuda a traducirlo
-
Locate the backside of the Treo's faceplate.
-
Remove the two screws using the T6 Torx screwdriver.
-
-
Este paso está sin traducir. Ayuda a traducirlo
-
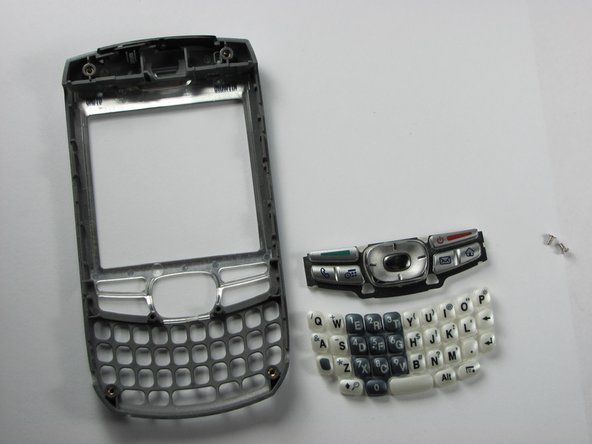
Take off the plastic back panel, to gain access to the rubber keys of the keyboard.
-
Push on the keys and function bar from the front of the Treo. They should all pop right out.
-


Cancelar: No complete esta guía.
Una persona más ha completado esta guía.
Equipo

Cal Poly, Team 6-4, Maness Fall 2009 Miembro de Cal Poly, Team 6-4, Maness Fall 2009
CPSU-MANESS-F09S6G4
4 Miembros
12 Guías creadas