Introducción
This guide shows how to remove and replace the rear-facing camera for the OnePlus 3.
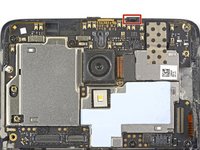
Due to the phone’s design, you have to loosen/remove the motherboard in order to remove the rear-facing camera. The hardest part of the guide is getting the frame clips of the back cover free.
Some guide images will show the battery already removed from the phone. You do not need to remove the battery for the rear-facing camera procedure.
Qué necesitas
-
-
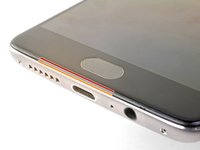
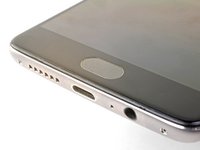
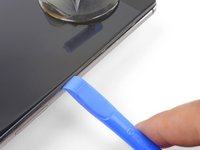
Insert a SIM eject tool, bit, or straightened paperclip into the hole located between the SIM card slot and the power button.
-
Press firmly to eject the SIM card tray.
-
-
-
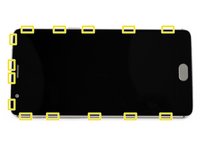
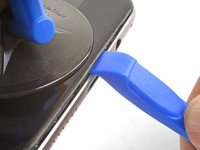
Display panel seam: This seam is part of the display assembly. Do not pry at this seam, or you will separate and damage the display panel.
-
Frame seam: This is where the plastic frame meets the back cover. It is recessed into the back cover. Only pry at this seam.
-
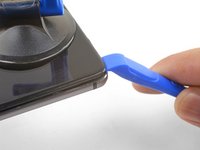
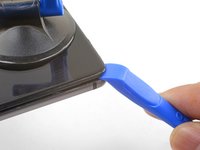
There are fourteen clips that hold the frame against the rear case. Be aware of their location as you pry the back cover off in the following steps.
-
-
-
-
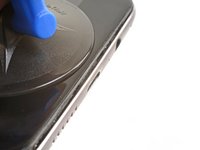
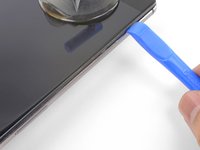
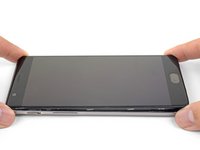
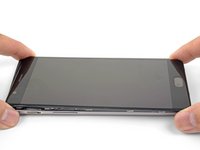
With the bottom and left edge of the phone freed, gently wiggle the frame to release the top and right edge clips.
-
Lift the screen up and remove it.
-
Align the top edge of the frame to the back cover and ensure that the top clips slip into place.
-
Squeeze along the long edges of the phone to snap the remaining clips into place.
-
-
-
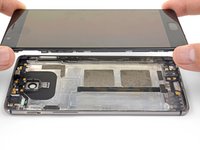
Use the point of a spudger to pry up and disconnect the battery connector from its socket, located above the top right corner of the battery pack.
-
Bend the connector away from the socket to prevent accidental contact.
-
-
-
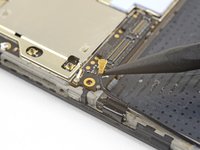
Remove the 3 mm Phillips screw securing the cable bracket.
-
Remove the cable bracket.
-
-
-
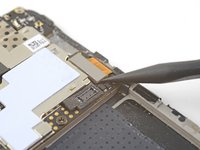
Slide the point of a spudger underneath the antenna interconnect cable located at the bottom left corner of the motherboard.
-
Pry up and disconnect the antenna interconnect cable.
-
-
-
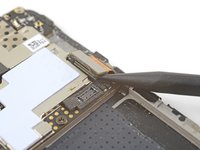
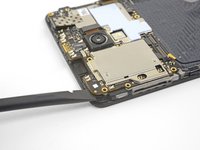
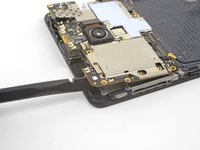
Use the point of a spudger to pry up and disconnect the rear-facing camera connector from its motherboard socket.
-


To reassemble your device, follow these instructions in reverse order.
Take your e-waste to an R2 or e-Stewards certified recycler.
Repair didn’t go as planned? Check out our OnePlus 3 Answers community for troubleshooting help.
To reassemble your device, follow these instructions in reverse order.
Take your e-waste to an R2 or e-Stewards certified recycler.
Repair didn’t go as planned? Check out our OnePlus 3 Answers community for troubleshooting help.
Cancelar: No complete esta guía.
48 personas más completaron esta guía.


18Guía Comentarios
Why do I have to take out the MoBo? For me it looks like the camera connector is accessible without removing everything, one less step to swap screws etc...
I haven't done this procedure yet, but it looks like there is a metal tab that protrudes from the top of the camera module that is tucked under the PCB.
Fantastic! Many thanks. That fixed the problem: no more blurry rear camera. For less than 9 €… You’re the boss!!!
under 10 bucks finally fixed my broken auto focus, great tutorial!
It worked pretty well for me, but I had to use a metal 0.3mm Guitar Pick for the very first opening step, as neither the plastic opening tools nor plastic picks worked for me.
@jackhutchinson60: The back cover is taken off first (which has no eletrical connections) and then the motherboard is removed, but it’s all screws and plugs, so no problem there. According to youtube lens cover fixes are cheap and doable as well.