Saltar al contenido principal

Nokia Lumia 520 Power/Volume Switch Replacement

Qué necesitas

  1. Nokia Lumia 520 Power/Volume Switch Replacement, Battery: paso 1, imagen 1 de 2 Nokia Lumia 520 Power/Volume Switch Replacement, Battery: paso 1, imagen 2 de 2
    • Insert the spudger into the crevice located between the back cover of the phone and the body of the phone.

  2. Nokia Lumia 520 Power/Volume Switch Replacement: paso 2, imagen 1 de 2 Nokia Lumia 520 Power/Volume Switch Replacement: paso 2, imagen 2 de 2
    • Lift the spudger gently to open the back cover of the phone.

  3. Nokia Lumia 520 Power/Volume Switch Replacement: paso 3, imagen 1 de 2 Nokia Lumia 520 Power/Volume Switch Replacement: paso 3, imagen 2 de 2
    • Insert the spudger into the space between the batter and the battery holder to remove the battery.

  4. Nokia Lumia 520 Power/Volume Switch Replacement, Power/Volume Switch: paso 4, imagen 1 de 3 Nokia Lumia 520 Power/Volume Switch Replacement, Power/Volume Switch: paso 4, imagen 2 de 3 Nokia Lumia 520 Power/Volume Switch Replacement, Power/Volume Switch: paso 4, imagen 3 de 3
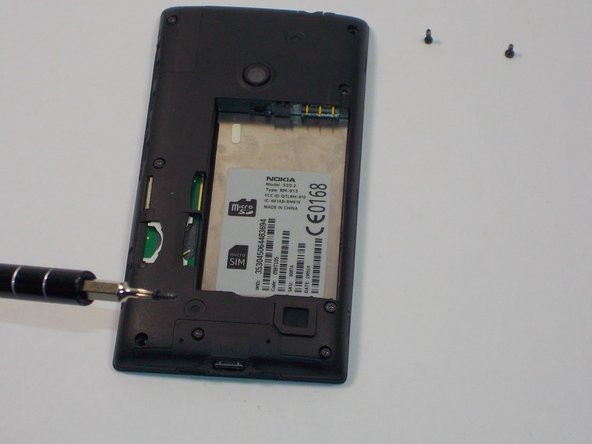
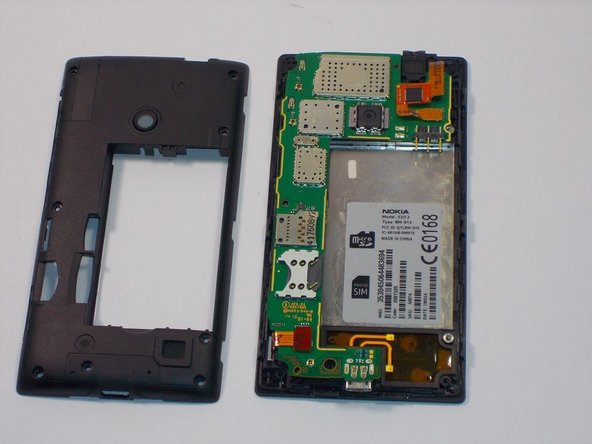
    • Unscrew the 8 screws with a Torx screw driver (T4). After all screws are unscrewed place them next to the phone in the order

  5. Nokia Lumia 520 Power/Volume Switch Replacement: paso 5, imagen 1 de 2 Nokia Lumia 520 Power/Volume Switch Replacement: paso 5, imagen 2 de 2
    • Use your spudger to remove the plastic casing over the motherboard. Do it very slowly because it will be tough to remove and you do not want to break it.

  6. Nokia Lumia 520 Power/Volume Switch Replacement: paso 6, imagen 1 de 2 Nokia Lumia 520 Power/Volume Switch Replacement: paso 6, imagen 2 de 2
    • Carefully unclip the digitizer touch screen cable and the display screen cable using a spudger.

  7. Nokia Lumia 520 Power/Volume Switch Replacement: paso 7, imagen 1 de 2 Nokia Lumia 520 Power/Volume Switch Replacement: paso 7, imagen 2 de 2
    • Gently remove the motherboard with your hands.

    • Flip it over and turn it 90 degrees to the left so the buttons are in front of you.

    • You will see four small switches close to the side of the circuit board.

  8. Nokia Lumia 520 Power/Volume Switch Replacement: paso 8, imagen 1 de 1
    • Gently take the power/volume switches off using a pair of needle nose pliers. Gently clean the solder that was there. Replace the solder with a new coat of solder.

    • Check out iFixit's soldering guides, here.

Conclusión

To reassemble your device, follow these instructions in reverse order.

4 personas más completaron esta guía.

Eduardo Perez

Miembro Desde 11/03/15

189 Reputación

1 Guía escrita

Equipo

UMass Dartmouth, Team 1-5, Bhusal Fall 2015 Miembro de UMass Dartmouth, Team 1-5, Bhusal Fall 2015

UMASSD-BHUSAL-F15S1G5

3 Miembros

8 Guías creadas

0 comentarios

Agregar Comentario

Ver Estadísticas:

Ultimas 24 horas: 1

Ultimos 7 días: 4

Ultimos 30 días: 20

Todo El Tiempo: 5,542