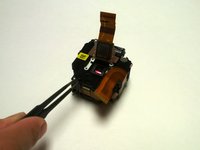
Saltar al contenido principal

Nikon Coolpix S6300 Zoom Lens Gears

Qué necesitas

  1. Nikon Coolpix S6300 Zoom Lens Gears, Battery: paso 1, imagen 1 de 1
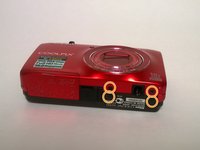
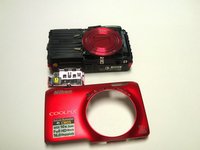
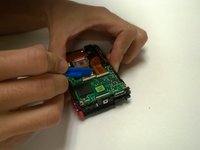
    • Place the camera facing upwards.

    • Press down on the battery cover and slide towards the front face of the camera.

  2. Nikon Coolpix S6300 Zoom Lens Gears: paso 2, imagen 1 de 1
    • Rotate the orange battery clip in the camera to release the battery.

  3. Nikon Coolpix S6300 Zoom Lens Gears, Buttons: paso 3, imagen 1 de 3 Nikon Coolpix S6300 Zoom Lens Gears, Buttons: paso 3, imagen 2 de 3 Nikon Coolpix S6300 Zoom Lens Gears, Buttons: paso 3, imagen 3 de 3
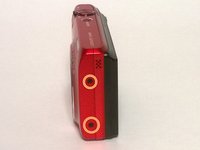
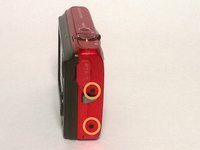
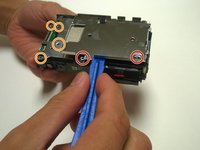
    • Locate the eight outer PH 2mm screws on the device.

    • Using the PH00 screwdriver remove all of the screws from the camera.

  4. Nikon Coolpix S6300 Zoom Lens Gears: paso 4, imagen 1 de 3 Nikon Coolpix S6300 Zoom Lens Gears: paso 4, imagen 2 de 3 Nikon Coolpix S6300 Zoom Lens Gears: paso 4, imagen 3 de 3
    • Using a plastic opening tool, gently pry off the front and rear plates.

    • Be patient with this step, do not force the clips holding the plates together.

  5. Nikon Coolpix S6300 Zoom Lens Gears: paso 5, imagen 1 de 1
    • Using a Phillips #00 screwdriver, remove the PH 2mm screw located to the right of the screen, above the OK dial.

  6. Nikon Coolpix S6300 Zoom Lens Gears: paso 6, imagen 1 de 1
    • Remove the two clasp using a plastic spudger

    • Be careful when removing the clasp to prevent ripping of the clasp

  7. Nikon Coolpix S6300 Zoom Lens Gears: paso 7, imagen 1 de 1
    • You may now remove the internal panel of the buttons

  8. Nikon Coolpix S6300 Zoom Lens Gears, Display: paso 8, imagen 1 de 1
    • Remove the clasp from the ribbon cable using the plastic spudger.

    • Make sure to be gentle when removing the clasp to prevent it from ripping.

    • You may now remove the display.

  9. Nikon Coolpix S6300 Zoom Lens Gears, Polarizing Lens: paso 9, imagen 1 de 3 Nikon Coolpix S6300 Zoom Lens Gears, Polarizing Lens: paso 9, imagen 2 de 3 Nikon Coolpix S6300 Zoom Lens Gears, Polarizing Lens: paso 9, imagen 3 de 3
    • Remove the four PH00 2.5 mm screws around the edges of the display plate.

    • Remove the three PH00 2 mm screws from the sides of the buttons plate and the 2.5 mm screw from the center of the buttons plate.

    • Lift the buttons plate out of the camera with the plastic tool.

    • Lift the display plate out of the camera with the plastic tool.

  10. Nikon Coolpix S6300 Zoom Lens Gears: paso 10, imagen 1 de 3 Nikon Coolpix S6300 Zoom Lens Gears: paso 10, imagen 2 de 3 Nikon Coolpix S6300 Zoom Lens Gears: paso 10, imagen 3 de 3
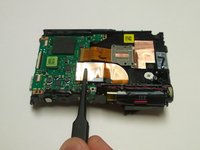
    • Use the plastic opening tool to gently flip the white folders at the end of the ribbon cables.

    • Use this tweezers to gently pull the cables out of the holders.

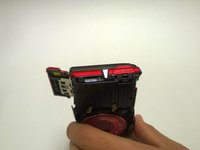
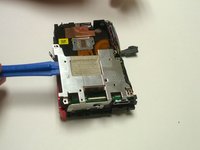
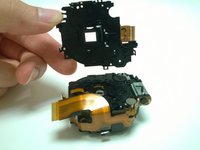
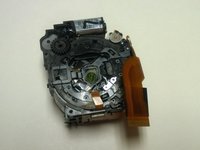
    • Lift the lens apparatus out of the rest of the camera by pushing the front of lens up from the bottom.

  11. Nikon Coolpix S6300 Zoom Lens Gears: paso 11, imagen 1 de 2 Nikon Coolpix S6300 Zoom Lens Gears: paso 11, imagen 2 de 2
    • Use the plastic opening tool to flip the two white clips holding the ribbon cables.

    • Use tweezers to pull the cables from clamps.

    • Use the PH00 screwdriver to remove the three 2 mm screws around the first lens area.

  12. Nikon Coolpix S6300 Zoom Lens Gears: paso 12, imagen 1 de 2 Nikon Coolpix S6300 Zoom Lens Gears: paso 12, imagen 2 de 2
    • Lift the first lens from the rest of the lens apparatus.

    • Use thin tweezers to left and remove the polarizing lens from the apparatus.

  13. Nikon Coolpix S6300 Zoom Lens Gears, Zoom Lens Gears: paso 13, imagen 1 de 1
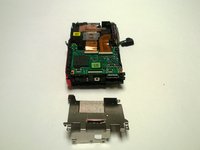
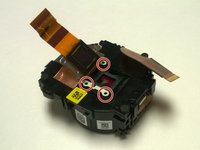
    • Check to see if there are any items stuck inside the gear.

    • Carefully remove items using tweezers.

    • If the gears are popped out of place, carefully push the gears back into its original position shown in the picture

Conclusión

To reassemble your device, follow these instructions in reverse order.

4 personas más completaron esta guía.

Hung

Miembro Desde 09/01/15

383 Reputación

2 Guías creadas

Equipo

USF Tampa, Team 1-2, Remmell Fall 2015 Miembro de USF Tampa, Team 1-2, Remmell Fall 2015

USFT-REMMELL-F15S1G2

5 Miembros

10 Guías creadas

Un comentario

Attention rester sur une table, et bien suivre le tutoriel. En effet, il y a des pilles, Pas la batterie: donc si vous touchez le haut de l'appareil, il y a un peux d’électricité max 4w , ce qui surprend....C'est pas dangereux mais cela surprend. Pas toucher le haut de l'appareil..... Ferreria J-C

a420mf - Contestar

Agregar Comentario

Ver Estadísticas:

Ultimas 24 horas: 0

Ultimos 7 días: 3

Ultimos 30 días: 11

Todo El Tiempo: 1,361