Esta versión puede contener ediciones incorrectas. Cambie a la última instantánea verificada.
Qué necesitas
-
Este paso está sin traducir. Ayuda a traducirlo
-
With a SIM card eject tool (a paperclip will work as well), push down on the hole at the top of the phone until the SIM card holder releases. This should not take much pressure.
-
Remove the SIM card and the SIM card holder.
-
-
Este paso está sin traducir. Ayuda a traducirlo
-
Lay out a soft cloth on your workspace to prevent scratching the screen in this and future steps.
-
Pry open the back casing using the soft plastic opening pick.
-
Carefully pull the back casing apart from the rest of the phone with your hands. Because the casing is glued to the rest of the phone, this step may require some force. Don't be alarmed if the casing flexes a bit.
-
-
Este paso está sin traducir. Ayuda a traducirlo
-
Remove the twenty-two 2.3 mm T3 Torx screws with the T3 Torx Screwdriver.
-
-
-
Con unas pinzas, retire el protector de goma de la parte inferior del teléfono.
-
Desconecta el conector de la batería haciendo palanca suavemente hacia arriba con unas pinzas, en el lado opuesto al cable.
-
Separe completamente el lado de la batería del lado de la placa base separando suavemente los lados con las manos.
-
-
-
Este paso está sin traducir. Ayuda a traducirlo
-
Use a spudger to gently detach the front facing camera connector.
-
Remove the front facing camera using the tweezers.
-
-
Este paso está sin traducir. Ayuda a traducirlo
-
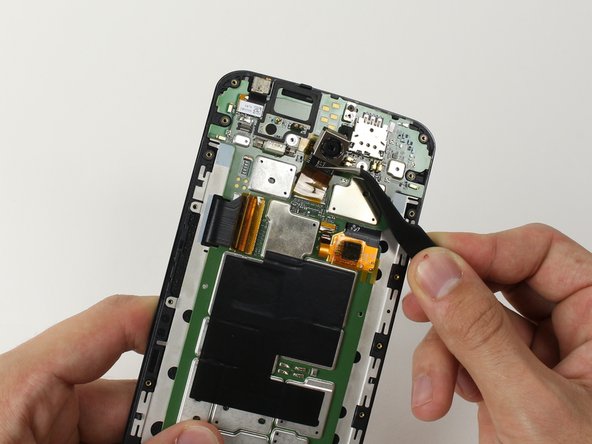
Use the spudger to release the rear facing camera connector.
-
Use tweezers to gently remove the rear facing camera.
-
-
Este paso está sin traducir. Ayuda a traducirlo
-
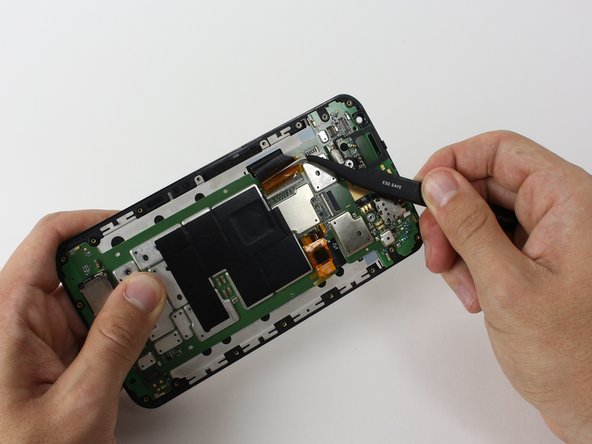
With a spudger, unlatch the ZIF connector for the smallest ribbon cable in the center. See instructions for detatching ZIF connectors here
-
Use tweezers to release the ribbon cable.
-
-
Este paso está sin traducir. Ayuda a traducirlo
-
With a spudger, unlatch the ZIF connector of the big ribbon cable on the side of the phone. See instructions for detatching ZIF connectors here.
-
Use tweezers to release the ribbon cable completely.
-
-
Este paso está sin traducir. Ayuda a traducirlo
-
Remove the 2.3 mm T3 Torx screw on the top of the phone.
-
-
Este paso está sin traducir. Ayuda a traducirlo
-
Peel the motherboard off of the screen with your hands.
-


Cancelar: No complete esta guía.
13 personas más completaron esta guía.
Equipo

Cal Poly, Team 70-3, Forte Winter 2015 Miembro de Cal Poly, Team 70-3, Forte Winter 2015
CPSU-FORTE-W15S70G3
4 Miembros
30 Guías creadas