Saltar al contenido principal

Nest x Yale Lock Speaker Replacement

Qué necesitas

  1. Nest x Yale Lock Speaker Replacement, Speaker: paso 1, imagen 1 de 3 Nest x Yale Lock Speaker Replacement, Speaker: paso 1, imagen 2 de 3 Nest x Yale Lock Speaker Replacement, Speaker: paso 1, imagen 3 de 3
    • Get the lock device and turn it around.

    • Take out the black cover by removing the screws as shown in picture #1 and pull it out gently just so.

    • All 3 screws are 0.25 inches high and are phillip screws.

    • Doing so gains access to the motherboard as shown in picture #3.

  2. Nest x Yale Lock Speaker Replacement: paso 2, imagen 1 de 2 Nest x Yale Lock Speaker Replacement: paso 2, imagen 2 de 2
    • On the white connector in picture #1, push down using a pointed tip object and then remove the connection using tweezers.

    • For the wider connection in picture #2, lift up the black switch and remove the connection using tweezers.

  3. Nest x Yale Lock Speaker Replacement: paso 3, imagen 1 de 2 Nest x Yale Lock Speaker Replacement: paso 3, imagen 2 de 2
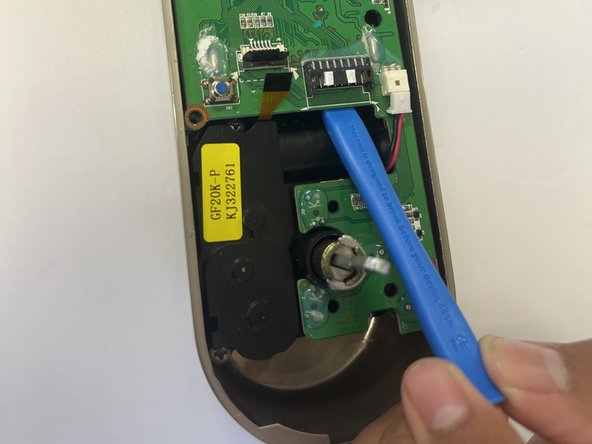
    • Take out the motherboard by unscrewing the screws holding it shown in picture #1.

    • The screws are phillips and are 0.25 inches.

    • After removing the screw on the motherboard, pry the motherboard out using a prying tool shown in picture #2.

  4. Nest x Yale Lock Speaker Replacement: paso 4, imagen 1 de 1
    • The small black part on the down right side of the motherboard is the audio.

Conclusión

To reassemble your device, follow these instructions in reverse order.

Equipo

CSU Los Angeles, Team 5-3, Adachi Fall 2022 Miembro de CSU Los Angeles, Team 5-3, Adachi Fall 2022

CSULA-ADACHI-F22S5G3

5 Miembros

5 Guías creadas

0 comentarios

Agregar Comentario

Ver Estadísticas:

Ultimas 24 horas: 0

Ultimos 7 días: 2

Ultimos 30 días: 13

Todo El Tiempo: 252