Esta versión puede contener ediciones incorrectas. Cambiar a la última instantánea verificada.
Qué necesitas
-
Este paso está sin traducir. Ayuda a traducirlo
-
Heat an iOpener and apply it to the left edge of the phone for two minutes.
-
As you wait, take note of the the following areas:
-
Display cable—be careful not to slice too deeply near the edge here, or you may damage the display cable.
-
Fingerprint sensor cable—be careful not to slice too deeply near the edge here, or you may damage the fingerprint sensor cable.
-
-
Este paso está sin traducir. Ayuda a traducirlo
-
Apply a suction cup to the screen, as close to the heated edge as possible.
-
Pull on the suction cup with strong, steady force to create a gap in the seam.
-
Insert the point of an opening pick into the gap.
-
-
Este paso está sin traducir. Ayuda a traducirlo
-
Slide the opening pick along the edge to slice through the adhesive.
-
Leave an opening pick in the seam to prevent the adhesive from re-sealing.
-
-
Este paso está sin traducir. Ayuda a traducirlo
-
Heat the top edge of the phone with an iOpener.
-
Carefully slice around the corner and through the top edge to separate the adhesive.
-
-
-
Este paso está sin traducir. Ayuda a traducirlo
-
Heat the screen's right edge with an iOpener.
-
Be careful not to slice too deeply near the cables to avoid damaging them.
-
Use an opening pick to slice along the right edge to separate the adhesive.
-
-
Este paso está sin traducir. Ayuda a traducirlo
-
Repeat the previous steps to heat and slice the bottom edge of the phone.
-
-
Este paso está sin traducir. Ayuda a traducirlo
-
Carefully lift up the left edge of the screen and cut away remaining adhesives with an opening pick.
-
-
Este paso está sin traducir. Ayuda a traducirlo
-
Swing open the screen and prop it up with a small box as you work on disconnecting the flex cables.
-
-
Este paso está sin traducir. Ayuda a traducirlo
-
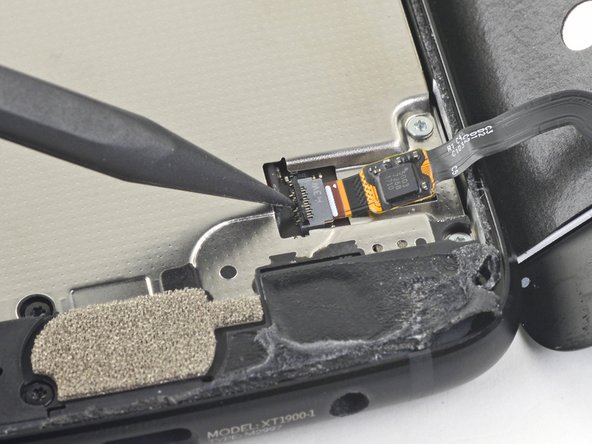
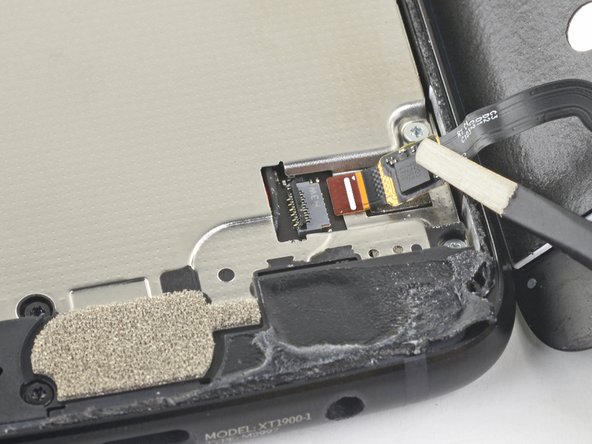
Slide the point of a spudger underneath the fingerprint sensor cable and gently pry up to loosen the cable from the phone.
-
-
Este paso está sin traducir. Ayuda a traducirlo
-
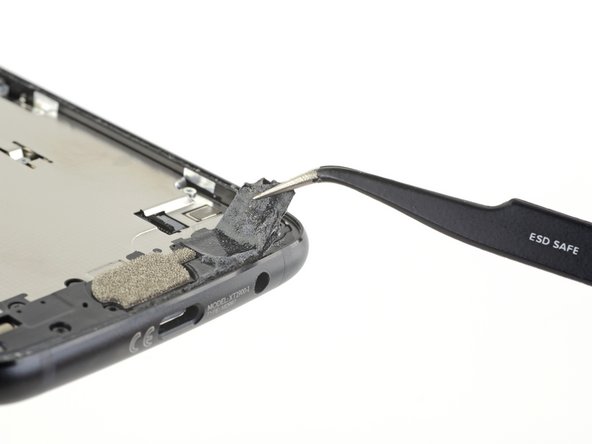
Use the point of a spudger to flip up the lock bar on the fingerprint sensor's ZIF socket, near the bottom right of the phone.
-
Use tweezers to carefully slide the fingerprint sensor cable out of the socket.
-
-
Este paso está sin traducir. Ayuda a traducirlo
-
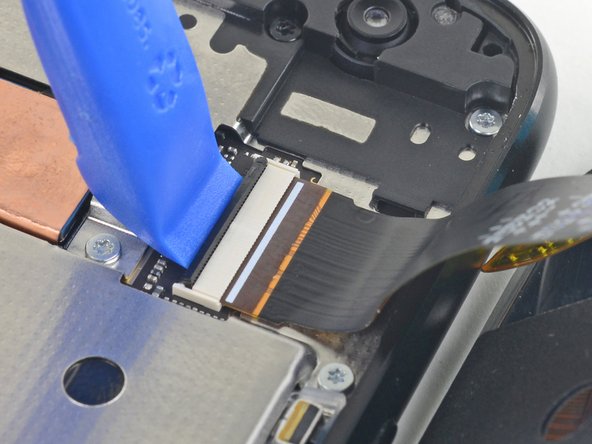
Use an opening tool to flip up the wide lock bar on the display cable's ZIF socket, near the top right of the phone.
-
Use tweezers to carefully slide the display cable out of the ZIF socket.
-


