Esta versión puede contener ediciones incorrectas. Cambie a la última instantánea verificada.
Qué necesitas
-
Este paso está sin traducir. Ayuda a traducirlo
-
Turn the clock radio over so the bottom is facing up.
-
Pull the tab upward and remove the cover from the battery compartment.
-
Remove the batteries.
-
-
Este paso está sin traducir. Ayuda a traducirlo
-
Remove the five screws on the bottom of the device with a screwdriver.
-
Grasp the top and bottom and gently pull apart.
-
-
-
Este paso está sin traducir. Ayuda a traducirlo
-
Remove the (5) 7mm screws with a Phillips #1 screwdriver and a pair of tweezers.
-
-
Este paso está sin traducir. Ayuda a traducirlo
-
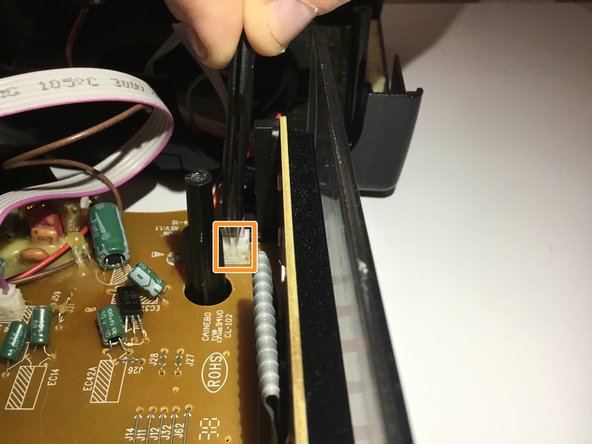
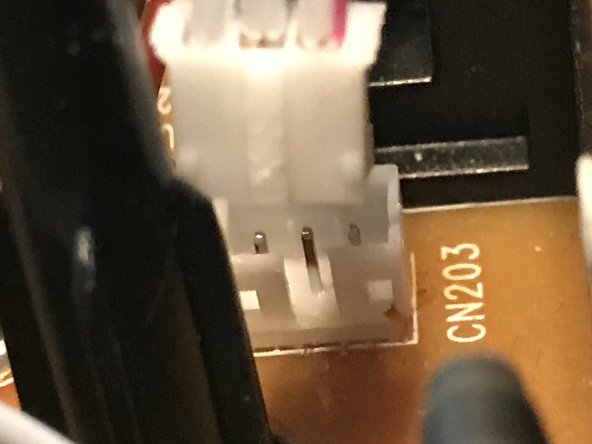
Locate the wiring harness.
-
Disconnect the wiring harness using the tweezers.
-
-
Este paso está sin traducir. Ayuda a traducirlo
-
Remove the PCB board from the device.
-
Replace the broken motherboard with a new PCB board.
-


Equipo

University of North Texas, Team S6-G6, Thomas Spring 2018 Miembro de University of North Texas, Team S6-G6, Thomas Spring 2018
UNT-THOMAS-S18S6G6
4 Miembros
6 Guías creadas