Esta versión puede contener ediciones incorrectas. Cambie a la última instantánea verificada.
Qué necesitas
-
-
Retira los diez tornillos que aseguran la carcasa inferior al ordenador:
-
Tres tornillos Phillips de 13.5 mm
-
Siete tornillos Phillips de 3 mm.
-
-
-
Si está presente, agarre la lengüeta de plástico unida al conector de la batería y tire de ella hacia el borde frontal del dispositivo. En los modelos Late-2011, el conector de la batería no tiene lengüeta y es simplemente un enchufe que se inserta directamente en la placa base.
-
-
-
Utiliza la punta de un spudger para empujar el pequeño retén de plástico del cable y separarlo de la toma del cable de la cámara, de modo que quede espacio suficiente para retirar el cable de la cámara.
-
-
-
Este paso está sin traducir. Ayuda a traducirlo
-
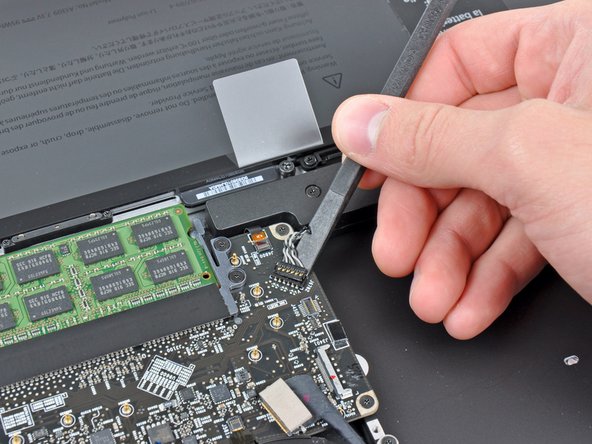
Use the flat end of a spudger to lift the subwoofer & right speaker connector out of its socket on the logic board.
-
-
Este paso está sin traducir. Ayuda a traducirlo
-
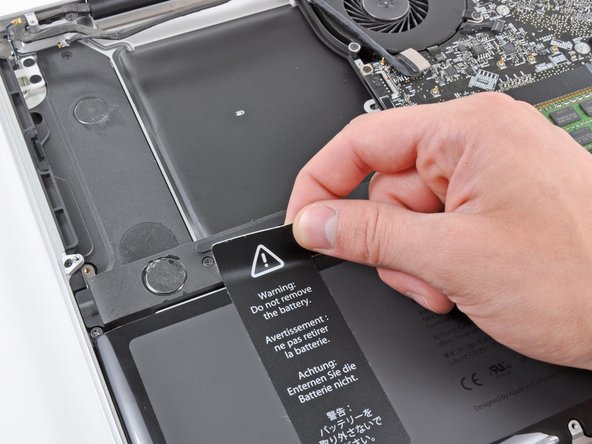
Use an iPod opening tool or another soft thin-edged tool to carefully lift up a corner of the "Warning: Do not remove the battery" sticker off the right speaker/subwoofer enclosure.
-
Peel the sticker off the right speaker/subwoofer enclosure.
-
-
Este paso está sin traducir. Ayuda a traducirlo
-
Remove the following three screws securing the subwoofer & right speaker to the upper case:
-
One 2.6 mm Phillips screw
-
Two 12.3 mm Phillips screws
-
-
Este paso está sin traducir. Ayuda a traducirlo
-
Hold the battery sticker out of the way as you remove the subwoofer & right speaker from the upper case.
-


Cancelar: No complete esta guía.
18 personas más completaron esta guía.

3 comentarios
Where can I find the right side speaker for a MacBook Pro 17” (EARLY 2011)
Bonjour, le speaker droit et gauche early 2009 jusqu’a mid 2010 sont-ils identiques ?
J’ai acheté un kit complet early 2009 et mon macbook pro 17 pouces est mi 2010
merci de vos réponses
Good job. Thank you.