Esta versión puede contener ediciones incorrectas. Cambiar a la última instantánea verificada.
Qué necesitas
-
-
Utiliza los dedos para empujar las dos lengüetas de liberación de la batería y sácala del ordenador.
-
-
-
Retira los cuatro tornillos Phillips idénticos de 3,4 mm de la puerta de la memoria. Estos tornillos tienen cabezas de 4 mm de diámetro en lugar de las cabezas de 3 mm de los tornillos del cuerpo.
-
-
-
Retira los tres tornillos Phillips del compartimento de la batería, cerca del pestillo. Apple tuvo la amabilidad de inclinar estos tornillos en un ligero ángulo para facilitar su extracción. En el A1261 estos tornillos tienen cabezas de 4 mm de diámetro en lugar de las cabezas de 3 mm en los tornillos del cuerpo.
-
-
-
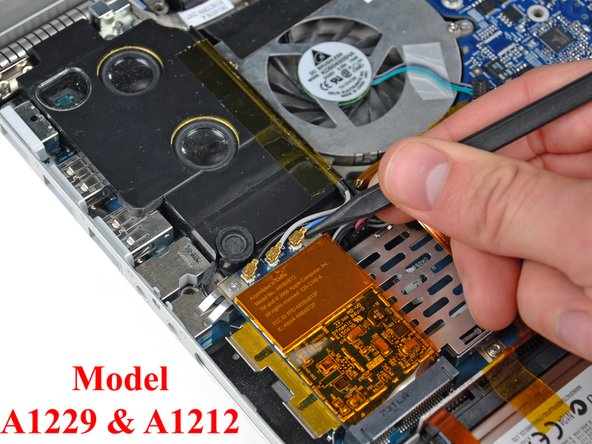
Este paso está sin traducir. Ayuda a traducirlo
-
Disconnect the two antenna cables attached to the AirPort Extreme card.
-
-
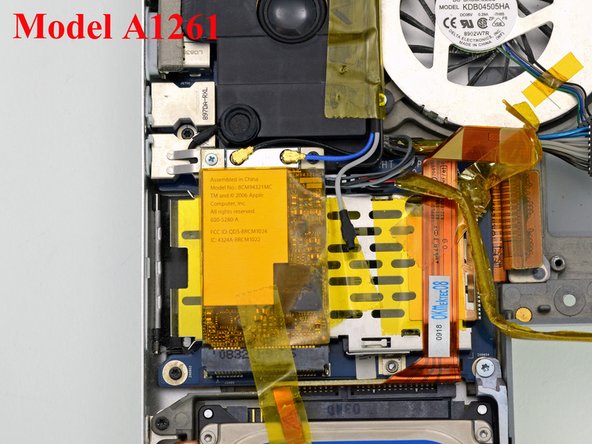
Este paso está sin traducir. Ayuda a traducirlo
-
Remove the single black T6 Torx screw from the top right corner of the AirPort Extreme card.
-
-
Este paso está sin traducir. Ayuda a traducirlo
-
Lift the AirPort Extreme card up and slide it out of its connector.
-
-
Este paso está sin traducir. Ayuda a traducirlo
-
Remove the two silver T6 Torx screws from the top left and bottom right corners of the left speaker assembly.
-
-
Este paso está sin traducir. Ayuda a traducirlo
-
Lift up the left speaker assembly with one hand and deroute the inverter cable from the top right corner of the speaker assembly.
-
-
Este paso está sin traducir. Ayuda a traducirlo
-
Disconnect the pink and black left speaker assembly cable from the left I/O board. Be sure to pull only on the white connector and not on the speaker wires.
-
Disconnect the microphone cable connector from the left I/O board.
-
Remove the left speaker/microphone assembly from the lower case.
-
-
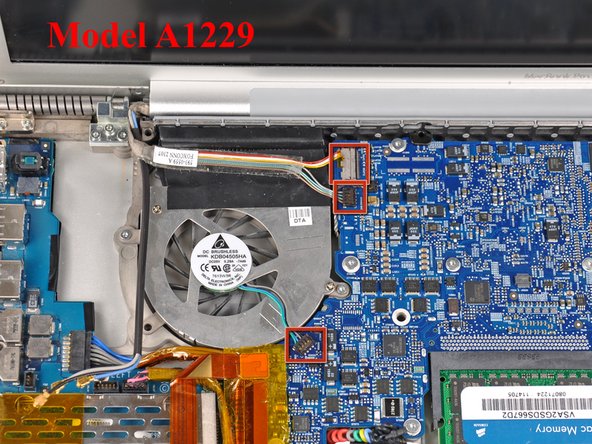
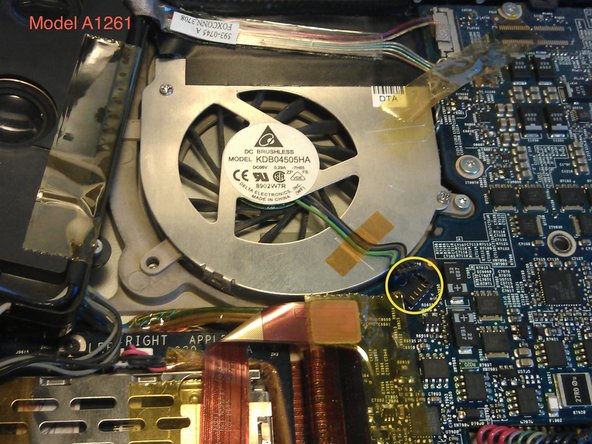
Este paso está sin traducir. Ayuda a traducirlo
-
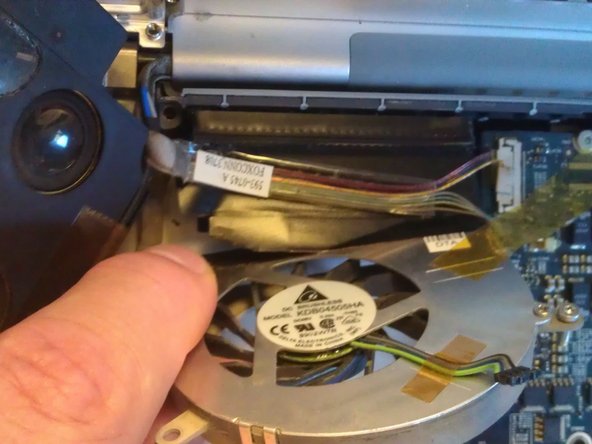
Disconnect the iSight, inverter, and left fan cables from the left side of the logic board.
-
-
Este paso está sin traducir. Ayuda a traducirlo
-
Peel up the iSight and inverter cables which are attached with a mild adhesive above the left fan.
-
-
Este paso está sin traducir. Ayuda a traducirlo
-
Remove the two silver T6 Torx screws securing the left fan to the lower case.
-
-
Este paso está sin traducir. Ayuda a traducirlo
-
Lift the left fan and its metal bracket out of the computer.
-


Cancelar: No complete esta guía.
81 personas más completaron esta guía.

6 comentarios
incredibly difficult. easy times unscrewing things but no guide as to "disconnecting.. cables..". used a jewelers loop & a flash light to see "push" on the connector, but that's it. Push down to connect? ..or up to disconnect.. slide it out- squeeze the something. nothing. I ended up breaking it off the logic board accidentally, rendering my computer irreparable, unless i could solder the wires to the board. yeah right. My advise do do it.
Sorry to hear that, I made almost the same experience as you. I was lucky to find out by my own, how to disconnect the cables on my A1212 and added a comment to step 17.
MBPTom -
Instead of replacing the fans completly, you may be able to repair them.
Once you removed the fan, there is a screw that you not yet have to touch. Unscrew it and carefuly open the housing. After that, you can pull the fan wheel with the shaft out. Clean everything (avoid water), including the hole that holds the shaft. Put a drop of oil (10W-40 syntetic motoroil works pretty well) on a piece of tissue and oil the shaft. Reasseble the whole thing and check that it moves.
This may not work if the mechanical damage is too extensive or when the electronic is broken. If it works, you spared 50 bucks, otherwise the nice folks at ifix can help you out ... I did this to both of the fans after they got rather noisy, and they worked another two years since.
While disassembling my A1261 to replace the right speaker I decided to keep going and give the computer a thorough cleaning. The fans and heat sink had collected a lot of dust. As I was removing one of the fans from its motor two of the blades fell off in my hand. Does anyone know if there is somewhere can get just the fan without the motor?