Esta versión puede contener ediciones incorrectas. Cambie a la última instantánea verificada.
Qué necesitas
-
-
Usa tus dedos para empujar ambas pestañas de liberación de la batería para separarlas de la batería y levanta la batería para sacarla de la computadora.
-
-
-
Retira los tres tornillos Phillips idénticos de la tapa de la memoria.
-
-
-
Retira los dos tornillos Phillips en el compartimiento de la batería cerca del pestillo.
-
-
-
Levanta la parte posterior del estuche y pasa los dedos por los lados, liberando el estuche a medida que avanza. Una vez que hayas liberado los lados, es posible que tengas que mover la caja hacia arriba y hacia abajo para liberar el frente de la caja superior. Esta etapa puede ser bastante complicada.
-
Sobre el lector de DVD hay 4 pestañas retrasadas que se abren verticalmente.
-
Ten en cuenta que las dos pequeñas lengüetas en el frente izquierdo de la caja superior pueden doblarse mientras retiras la caja superior. Al volver a instalarlos, es posible que debas doblarlos hacia atrás para que encajen en las ranuras de la carcasa inferior.
-
-
-
Este paso está sin traducir. Ayuda a traducirlo
-
Disconnect the iSight, inverter, and left fan cables from the logic board.
-
-
Este paso está sin traducir. Ayuda a traducirlo
-
Use a spudger to flip up the brown plastic flap securing the left ambient light sensor cable to the logic board.
-
Slide the left ambient light sensor cable to the left and out of its connector.
-
-
Este paso está sin traducir. Ayuda a traducirlo
-
Peel up the left ambient light sensor cable from above the left fan.
-
-
Este paso está sin traducir. Ayuda a traducirlo
-
Peel up the iSight and inverter cables from above the left fan, removing tape as necessary.
-
-
Este paso está sin traducir. Ayuda a traducirlo
-
Remove the following 3 screws:
-
One 6.2 mm black T6 Torx screw from the right side of the fan.
-
Two 9.4 mm silver T6 Torx screws from the left side of the fan.
-
-
Este paso está sin traducir. Ayuda a traducirlo
-
Lift the lift fan up and carefully peel up the tape securing the fan to the heat sink as you go.
-
-
Este paso está sin traducir. Ayuda a traducirlo
-
Disconnect the hard drive and ExpressCard connectors from the left side of the logic board.
-
-
Este paso está sin traducir. Ayuda a traducirlo
-
Disconnect the two antenna cables attached to the Airport Extreme card.
-
-
Este paso está sin traducir. Ayuda a traducirlo
-
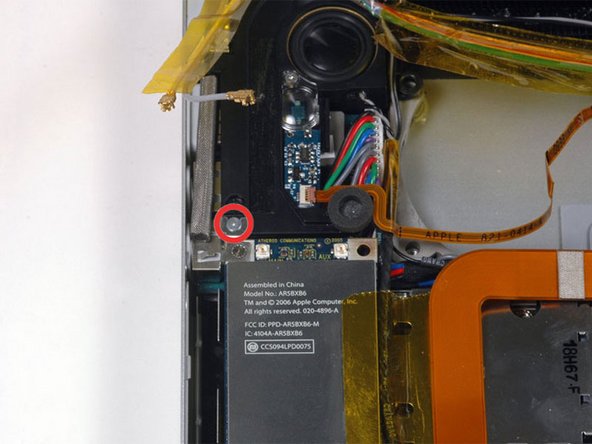
Remove the single silver Phillips screw located just above the Airport Extreme card.
-
Lift the small silver metal retaining bracket up and out of the computer.
-
-
Este paso está sin traducir. Ayuda a traducirlo
-
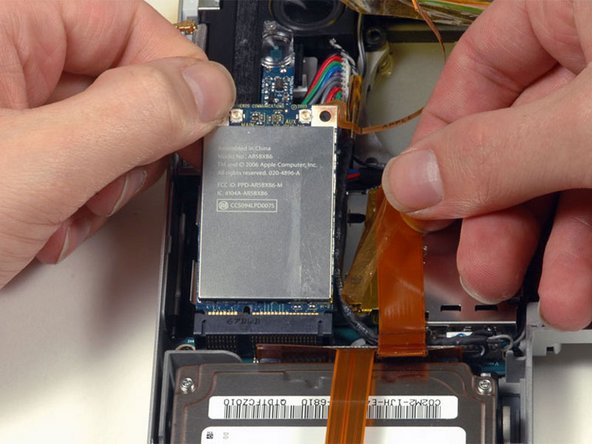
Peel back the orange tape on the right side of the Airport Extreme card.
-
Lift the Airport Extreme card up and slide it out of its connector.
-
-
Este paso está sin traducir. Ayuda a traducirlo
-
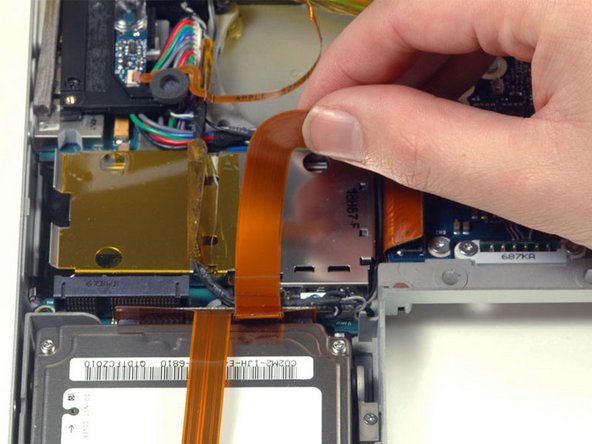
Peel up the orange hard drive cable from above the ExpressCard cage.
-
-
Este paso está sin traducir. Ayuda a traducirlo
-
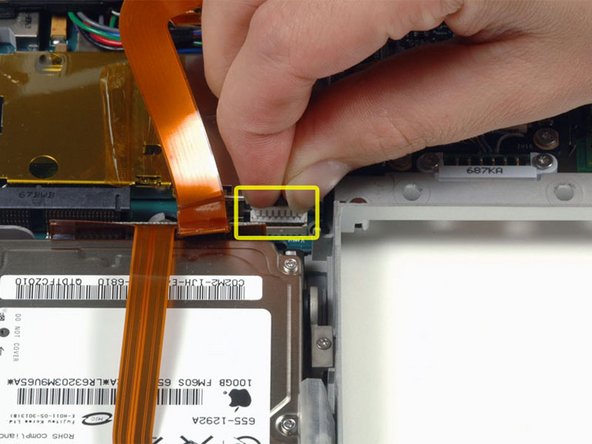
Disconnect the speaker cable from the corner of the left I/O board.
-
-
Este paso está sin traducir. Ayuda a traducirlo
-
Remove the single black T6 Torx screw securing the left speaker.
-
-
Este paso está sin traducir. Ayuda a traducirlo
-
Lift the left speaker assembly out of its housing and place it in the area previously occupied by the left fan.
-
-
Este paso está sin traducir. Ayuda a traducirlo
-
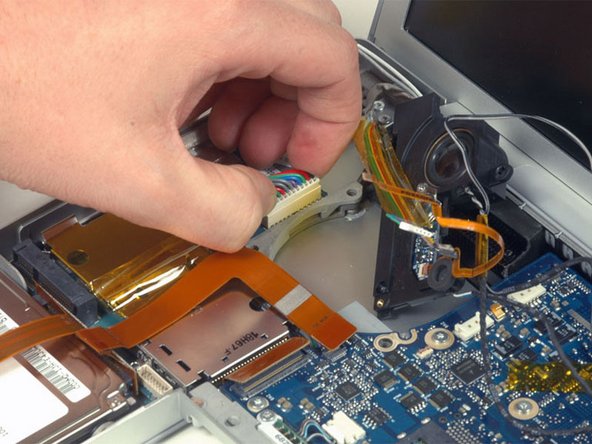
Disconnect the large multi-colored power cable from the left I/O board.
-
-
Este paso está sin traducir. Ayuda a traducirlo
-
Remove the following 5 screws/standoffs:
-
Four black T6 Torx screws securing the left I/O board to the lower case.
-
One 4 mm standoff located between the audio jacks.
-
-
Este paso está sin traducir. Ayuda a traducirlo
-
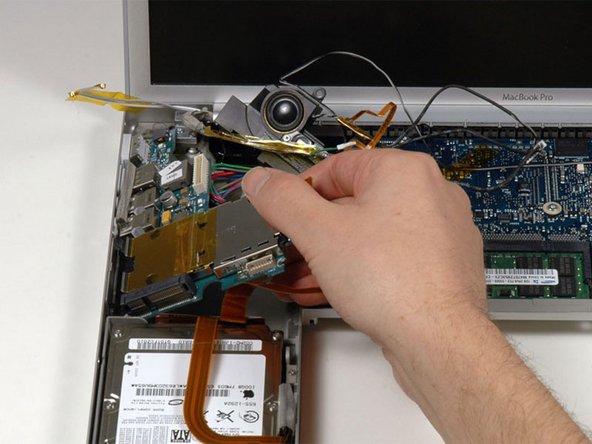
Lift up the right side of the left I/O board and slide it out of the computer.
-
-
Este paso está sin traducir. Ayuda a traducirlo
-
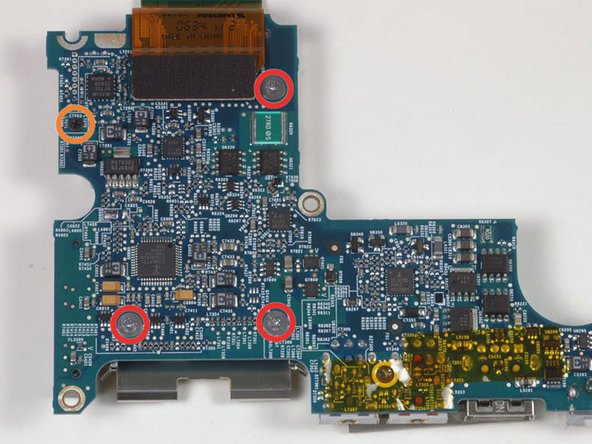
Remove the following 4 screws:
-
Three 1.2 mm silver Phillips with large heads.
-
One 3.2 mm black Phillips on the left side.
-


Cancelar: No complete esta guía.
Una persona más ha completado esta guía.
