Esta versión puede contener ediciones incorrectas. Cambiar a la última instantánea verificada.
Qué necesitas
-
-
Utiliza una moneda o un spudger para girar el tornillo de bloqueo de la batería 90 grados en el sentido de las agujas del reloj.
-
-
-
-
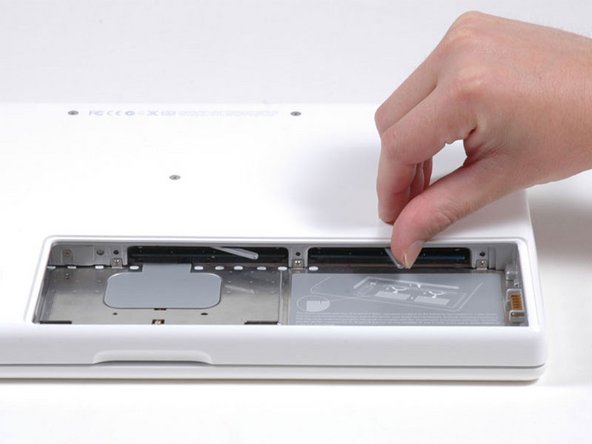
Desatornilla los tres tornillos Phillips espaciados uniformemente a lo largo de la pared posterior del compartimento de la batería.
-
-
Este paso está sin traducir. Ayuda a traducirlo
-
Pull back on the metal lever and slide the RAM chip out from its compartment.
-


Cancelar: No complete esta guía.
453 personas más completaron esta guía.

19 comentarios
another great tutorial ~ this was very easy, took maybe 10 minutes max, and now i have a noticeably faster computer. i agree with the previous comment that you need to push the new ram in rather firmly.
Success! Fifth time was the charm! I tried to move up from the original 2x1Gb RAM configuration in my MacBook 6.4 Ghz Core 2 Duo to 6 Gb RAM (1x4 Gb + 1x2 Gb, all from iFixit). Followed instructions exactly after grounding myself several times etc, put the 4Gb module on the left and 2 Gb on the right but got the dreaded "three beep." Tried re-installing w/ the 4Gb module on the right--no joy. Tried re-installing old 1+1; no problem, so obviously I was seating the modules correctly. Fourth time: Just installed the new 2 GB and left on of the old 1 Gb--success! The 4 Gb module seemed to be the problem. Tried one more time--attempt number FIVE. Put the 4 Gb back in for the third time (in place of one of the old 1 Gb of course--SUCCESS. I heard a different click this time too. Anyway--I now have six times the RAM I originally had installed--Yea! Thanks, iFixit! Now, I'll work in my iMac!
Ok - I took your lead and started trying all the different combinations I could create and finally one just worked. So don't give up people - just use process of elimination and you will find the right combo! I did try one new, one old 3 different ways before it took.
Nellie -
someone told me that the macbook 2,1 could take 4 gb ram but only make use of 3 gb.... ?
can someone verify if this is true ?? and is it then posible to combine 1gb and 2gb of 2ddr pc5300 ?