Saltar al contenido principal

Logitech G920 Driving Force XYAB Buttons Replacement

Qué necesitas

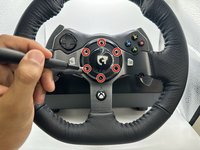
  1. Logitech G920 Driving Force XYAB Buttons Replacement, Steering Wheel Motherboard: paso 1, imagen 1 de 1
    • Use the Phillips #0 screwdriver to remove the five 9.5 mm external screws.

    • Only three of the five screws are visible from each side of the wheel due to the center unit.

  2. Logitech G920 Driving Force XYAB Buttons Replacement: paso 2, imagen 1 de 1
    • Using the Phillips #0 screwdriver, remove the 5 mm screws holding the bumpers in place.

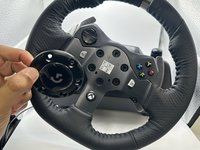
  3. Logitech G920 Driving Force XYAB Buttons Replacement: paso 3, imagen 1 de 2 Logitech G920 Driving Force XYAB Buttons Replacement: paso 3, imagen 2 de 2
    • Using the TR25 Torx Security Screwdriver, remove the six 23.8 mm screws holding the face plate together.

    • Remove the face plate from the steering wheel.

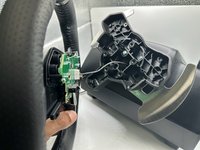
  4. Logitech G920 Driving Force XYAB Buttons Replacement: paso 4, imagen 1 de 2 Logitech G920 Driving Force XYAB Buttons Replacement: paso 4, imagen 2 de 2
    • Remove the wheel from the main steering wheel console.

    • Ensure this is done carefully as to not damage the connection wire.

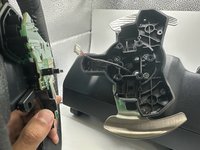
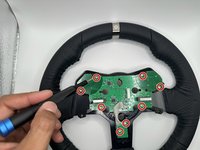
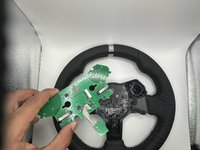
  5. Logitech G920 Driving Force XYAB Buttons Replacement: paso 5, imagen 1 de 2 Logitech G920 Driving Force XYAB Buttons Replacement: paso 5, imagen 2 de 2
    • Remove the eight 7.5 mm screws holding the steering wheel motherboard in place using a Phillips #0 screwdriver.

    • Remove the steering wheel motherboard.

  6. Logitech G920 Driving Force XYAB Buttons Replacement, XYAB Buttons: paso 6, imagen 1 de 1
    • Remove the XYAB buttons from the back of the steering wheel.

Conclusión

To reassemble your device, follow these instructions in reverse order.

Una persona más ha completado esta guía.

0Guía Comentarios

Agregar Comentario

Ver Estadísticas:

Ultimas 24 horas: 0

Ultimos 7 días: 6

Ultimos 30 días: 32

Todo El Tiempo: 513