Saltar al contenido principal

Lasko CD08200 Fan Replacement

Qué necesitas

  1. Lasko CD08200 Fan Replacement, Lasko CD08200 Disassembly: paso 1, imagen 1 de 2 Lasko CD08200 Fan Replacement, Lasko CD08200 Disassembly: paso 1, imagen 2 de 2
    • Turn over the device and place it on its head.

    • Remove the four 14mm screws holding the bottom using a TR15 screwdriver.

  2. Lasko CD08200 Fan Replacement: paso 2, imagen 1 de 1
    • Remove both 14mm screws from the power cord casing using a Phillips #2 screwdriver.

    • Remove the power cord casing from the device case.

  3. Lasko CD08200 Fan Replacement: paso 3, imagen 1 de 3 Lasko CD08200 Fan Replacement: paso 3, imagen 2 de 3 Lasko CD08200 Fan Replacement: paso 3, imagen 3 de 3
    • Cut the sticker on the right side of the device using a Jimmy.

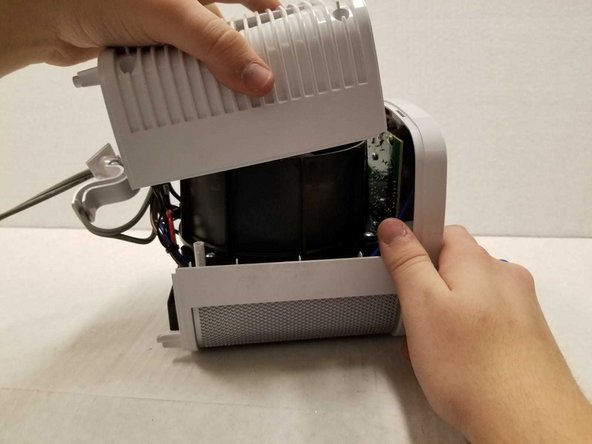
    • Unscrew the four 14mm screws with a Phillips #2 bit on the back of the device.

    • If your screwdriver cannot reach the screw, you can use the metal spudger.

    • Remove the back casing from the device.

  4. Lasko CD08200 Fan Replacement: paso 4, imagen 1 de 3 Lasko CD08200 Fan Replacement: paso 4, imagen 2 de 3 Lasko CD08200 Fan Replacement: paso 4, imagen 3 de 3
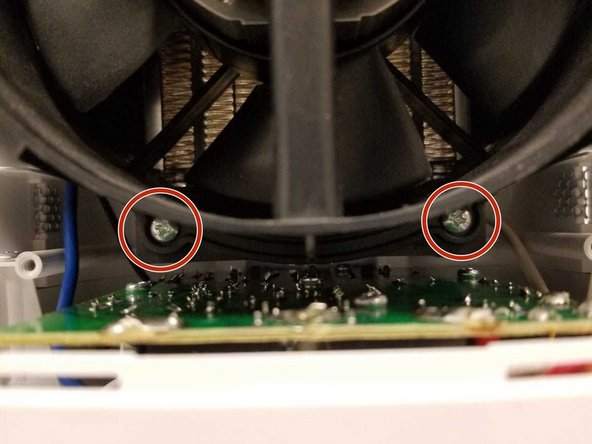
    • Remove the four 14mm screws housing the fan using the Phillips #2 screwdriver.

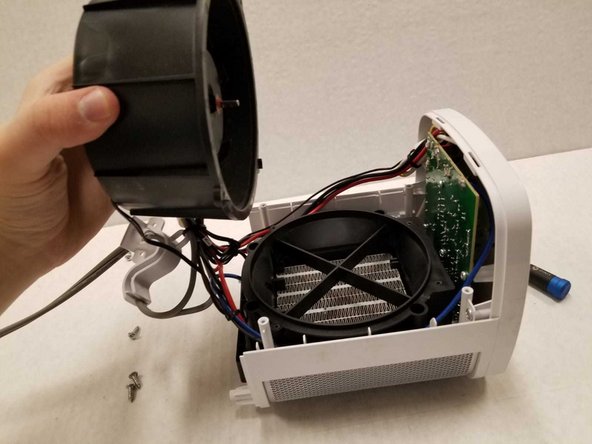
    • Remove the top of the fan housing with the fan attached and place it on the table.

  5. Lasko CD08200 Fan Replacement, Fan: paso 5, imagen 1 de 2 Lasko CD08200 Fan Replacement, Fan: paso 5, imagen 2 de 2
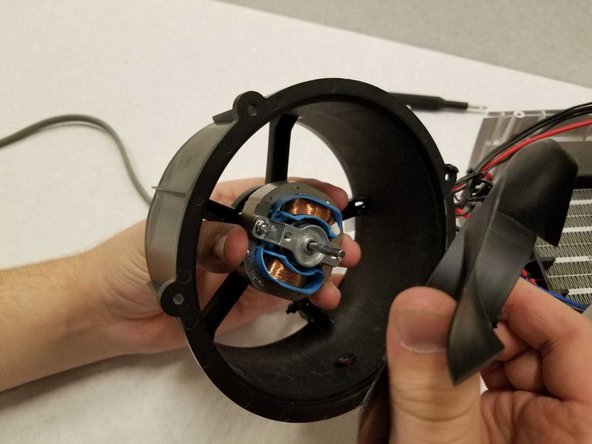
    • While holding onto the back of the fan housing with one hand and holding the center of the propeller, pull the propeller out.

    • During reassembly, push the propeller and red plate together into the metal shaft until you feel the plate click.

Conclusión

To reassemble your device, follow these instructions in reverse order.

0 comentarios

Agregar Comentario

Ver Estadísticas:

Ultimas 24 horas: 0

Ultimos 7 días: 7

Ultimos 30 días: 16

Todo El Tiempo: 677