Introducción
Utiliza esta guía para reemplazar el ventilador del evaporador de su refrigerador LG.
Esta guía funcionará para la mayoría de los refrigeradores LG. Esta guía está escrita para un refrigerador LG modelo LFX25973. Si tiene un modelo diferente, puedes encontrar algunas pequeñas diferencias en el desmontaje, pero el proceso general de reparación será el mismo.
El ventilador del evaporador es una parte importante del sistema de enfriamiento de su refrigerador. Hace circular el aire dentro del refrigerador para que todas las partes se enfríen con el aire frío del evaporador.
Si el ventilador del evaporador falla debido a una falla mecánica o eléctrica o no puede girar debido a la acumulación de hielo, el refrigerador no se mantendrá tan frío. Esto es especialmente cierto en el compartimiento de alimentos frescos, ya que el ventilador envía aire frío a ese compartimiento.
Qué necesitas
-
-
Desenchufa tu refrigerador antes de comenzar la reparación.
-
Motor del ventilador del condensador
-
Motor del compresor y dispositivo de sobrecarga térmica.
-
Conjunto de válvula de suministro de agua
-
-
-
Levanta y quita el cajón extraíble superior.
-
Levanta y retira el compartimiento del cajón principal.
-
-
-
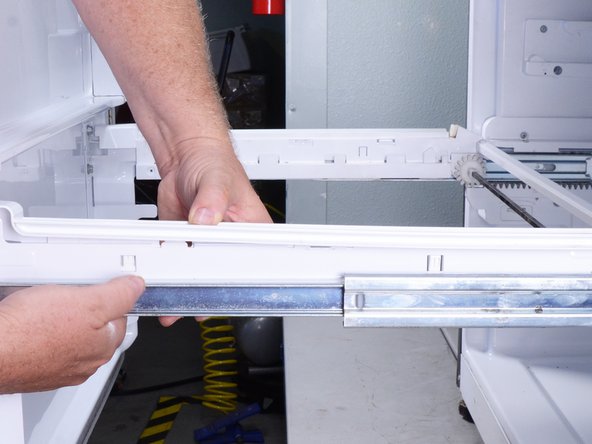
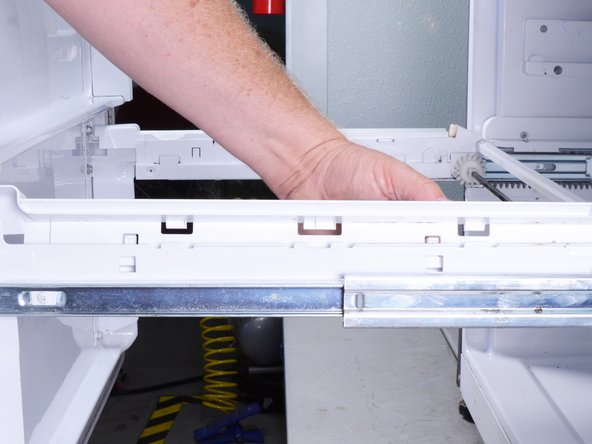
Usa tu dedo o un destornillador de punta plana para presionar las dos pestañas de bloqueo en la cubierta del riel del cajón derecho.
-
Levanta la cubierta del riel y quítala.
-
Repite este procedimiento para la cubierta del riel del cajón izquierdo.
-
-
-
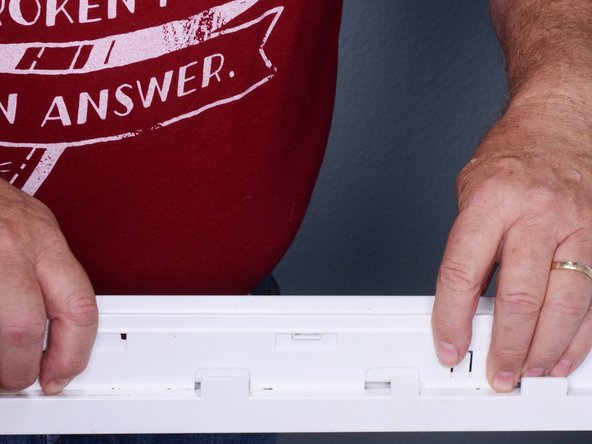
Sostén la cubierta del riel del cajón al ras contra el costado del riel del cajón.
-
Empuja la cubierta del riel hacia abajo para instalarla. Debería encajar en su lugar.
-
-
-
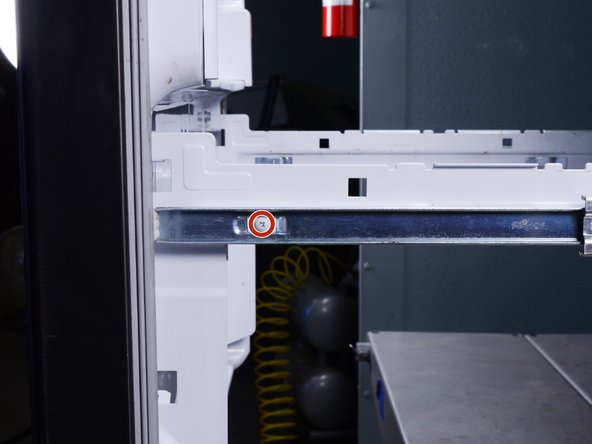
Utiliza un destornillador Phillips para quitar el tornillo que sujeta el cajón a cada una de las guías del cajón.
-
-
-
Utiliza un destornillador Phillips para quitar los tornillos que sujetan ambas guías del cajón izquierdo.
-
-
-
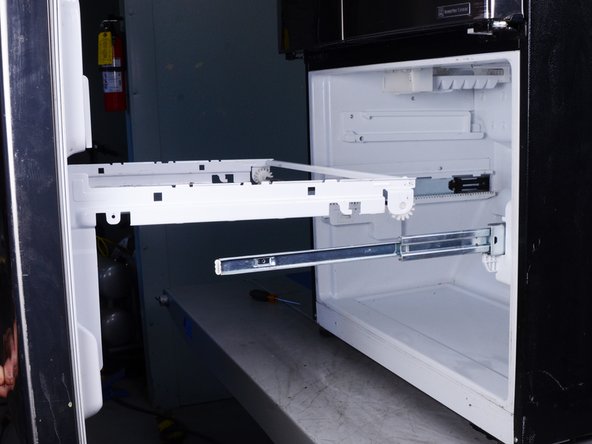
Tira ligeramente de la corredera del cajón superior izquierdo hacia ti para liberar la pestaña de bloqueo en la parte trasera.
-
Quita la corredera del cajón superior izquierdo.
-
-
-
-
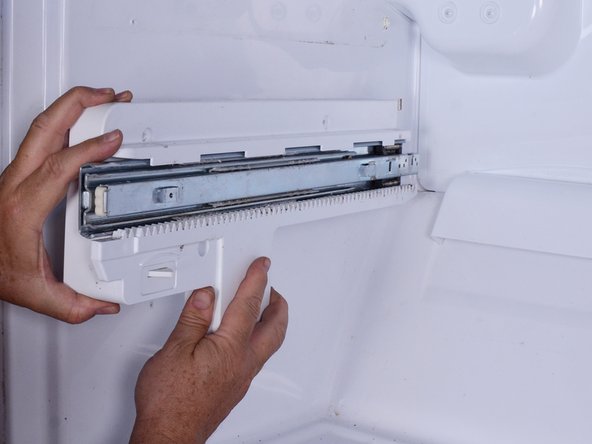
Tira ligeramente de la corredera del cajón inferior izquierdo hacia usted para liberar la pestaña de bloqueo en la parte trasera.
-
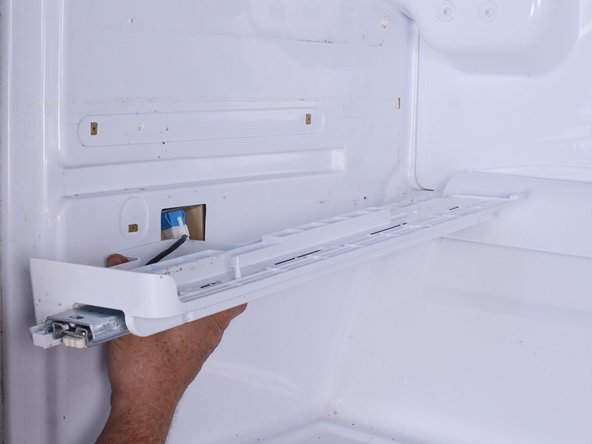
Vuelve a colocar la corredera del cajón inferior izquierdo para acceder al conector del interruptor de la puerta.
-
-
-
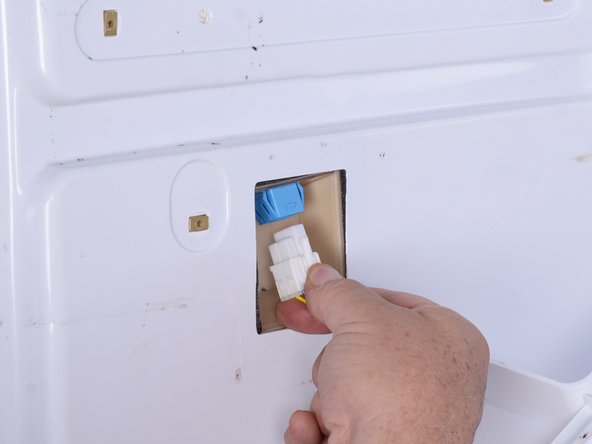
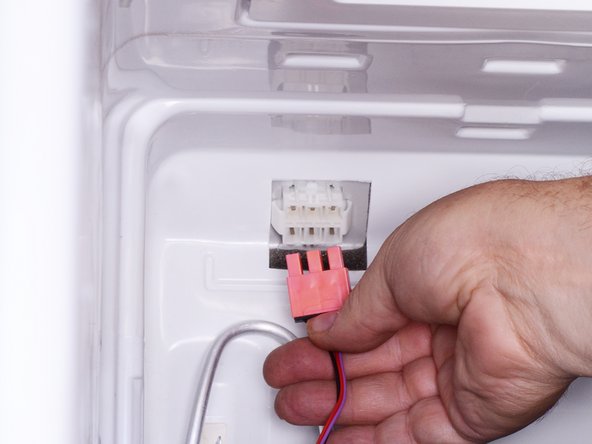
Aprieta el conector del interruptor de la puerta para soltarlo.
-
Tira del conector del interruptor de la puerta hacia abajo para desconectarlo.
-
Quita la corredera del cajón inferior izquierdo.
-
-
-
Utiliza un destornillador Phillips para quitar los tornillos que sujetan la máquina de hielo a la parte superior del compartimento del congelador.
-
-
-
Inserta un destornillador de punta plana en la ranura ubicada en el borde derecho de la máquina de hielo.
-
Haz palanca hacia afuera con el destornillador para liberar la pestaña de bloqueo que sujeta la máquina de hielo al refrigerador.
-
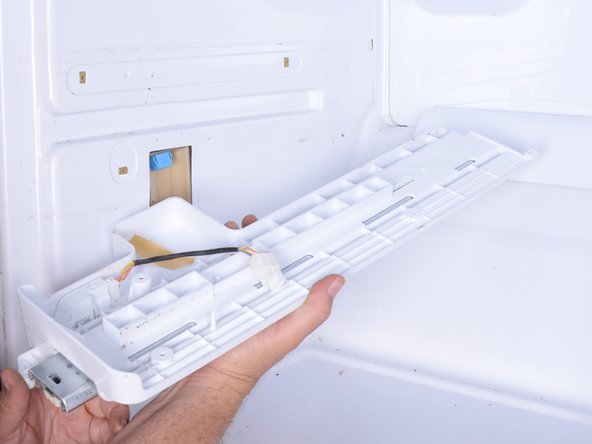
Cuando se suelte la pestaña, tira hacia abajo la esquina frontal derecha de la máquina de hielo.
-
-
-
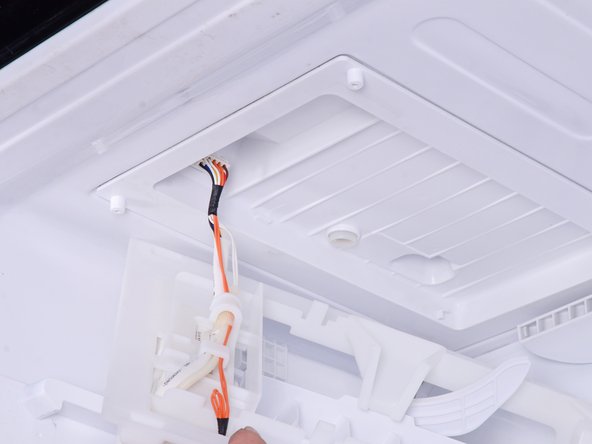
Aprieta el conector de la máquina de hielo para soltarlo y tira de él hacia afuera para desconectarlo.
-
Quita la máquina de hielo.
-
-
-
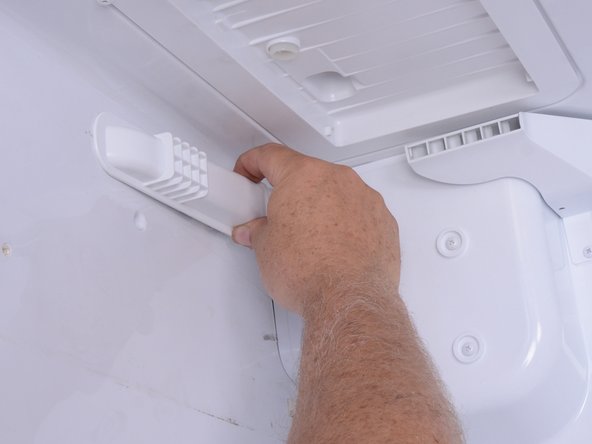
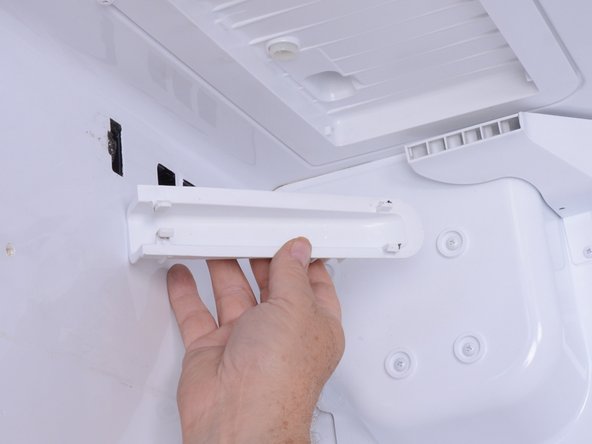
Pellizca la parte trasera de la cubierta de retorno de aire para liberarla de la pared del congelador.
-
Tira de la cubierta de retorno de aire hacia afuera y quítala.
-
-
-
Utiliza un destornillador Philips para quitar el tornillo (o tornillos) que sujetan la cubierta del evaporador.
-
-
-
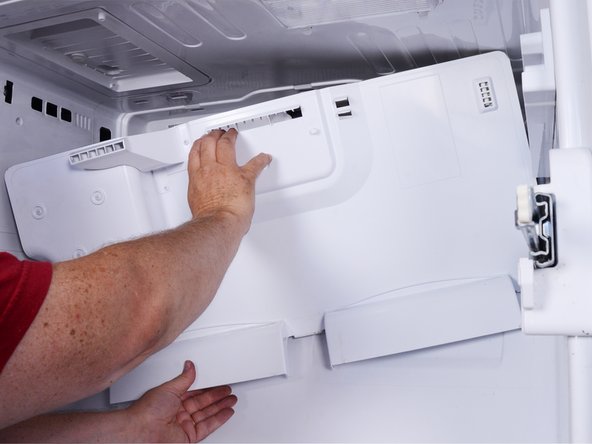
Sujeta la cubierta del evaporador por las aberturas de ventilación y tire del borde superior hacia usted.
-
-
-
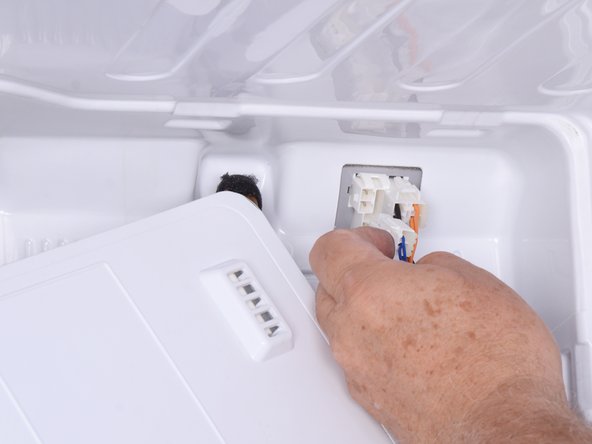
Desconecta las conexiones eléctricas en la esquina superior izquierda del congelador.
-
-
-
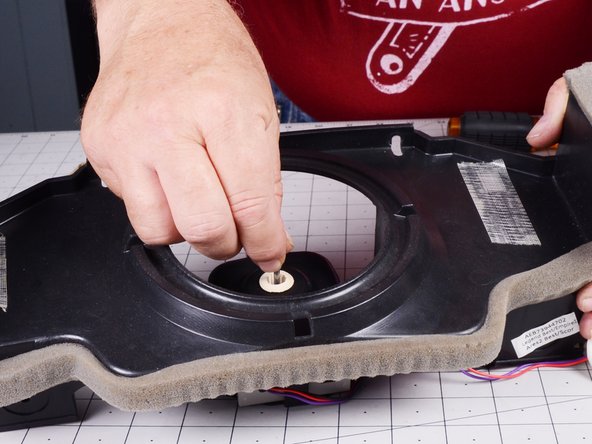
Utiliza un destornillador Philips para quitar los tornillos que sujetan el conjunto del ventilador del evaporador a la cubierta del evaporador.
-
Quita el conjunto del ventilador del evaporador.
-
-
-
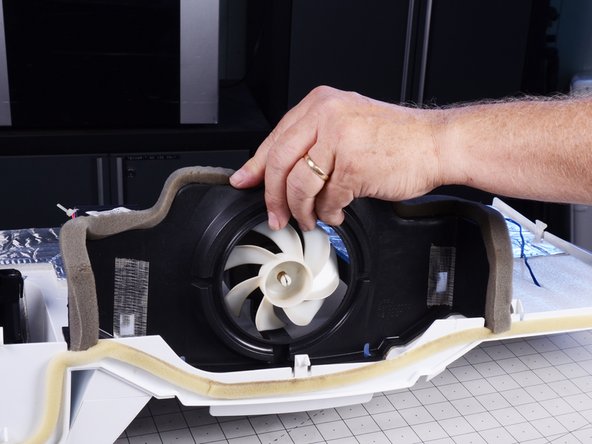
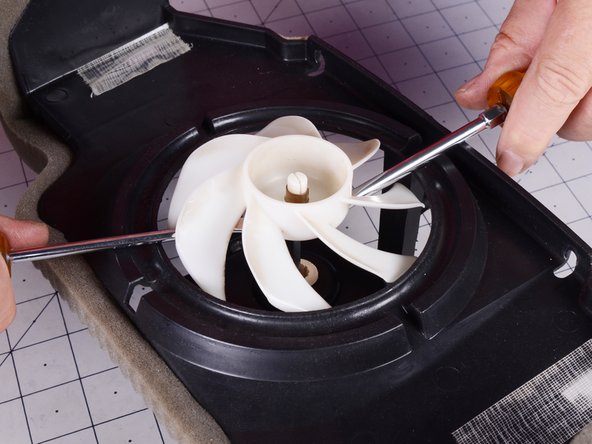
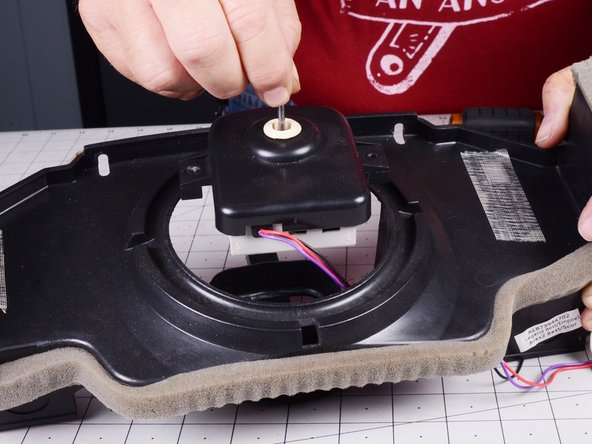
Inserta dos destornilladores de punta plana a través de la parte superior de la abertura del ventilador en el conjunto del ventilador.
-
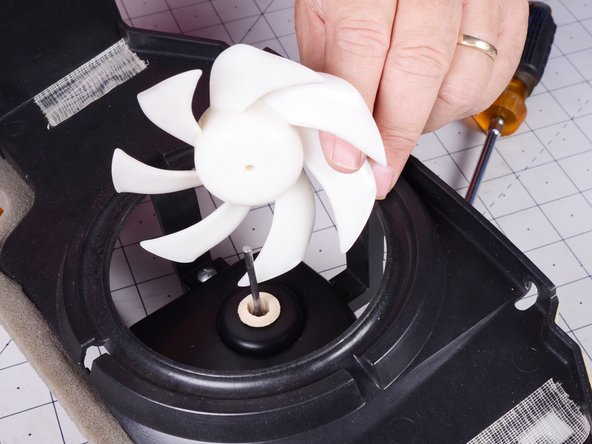
Utiliza los destornilladores para sacar el ventilador del eje.
-
Quita el ventilador.
-
-
-
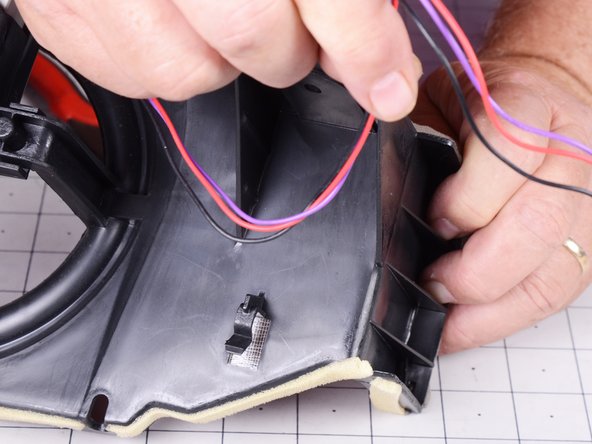
Corta las bridas que sujetan los cables del motor al conjunto del ventilador del evaporador.
-
Desengancha los cables del motor del conjunto del ventilador del evaporador.
-


Para volver a ensamblar tu dispositivo, sigue estas instrucciones en orden inverso.
Lleva tus desechos electrónicos a un centro de reciclaje certificado por R2 o e-Stewards.
¿La reparación no salió como estaba previsto? Prueba alguna solución de problemas básicos o solicita ayuda a nuestra comunidad de respuestas.
Un agradecimiento especial a estos traductores:
100%

¡ Angel nos está ayudando a reparar el mundo! ¿Quieres contribuir?
Empezar a traducir ›

