Esta versión puede contener ediciones incorrectas. Cambie a la última instantánea verificada.
Qué necesitas
-
Este paso está sin traducir. Ayuda a traducirlo
-
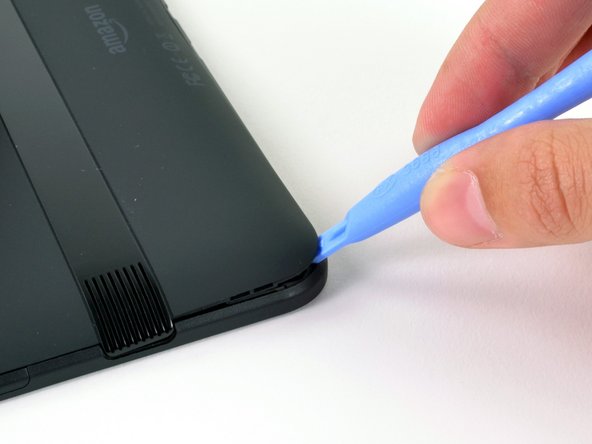
Wedge a plastic opening tool into the lower right corner of the Kindle Fire.
-
Lift up until you hear a slight popping noise.
-
Repeat along the perimeter of the device to release the clips securing the case halves to each other. Remove the back cover.
-
-
Este paso está sin traducir. Ayuda a traducirlo
-
If your device has copper tape attached to the battery, carefully peel it off the battery.
-
-
Este paso está sin traducir. Ayuda a traducirlo
-
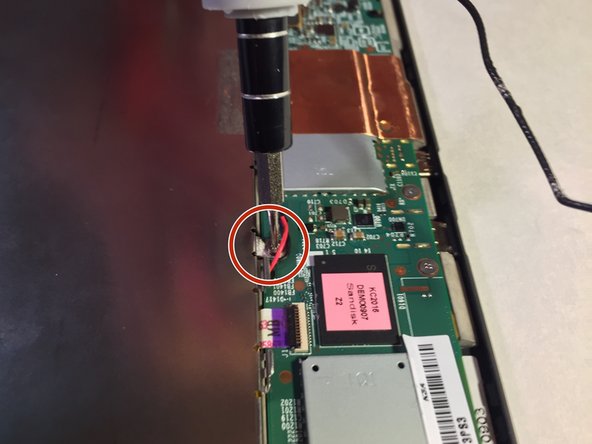
Locate the antenna cable connector which is easier to find if you look for the gold tipped black wire that surrounds the battery.
-
Lift and pull up the antenna connector and the antenna cable that surrounds the battery
-
-
-
Este paso está sin traducir. Ayuda a traducirlo
-
Locate and unscrew the four 3 mm screws using the Phillips #00 screwdriver.
-
Unscrew the one T5 Torx screw using the special T5 Torx screwdriver head.
-
-
Este paso está sin traducir. Ayuda a traducirlo
-
Detach the plastic piece that connects the wires to the motherboard using the plastic opening tool.
-
-
Este paso está sin traducir. Ayuda a traducirlo
-
Lift the battery out of the device with your finger or the plastic opening tool.
-
-
Este paso está sin traducir. Ayuda a traducirlo
-
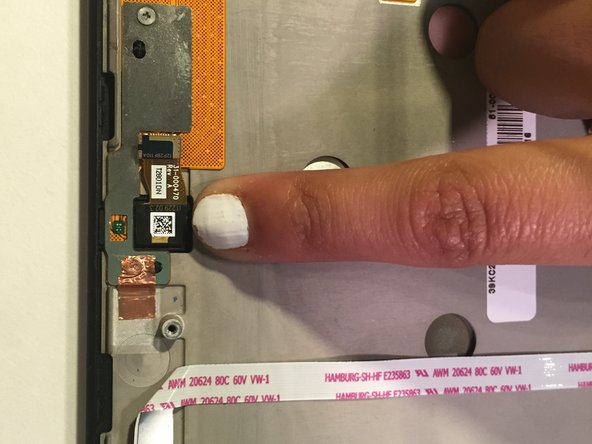
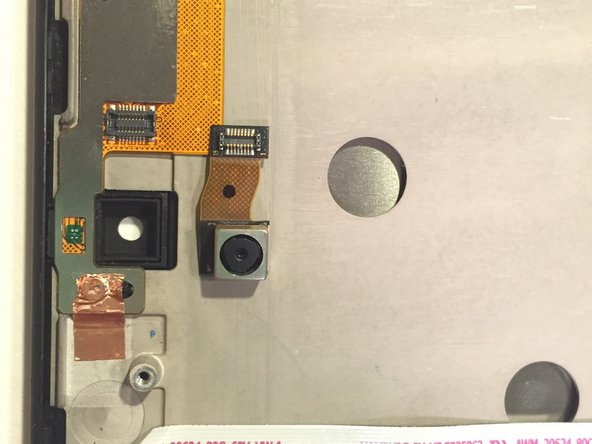
Use the plastic opening tool to carefully lift the camera up.
-
Now you may lift the camera out of your device.
-


Cancelar: No complete esta guía.
2 personas más completaron esta guía.
Equipo

Sam Houston State, Team 11-2, Blackburne Winter 2015 Miembro de Sam Houston State, Team 11-2, Blackburne Winter 2015
SHSU-BLACKBURNE-W15S11G2
3 Miembros
9 Guías creadas