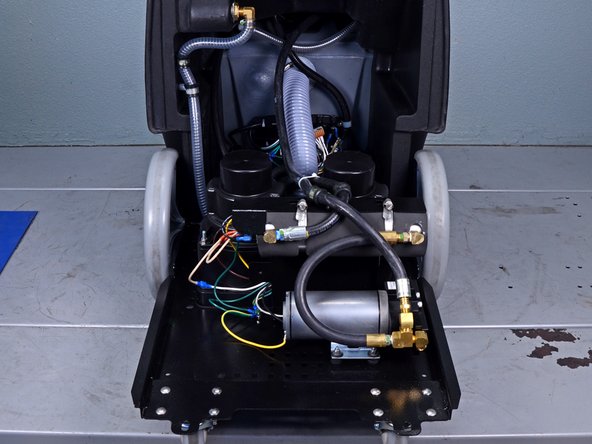
Saltar al contenido principal

Karcher Carpet Cleaner 10066730 2014 Vacuum Motor Replacement

Qué necesitas

  1. Karcher Carpet Cleaner 10066730 2014 Vacuum Motor Replacement, Lower the device down: paso 1, imagen 1 de 3 Karcher Carpet Cleaner 10066730 2014 Vacuum Motor Replacement, Lower the device down: paso 1, imagen 2 de 3 Karcher Carpet Cleaner 10066730 2014 Vacuum Motor Replacement, Lower the device down: paso 1, imagen 3 de 3
    • Before beginning repairs, disconnect the device from power, disconnect all hoses, drain and depressurize the system, and let the device cool if the heater was recently used.

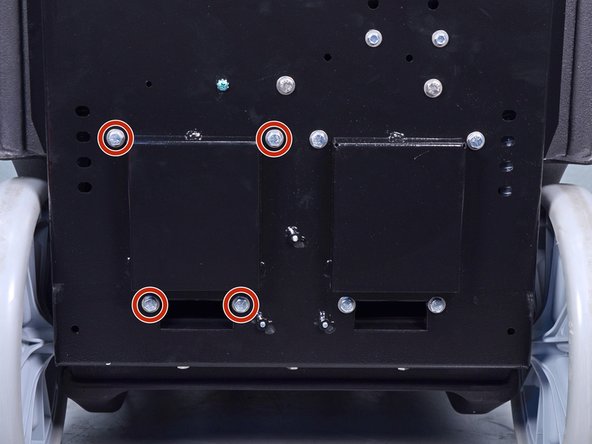
    • Lower the device down so it is laying on its backside, bottom facing out.

  2. Karcher Carpet Cleaner 10066730 2014 Vacuum Motor Replacement, Remove the wing nuts: paso 2, imagen 1 de 1
    • Remove the two wing nuts securing the base to the device.

    • The base is heavy, so be prepared to lower it down slowly once the wing nuts are removed.

  3. Karcher Carpet Cleaner 10066730 2014 Vacuum Motor Replacement, Lower the base down: paso 3, imagen 1 de 3 Karcher Carpet Cleaner 10066730 2014 Vacuum Motor Replacement, Lower the base down: paso 3, imagen 2 de 3 Karcher Carpet Cleaner 10066730 2014 Vacuum Motor Replacement, Lower the base down: paso 3, imagen 3 de 3
    • Lower the base down until the swivel wheels touch the ground.

  4. Karcher Carpet Cleaner 10066730 2014 Vacuum Motor Replacement, Remove the motor cover: paso 4, imagen 1 de 2 Karcher Carpet Cleaner 10066730 2014 Vacuum Motor Replacement, Remove the motor cover: paso 4, imagen 2 de 2
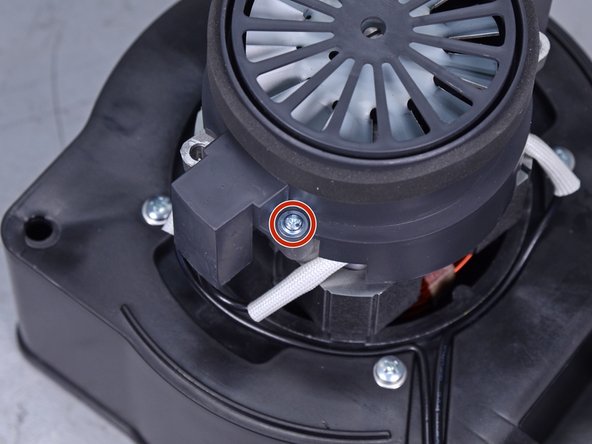
    • Use a 7/16 inch socket and wrench to remove the four bolts, nuts, and washers securing the vacuum motor cover to the base.

  5. Karcher Carpet Cleaner 10066730 2014 Vacuum Motor Replacement: paso 5, imagen 1 de 3 Karcher Carpet Cleaner 10066730 2014 Vacuum Motor Replacement: paso 5, imagen 2 de 3 Karcher Carpet Cleaner 10066730 2014 Vacuum Motor Replacement: paso 5, imagen 3 de 3
    • Lift up to remove the vacuum motor cover.

  6. Karcher Carpet Cleaner 10066730 2014 Vacuum Motor Replacement: paso 6, imagen 1 de 1
    • Use a Phillips screwdriver to remove the screw securing the ground wire to the vacuum motor.

  7. Karcher Carpet Cleaner 10066730 2014 Vacuum Motor Replacement: paso 7, imagen 1 de 1
    • Remove the ground wire from the vacuum motor.

  8. Karcher Carpet Cleaner 10066730 2014 Vacuum Motor Replacement: paso 8, imagen 1 de 3 Karcher Carpet Cleaner 10066730 2014 Vacuum Motor Replacement: paso 8, imagen 2 de 3 Karcher Carpet Cleaner 10066730 2014 Vacuum Motor Replacement: paso 8, imagen 3 de 3
    • Separate the purple wire from the left black wire.

    • Separate the white wire from the right black wire.

    • Keep track of which black wire was connected to each purple and white wire.

    • During reinstallation, note how the cables are routed in the channels on the vacuum motor base.

  9. Karcher Carpet Cleaner 10066730 2014 Vacuum Motor Replacement: paso 9, imagen 1 de 2 Karcher Carpet Cleaner 10066730 2014 Vacuum Motor Replacement: paso 9, imagen 2 de 2
    • Use a Phillips screwdriver to remove the two screws securing the motor fan blade cover.

  10. Karcher Carpet Cleaner 10066730 2014 Vacuum Motor Replacement: paso 10, imagen 1 de 2 Karcher Carpet Cleaner 10066730 2014 Vacuum Motor Replacement: paso 10, imagen 2 de 2
    • Lift up to remove the motor fan blade cover.

  11. Karcher Carpet Cleaner 10066730 2014 Vacuum Motor Replacement: paso 11, imagen 1 de 1
    • Use a Phillips screwdriver to remove the four screws and washers securing the vacuum motor mount.

  12. Karcher Carpet Cleaner 10066730 2014 Vacuum Motor Replacement: paso 12, imagen 1 de 3 Karcher Carpet Cleaner 10066730 2014 Vacuum Motor Replacement: paso 12, imagen 2 de 3 Karcher Carpet Cleaner 10066730 2014 Vacuum Motor Replacement: paso 12, imagen 3 de 3
    • Lift the plastic motor mount up and off of the motor.

  13. Karcher Carpet Cleaner 10066730 2014 Vacuum Motor Replacement: paso 13, imagen 1 de 1
    • Only the motor remains.

Conclusión

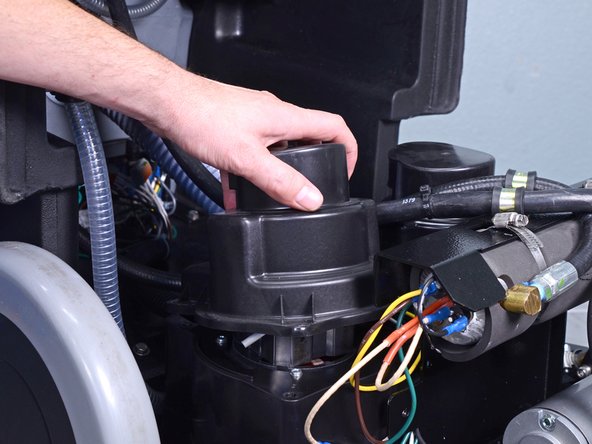
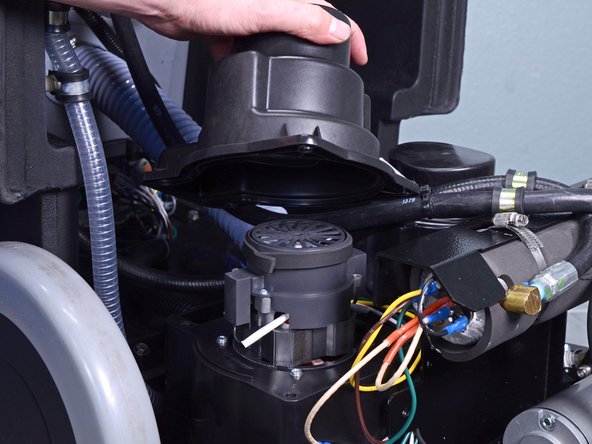
To reassemble your device, follow these instructions in reverse order.

2 personas más completaron esta guía.

Carsten Frauenheim

Miembro Desde 03/10/20

113,712 Reputación

338 Guías creadas

Equipo

iFixit Miembro de iFixit

Staff

135 Miembros

16,817 Guías creadas

0 comentarios

Agregar Comentario

Ver Estadísticas:

Ultimas 24 horas: 5

Ultimos 7 días: 5

Ultimos 30 días: 28

Todo El Tiempo: 624