Saltar al contenido principal

Instant Pot Smart-60 Disassembly

Qué necesitas

  1. Instant Pot Smart-60 Disassembly, Bottom access plate screw: paso 1, imagen 1 de 3 Instant Pot Smart-60 Disassembly, Bottom access plate screw: paso 1, imagen 2 de 3 Instant Pot Smart-60 Disassembly, Bottom access plate screw: paso 1, imagen 3 de 3
    • Insert wisdom here.

    You’ll need a T15 bit

    Terrance Kennedy - Contestar

  2. Instant Pot Smart-60 Disassembly, Bottom bracket - remove battery holder, then 3x bolts: paso 2, imagen 1 de 3 Instant Pot Smart-60 Disassembly, Bottom bracket - remove battery holder, then 3x bolts: paso 2, imagen 2 de 3 Instant Pot Smart-60 Disassembly, Bottom bracket - remove battery holder, then 3x bolts: paso 2, imagen 3 de 3
    • Remove 3x bolts

  3. Instant Pot Smart-60 Disassembly, Bottom bracket - snap out power receptacle: paso 3, imagen 1 de 3 Instant Pot Smart-60 Disassembly, Bottom bracket - snap out power receptacle: paso 3, imagen 2 de 3 Instant Pot Smart-60 Disassembly, Bottom bracket - snap out power receptacle: paso 3, imagen 3 de 3
    • Insert wisdom here.

  4. Instant Pot Smart-60 Disassembly, Circuit board 1: paso 4, imagen 1 de 3 Instant Pot Smart-60 Disassembly, Circuit board 1: paso 4, imagen 2 de 3 Instant Pot Smart-60 Disassembly, Circuit board 1: paso 4, imagen 3 de 3
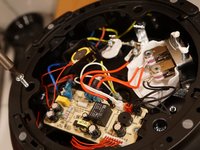
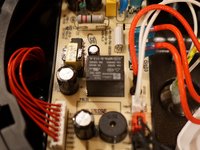
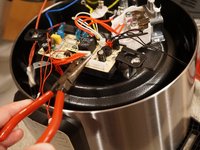
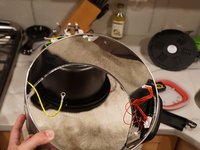
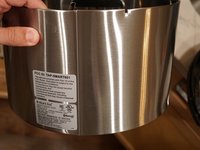
    • Black molex connector on top right must come out to remove the outer shell.

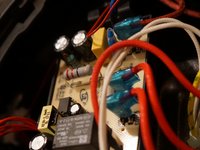
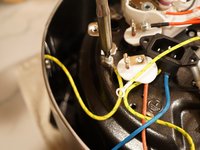
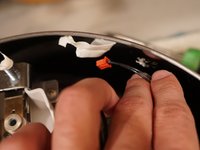
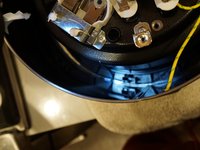
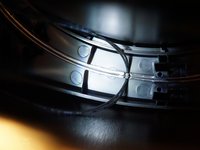
    • Red wire spring clips with blue translucent covers I was unable to remove safely, I suggest removing other ends of those wires if you need to remove the heating element plate.

  5. Instant Pot Smart-60 Disassembly, Battery and front panel wires: paso 5, imagen 1 de 3 Instant Pot Smart-60 Disassembly, Battery and front panel wires: paso 5, imagen 2 de 3 Instant Pot Smart-60 Disassembly, Battery and front panel wires: paso 5, imagen 3 de 3
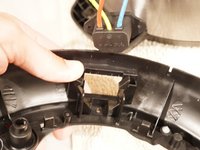
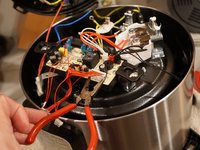
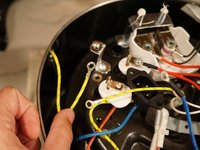
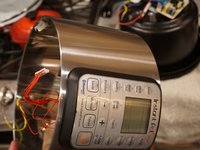
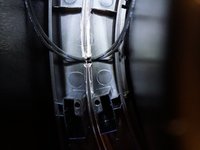
    • I needed small needle nose pliers to pinch and remove wide front panel connector.

    J'aimerais savoir ou je peut trouver la platine électronique principale

    Qui et enpanne/( l'adresse car je n'arrive pas a trouver le fabricant.merci)

    Jean Claude Ballester - Contestar

  6. Instant Pot Smart-60 Disassembly, Outer shell ground wire: paso 6, imagen 1 de 3 Instant Pot Smart-60 Disassembly, Outer shell ground wire: paso 6, imagen 2 de 3 Instant Pot Smart-60 Disassembly, Outer shell ground wire: paso 6, imagen 3 de 3
    • Insert wisdom here.

  7. Instant Pot Smart-60 Disassembly, Outer shell removal - release tape from lid sensor wire: paso 7, imagen 1 de 3 Instant Pot Smart-60 Disassembly, Outer shell removal - release tape from lid sensor wire: paso 7, imagen 2 de 3 Instant Pot Smart-60 Disassembly, Outer shell removal - release tape from lid sensor wire: paso 7, imagen 3 de 3
    • Insert wisdom here.

  8. Instant Pot Smart-60 Disassembly, Outer shell re-assembly - lid sensor wire notch: paso 8, imagen 1 de 3 Instant Pot Smart-60 Disassembly, Outer shell re-assembly - lid sensor wire notch: paso 8, imagen 2 de 3 Instant Pot Smart-60 Disassembly, Outer shell re-assembly - lid sensor wire notch: paso 8, imagen 3 de 3
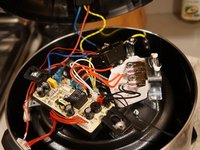
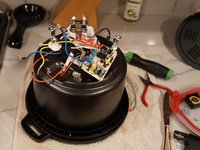
    • I'm skipping removing heating element and nearby sensors, it's similar to other models. Search for Instant Pot repair videos for instructions.

  9. Instant Pot Smart-60 Disassembly, Outer shell re-assembly - lid sensor wire goes into notch: paso 9, imagen 1 de 3 Instant Pot Smart-60 Disassembly, Outer shell re-assembly - lid sensor wire goes into notch: paso 9, imagen 2 de 3 Instant Pot Smart-60 Disassembly, Outer shell re-assembly - lid sensor wire goes into notch: paso 9, imagen 3 de 3
    • Insert wisdom here.

  10. Instant Pot Smart-60 Disassembly, Outer shell re-assembly: paso 10, imagen 1 de 2 Instant Pot Smart-60 Disassembly, Outer shell re-assembly: paso 10, imagen 2 de 2
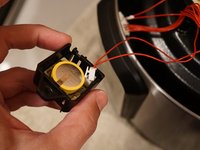
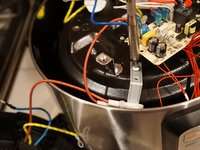
    • Pull lid sensor wire up, re-tape to inside of outer shell.

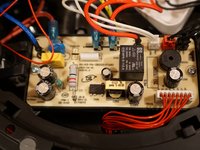
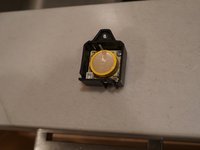
    • Battery replacement, you should remove the screw and pull the mini circuit board holding the battery before attempting to swap batteries.

    The battery needs to be de-soldered to be removed.

    sputicus - Contestar

Conclusión

To reassemble your device, follow these instructions in reverse order.

8 personas más completaron esta guía.

Zen1

Miembro Desde 03/01/18

392 Reputación

1 Guía escrita

3Guía Comentarios

If the outer shell is dented but panel is functioning is it safe to operate the instant pot? looks like it moved a bit in the box in shipment, no visible damage to the pot just the to the aluminum shell

Jeff Medlin - Contestar

Mine is dented and it should be totally fine. As you said, the pressure vessel is separate from the outer shell, so there are no safety concerns. Just asthetic. I wish there wasn't this gap of air between the pressure vessel and the outer shell, or, I wish the shell was a bit more durable as it's VERY easily dented.

Kuake Ye - Contestar

What is the voltage of the component named ZNR091

Yanni Koulandris - Contestar

Agregar Comentario

Ver Estadísticas:

Ultimas 24 horas: 1

Ultimos 7 días: 21

Ultimos 30 días: 134

Todo El Tiempo: 8,628