Saltar al contenido principal

Huawei P10 Display Replacement

Qué necesitas

  1. Huawei P10 Display Replacement, Back Cover: paso 1, imagen 1 de 3 Huawei P10 Display Replacement, Back Cover: paso 1, imagen 2 de 3 Huawei P10 Display Replacement, Back Cover: paso 1, imagen 3 de 3
    • Switch off your phone.

    • Remove the two Pentalobe P2 screws at the bottom.

    • Remove the SIM card tray.

  2. Huawei P10 Display Replacement: paso 2, imagen 1 de 3 Huawei P10 Display Replacement: paso 2, imagen 2 de 3 Huawei P10 Display Replacement: paso 2, imagen 3 de 3
    • Insert a plastic opening tool between the display and the case starting at the bottom area of your phone.

    • Carefully pry the display with its parts out of the case.

    • Getting the prying tool in will require some effort, be careful not to slide the tool too much or you might slightly damage the housing.

    • After you pried out the bottom end, use the opening tool to open the clamps on both sides.

  3. Huawei P10 Display Replacement: paso 3, imagen 1 de 2 Huawei P10 Display Replacement: paso 3, imagen 2 de 2
    • Don't open the phone all the way, yet. The cable for the standby and volume buttons is still connected to the back cover.

    • Swing open the phone backwards.

    • Use a spudger to disconnect the power- and volume button flex cable.

  4. Huawei P10 Display Replacement, Main and display flex disconnect: paso 4, imagen 1 de 3 Huawei P10 Display Replacement, Main and display flex disconnect: paso 4, imagen 2 de 3 Huawei P10 Display Replacement, Main and display flex disconnect: paso 4, imagen 3 de 3
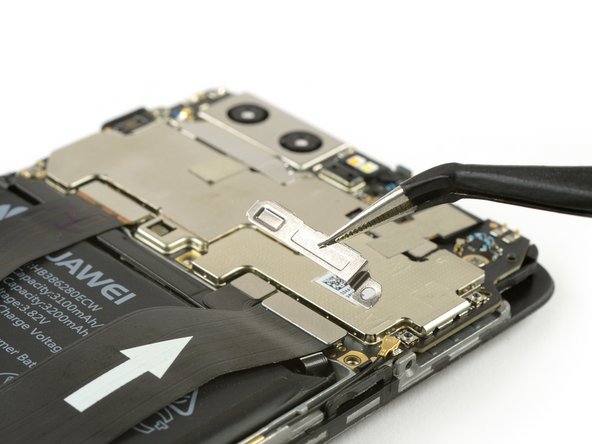
    • Remove the two Phillips #00 screws.

    • Use tweezers to remove both metal plates.

  5. Huawei P10 Display Replacement: paso 5, imagen 1 de 3 Huawei P10 Display Replacement: paso 5, imagen 2 de 3 Huawei P10 Display Replacement: paso 5, imagen 3 de 3
    • Use a spudger to disconnect the interconnect, the battery and the display flex cable.

  6. Huawei P10 Display Replacement, Charging Board: paso 6, imagen 1 de 2 Huawei P10 Display Replacement, Charging Board: paso 6, imagen 2 de 2
    • Remove the four Phillips #00 screws.

    • Use Tweezers to remove the metal plate.

  7. Huawei P10 Display Replacement: paso 7, imagen 1 de 2 Huawei P10 Display Replacement: paso 7, imagen 2 de 2
    • Use a spudger to disconnect the main flex cable.

    • Use tweezers to disconnect the antenna cable and pull it out of the clamp holding it down to the charging board.

  8. Huawei P10 Display Replacement: paso 8, imagen 1 de 2 Huawei P10 Display Replacement: paso 8, imagen 2 de 2
    • Use a spudger to disconnect the headphone jack and the loudspeaker flex cables.

  9. Huawei P10 Display Replacement: paso 9, imagen 1 de 2 Huawei P10 Display Replacement: paso 9, imagen 2 de 2
    • Do not damage any components sitting on the charging board while removing it.

    • Use a spudger to pry out the charging board.

    • Remove the charging board.

  10. Huawei P10 Display Replacement, Loudspeaker: paso 10, imagen 1 de 2 Huawei P10 Display Replacement, Loudspeaker: paso 10, imagen 2 de 2
    • Only insert the spudger as deep as 1/16 of an inch to avoid damage.

    • Use a spudger to carefully pry out the loudspeaker. There is some adhesive underneath so it might be a little bit sticky. You can use an iOpener to loosen it.

    • Remove the loudspeaker.

    • When reassembling your phone, apply new adhesive where it's necessary.

  11. Huawei P10 Display Replacement, Display: paso 11, imagen 1 de 2 Huawei P10 Display Replacement, Display: paso 11, imagen 2 de 2
    • Remove the antenna cable if you haven't already.

    • Use tweezers to remove the interconnect cable.

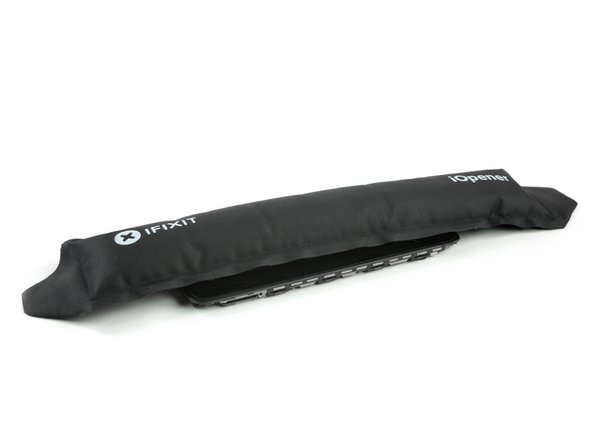
    • Use an iOpener to loosen the adhesive beneath the display. Especially take care of the upper and lower part of the display.

  12. Huawei P10 Display Replacement: paso 12, imagen 1 de 3 Huawei P10 Display Replacement: paso 12, imagen 2 de 3 Huawei P10 Display Replacement: paso 12, imagen 3 de 3
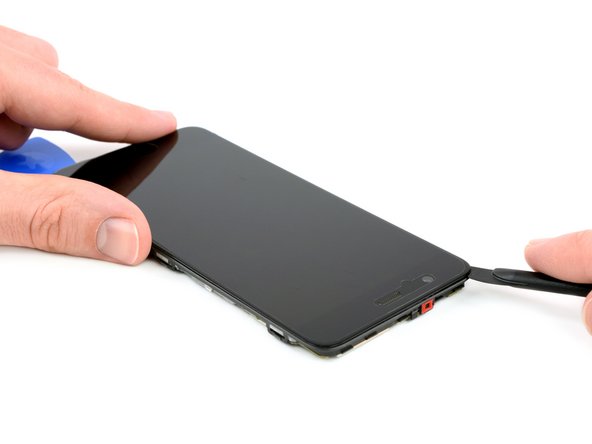
    • Insert the tip of an opening pick between the display and the midframe on the bottom of the phone, near the home button.

    • Slide the opening pick along the bottom edge, to cut the adhesive.

    • Slide the opening pick to the bottom right corner and leave it there.

    • Insert another opening pick under the screen on the bottom left corner.

  13. Huawei P10 Display Replacement: paso 13, imagen 1 de 3 Huawei P10 Display Replacement: paso 13, imagen 2 de 3 Huawei P10 Display Replacement: paso 13, imagen 3 de 3
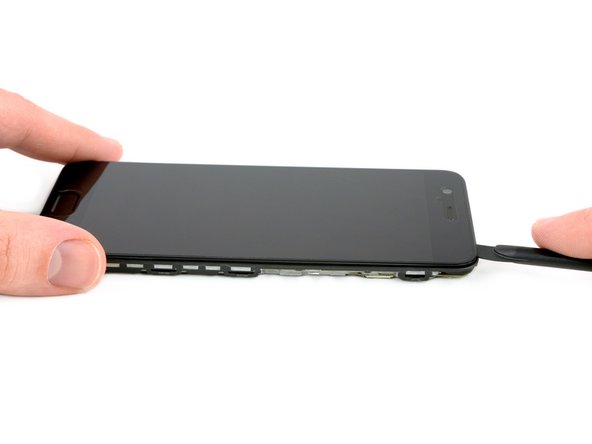
    • Slide the opening pick under the screen around all edges of the phone.

    • If the adhesive gets tough to pry it is likely too cold. Use your iOpener or heat gun to reheat it.

  14. Huawei P10 Display Replacement: paso 14, imagen 1 de 2 Huawei P10 Display Replacement: paso 14, imagen 2 de 2
    • Carefully pull the display assembly away from the frame.

    • Remove the display assembly.

Conclusión

To reassemble your device, follow these instructions in reverse order.

23 personas más completaron esta guía.

Dominik Schnabelrauch

Miembro Desde 11/23/16

203,353 Reputación

682 Guías creadas

Equipo

iFixit Miembro de iFixit

Staff

135 Miembros

16,817 Guías creadas

4 comentarios

Any advice which adhesive to use? I’ve seen a russian replacement video, it looked like the guy was using some kind of silicone.

Tom My - Contestar

I used B-7000 glue. It enables you to release the screen when a second replacement is needed.

teunkeusters -

Assuming I purchase a screen off of ebay, and replace it using this method, will the touch id still work?

Simon Fisher - Contestar

Agregar Comentario

Ver Estadísticas:

Ultimas 24 horas: 3

Ultimos 7 días: 9

Ultimos 30 días: 58

Todo El Tiempo: 26,583