Saltar al contenido principal

Honda Lawn Mower HRS216K6 PKAA Flywheel Replacement

Qué necesitas

  1. Honda Lawn Mower HRS216K6 PKAA Flywheel Replacement, Disconnect the spark plug: paso 1, imagen 1 de 2 Honda Lawn Mower HRS216K6 PKAA Flywheel Replacement, Disconnect the spark plug: paso 1, imagen 2 de 2
    • Before you begin, make sure the engine is switched off and cool to the touch.

    • Grab the plastic housing at the end of the spark plug wire and pull firmly to disconnect it.

  2. Honda Lawn Mower HRS216K6 PKAA Flywheel Replacement, Restrict fuel flow: paso 2, imagen 1 de 1
    • Turn the fuel cutoff valve to the off position to restrict fuel flow during disassembly.

    • Turn the fuel cutoff valve clockwise so the handle becomes vertical.

  3. Honda Lawn Mower HRS216K6 PKAA Flywheel Replacement, Disconnect the fuel tank: paso 3, imagen 1 de 3 Honda Lawn Mower HRS216K6 PKAA Flywheel Replacement, Disconnect the fuel tank: paso 3, imagen 2 de 3 Honda Lawn Mower HRS216K6 PKAA Flywheel Replacement, Disconnect the fuel tank: paso 3, imagen 3 de 3
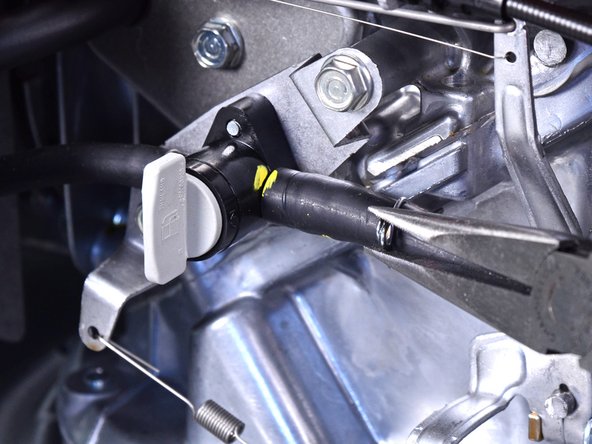
    • Use needle nose pliers to compress and slide the tube clamp away from the cutoff valve's fitting.

  4. Honda Lawn Mower HRS216K6 PKAA Flywheel Replacement: paso 4, imagen 1 de 2 Honda Lawn Mower HRS216K6 PKAA Flywheel Replacement: paso 4, imagen 2 de 2
    • Residual fuel may leak out of this hose. Be ready to catch any spillage.

    • Disconnect the fuel line from the cutoff valve.

  5. Honda Lawn Mower HRS216K6 PKAA Flywheel Replacement, Disconnect the brake cable: paso 5, imagen 1 de 1
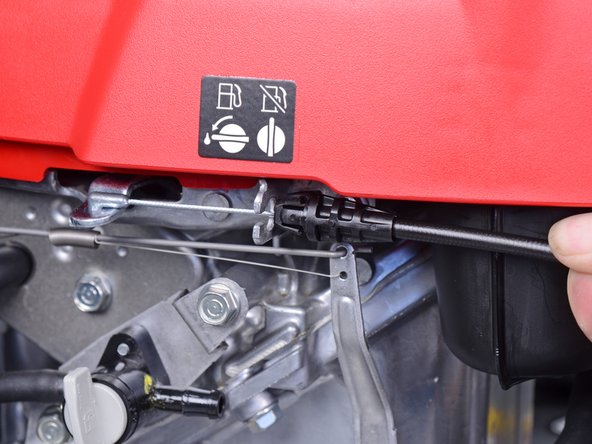
    • Use needle nose pliers to squeeze the two locking tabs on the brake cable latch.

  6. Honda Lawn Mower HRS216K6 PKAA Flywheel Replacement: paso 6, imagen 1 de 3 Honda Lawn Mower HRS216K6 PKAA Flywheel Replacement: paso 6, imagen 2 de 3 Honda Lawn Mower HRS216K6 PKAA Flywheel Replacement: paso 6, imagen 3 de 3
    • Pull to unlatch the cable sheath.

    • Pull the brake cable away from the motor.

  7. Honda Lawn Mower HRS216K6 PKAA Flywheel Replacement: paso 7, imagen 1 de 3 Honda Lawn Mower HRS216K6 PKAA Flywheel Replacement: paso 7, imagen 2 de 3 Honda Lawn Mower HRS216K6 PKAA Flywheel Replacement: paso 7, imagen 3 de 3
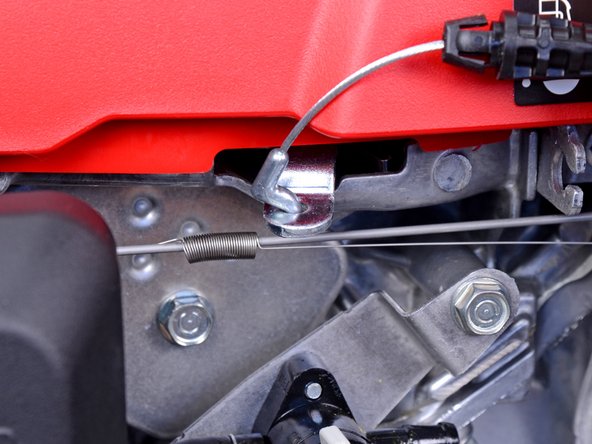
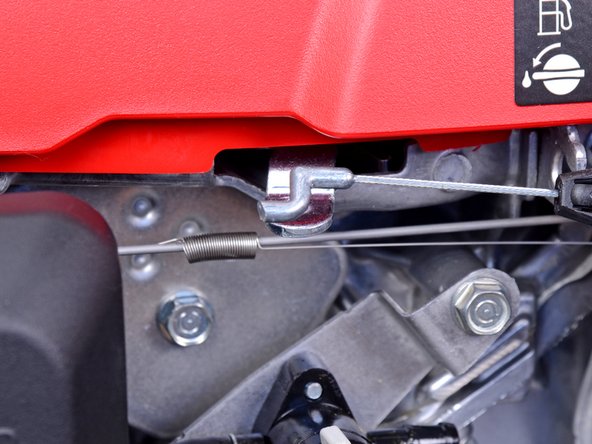
    • Push the cable towards the cable anchor to give it enough slack to be removed.

    • Remove the brake cable from the motor.

  8. Honda Lawn Mower HRS216K6 PKAA Flywheel Replacement, Disconnect the pull start cord: paso 8, imagen 1 de 3 Honda Lawn Mower HRS216K6 PKAA Flywheel Replacement, Disconnect the pull start cord: paso 8, imagen 2 de 3 Honda Lawn Mower HRS216K6 PKAA Flywheel Replacement, Disconnect the pull start cord: paso 8, imagen 3 de 3
    • Pull the pull start cord out of the small opening on the handle post and remove it.

  9. Honda Lawn Mower HRS216K6 PKAA Flywheel Replacement, Remove the fan cover: paso 9, imagen 1 de 1
    • Remove the three 10 mm nuts securing the fan cover.

  10. Honda Lawn Mower HRS216K6 PKAA Flywheel Replacement: paso 10, imagen 1 de 2 Honda Lawn Mower HRS216K6 PKAA Flywheel Replacement: paso 10, imagen 2 de 2
    • Remove the fan cover.

    • The fuel tank is connected to the fan cover. They will both come out as one unit.

  11. Honda Lawn Mower HRS216K6 PKAA Flywheel Replacement, Remove the cooling fan: paso 11, imagen 1 de 1
    • Remove the 19 mm nut securing the flywheel and cooling fan to the motor.

  12. Honda Lawn Mower HRS216K6 PKAA Flywheel Replacement: paso 12, imagen 1 de 2 Honda Lawn Mower HRS216K6 PKAA Flywheel Replacement: paso 12, imagen 2 de 2
    • Remove the washer on top of the cooling fan.

    • Remove the cooling fan.

  13. Honda Lawn Mower HRS216K6 PKAA Flywheel Replacement, Loosen the flywheel: paso 13, imagen 1 de 2 Honda Lawn Mower HRS216K6 PKAA Flywheel Replacement, Loosen the flywheel: paso 13, imagen 2 de 2
    • Caution: The flywheel may come loose at any time during this step, potentially sending itself and the puller into the air. Before you begin this step, be sure to wear PPE.

    • Use a universal puller to loosen the flywheel from the tapered pressure fit on the end of the crankshaft.

    • Attach the universal puller arms underneath the denoted "puller" sections on the flywheel.

    • Use a wrench to torque down the puller to slowly loosen the flywheel.

    • This may take a lot of force.

    • If the flywheel seems to become stuck after significant pressure is applied with the universal puller, use a blowtorch to slowly apply heat where the flywheel contacts the crankshaft.

    • The flywheel will "pop" off the crankshaft once loose.

  14. Honda Lawn Mower HRS216K6 PKAA Flywheel Replacement, Remove the flywheel: paso 14, imagen 1 de 3 Honda Lawn Mower HRS216K6 PKAA Flywheel Replacement, Remove the flywheel: paso 14, imagen 2 de 3 Honda Lawn Mower HRS216K6 PKAA Flywheel Replacement, Remove the flywheel: paso 14, imagen 3 de 3
    • Remove the flywheel.

    • If the flywheel became deformed at all during the last step, it will need to be replaced before reinstallation.

    • During reassembly, make sure to align the flywheel with the flywheel key.

Conclusión

To reassemble your device, follow these instructions in reverse order.

Carsten Frauenheim

Miembro Desde 03/10/20

115,255 Reputación

339 Guías creadas

Equipo

iFixit Miembro de iFixit

Staff

136 Miembros

17,420 Guías creadas

0 comentarios

Agregar Comentario

Ver Estadísticas:

Ultimas 24 horas: 1

Ultimos 7 días: 15

Ultimos 30 días: 63

Todo El Tiempo: 1,071