Saltar al contenido principal

HP Stream 11-d008TU Keyboard Assembly Replacement

Qué necesitas

  1. HP Stream 11-d008TU Keyboard Assembly Replacement, Rubber Feet Removal: paso 1, imagen 1 de 3 HP Stream 11-d008TU Keyboard Assembly Replacement, Rubber Feet Removal: paso 1, imagen 2 de 3 HP Stream 11-d008TU Keyboard Assembly Replacement, Rubber Feet Removal: paso 1, imagen 3 de 3
    • Use a prying tool to pry the 2 rubber feet off closest to the hinge of the device

    • Repeat this process for the other side of the device

    • The bottom rubber feet do not have hidden screws underneath them, and as such, they are unnecessary to remove

  2. HP Stream 11-d008TU Keyboard Assembly Replacement, Screw removal: paso 2, imagen 1 de 2 HP Stream 11-d008TU Keyboard Assembly Replacement, Screw removal: paso 2, imagen 2 de 2
    • Remove the 11x 5mm Phillips PH-0 screws (circled)

  3. HP Stream 11-d008TU Keyboard Assembly Replacement, Keyboard Unclipping: paso 3, imagen 1 de 3 HP Stream 11-d008TU Keyboard Assembly Replacement, Keyboard Unclipping: paso 3, imagen 2 de 3 HP Stream 11-d008TU Keyboard Assembly Replacement, Keyboard Unclipping: paso 3, imagen 3 de 3
    • Use your finger to pry the outer blue shell over the keyboard

    • Continue this process around the edges of the device

    • You may have to use a prying tool to pry the harder edges such as around the I/O ports

    • Do not lift the keyboard once all the clips are undone, as there are still various cables connected

  4. HP Stream 11-d008TU Keyboard Assembly Replacement, Keyboard removal: paso 4, imagen 1 de 3 HP Stream 11-d008TU Keyboard Assembly Replacement, Keyboard removal: paso 4, imagen 2 de 3 HP Stream 11-d008TU Keyboard Assembly Replacement, Keyboard removal: paso 4, imagen 3 de 3
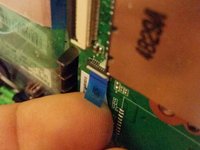
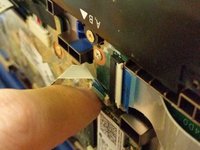
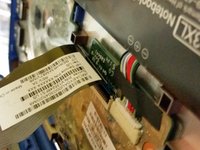
    • Disconnect the power button connector by peeling back the protective tape, using your fingernail to flip the white retaining clip back, and pulling the ribbon cable out

    • Disconnect the touchpad connector by using your fingernail to flip the black retaining clip back, and pulling the ribbon cable out

    • Disconnect the keyboard connector by using your fingernail to flip the black retaining clip back, and pulling the ribbon cable out

    • Your keyboard assembly is now safe to remove

Conclusión

To reassemble your device, follow these instructions in reverse order.

Una persona más ha completado esta guía.

Joel Taylor

Miembro Desde 03/07/20

1,298 Reputación

8 Guías creadas

Equipo

Australia Miembro de Australia

Community

Miembros de 4

11 Guías creadas

0 comentarios

Agregar Comentario

Ver Estadísticas:

Ultimas 24 horas: 0

Ultimos 7 días: 1

Ultimos 30 días: 3

Todo El Tiempo: 111