Saltar al contenido principal

HP Pavilion 13-P110NR Battery Replacement

Qué necesitas

  1. HP Pavilion 13-P110NR Battery Replacement, Battery: paso 1, imagen 1 de 1
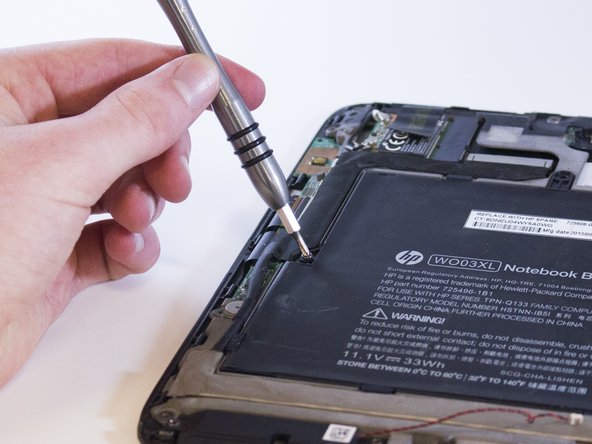
    • Gently use the black nylon spudger to pry the back casing from the screen until it snaps apart.

  2. HP Pavilion 13-P110NR Battery Replacement: paso 2, imagen 1 de 2 HP Pavilion 13-P110NR Battery Replacement: paso 2, imagen 2 de 2
    • Flip the gray latch back and remove the blue and white band of wires from the green motherboard.

  3. HP Pavilion 13-P110NR Battery Replacement: paso 3, imagen 1 de 3 HP Pavilion 13-P110NR Battery Replacement: paso 3, imagen 2 de 3 HP Pavilion 13-P110NR Battery Replacement: paso 3, imagen 3 de 3
    • Pull the black and white wire out of the green circuit board.

    • Pull the red and black wire out on the other side of the device.

  4. HP Pavilion 13-P110NR Battery Replacement: paso 4, imagen 1 de 2 HP Pavilion 13-P110NR Battery Replacement: paso 4, imagen 2 de 2
    • Unscrew the three screws from the circuit board using a Phillips #00 screwdriver.

    • Unscrew two 4.0 mm Philips #00 screws from the left side of the battery.

    • Unscrew two 3.0 mm Philips #00 screws from the right side of the battery.

  5. HP Pavilion 13-P110NR Battery Replacement: paso 5, imagen 1 de 2 HP Pavilion 13-P110NR Battery Replacement: paso 5, imagen 2 de 2
    • Unplug the bound (red, white and black) wires connecting the battery and the motherboard.

  6. HP Pavilion 13-P110NR Battery Replacement: paso 6, imagen 1 de 2 HP Pavilion 13-P110NR Battery Replacement: paso 6, imagen 2 de 2
    • Carefully remove the battery without pulling the copper information transmitter out.

Conclusión

To reassemble your device, follow these instructions in reverse order.

0 comentarios

Agregar Comentario

Ver Estadísticas:

Ultimas 24 horas: 1

Ultimos 7 días: 5

Ultimos 30 días: 7

Todo El Tiempo: 545