Saltar al contenido principal

HP Chromebook 11A G6 EE Battery Replacement

Qué necesitas

  1. HP Chromebook 11A G6 EE Battery Replacement, Keyboard: paso 1, imagen 1 de 3 HP Chromebook 11A G6 EE Battery Replacement, Keyboard: paso 1, imagen 2 de 3 HP Chromebook 11A G6 EE Battery Replacement, Keyboard: paso 1, imagen 3 de 3
    • Remove six 6.6 mm screws from the back case using a Phillips #1 screwdriver.

    • Remove two 8.7 mm screws from the back case using a Phillips #1 screwdriver.

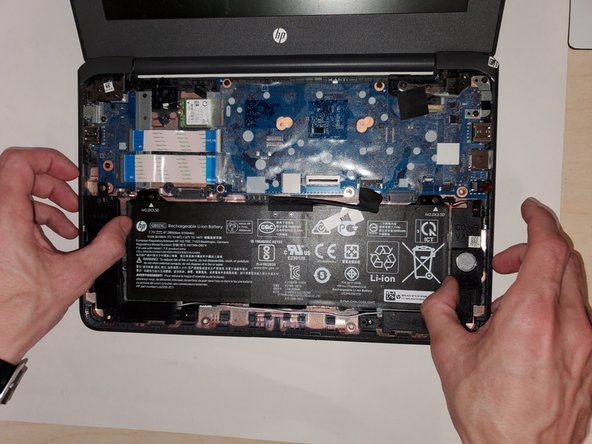
    • Turn the computer over and open it as if you are going to use it.

  2. HP Chromebook 11A G6 EE Battery Replacement: paso 2, imagen 1 de 3 HP Chromebook 11A G6 EE Battery Replacement: paso 2, imagen 2 de 3 HP Chromebook 11A G6 EE Battery Replacement: paso 2, imagen 3 de 3
    • Use the iFixit opening tool to get between the keyboard bezel and the outer edge of the laptop.

    • There are several clips on all sides that will need to be released. You'll hear and feel a pop as each clip is released.

    • Move the opening tool or spudger around the perimeter until you unclipped the keyboard on all sides.

    • This will require a little force. The only thing you don't want to do is push the spudger too deep under the keyboard. You could damage the internals if you do.

  3. HP Chromebook 11A G6 EE Battery Replacement: paso 3, imagen 1 de 2 HP Chromebook 11A G6 EE Battery Replacement: paso 3, imagen 2 de 2
    • Carefully lift the top of the keyboard up to access the ribbon cables connecting it to the device.

    • Use the tip of a spudger or your fingernail to flip up the small locking flap on each connector. Then, pull the connector out.

    • Remove the keyboard and set aside.

  4. HP Chromebook 11A G6 EE Battery Replacement, Speakers: paso 4, imagen 1 de 3 HP Chromebook 11A G6 EE Battery Replacement, Speakers: paso 4, imagen 2 de 3 HP Chromebook 11A G6 EE Battery Replacement, Speakers: paso 4, imagen 3 de 3
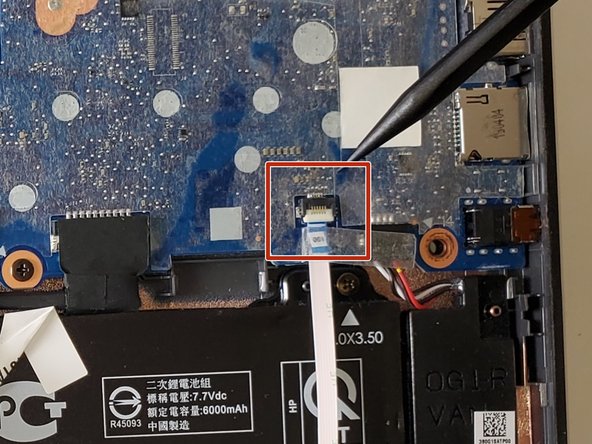
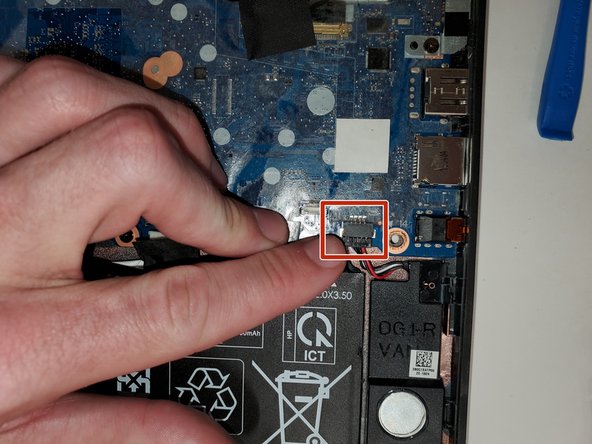
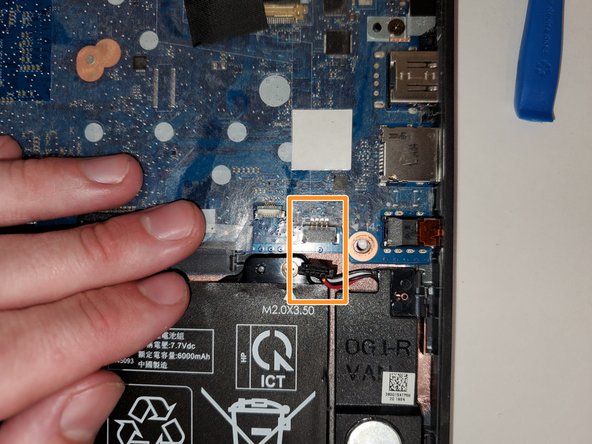
    • Release the tape that secures the battery cable connector to the system board.

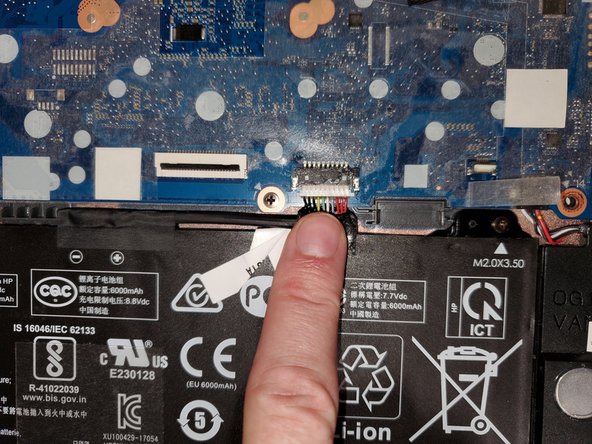
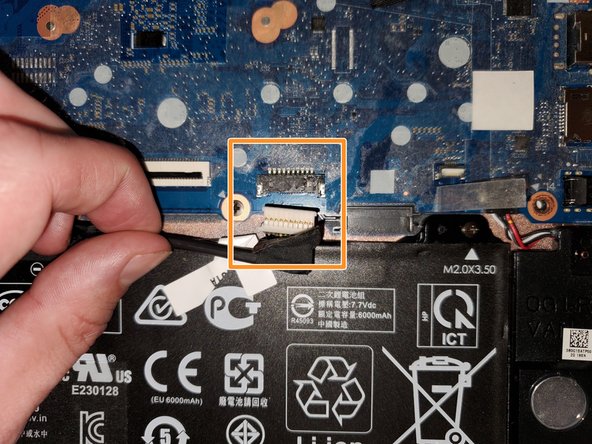
    • Disconnect the battery cable from the system board. Pull the cable straight out of the connector by the white plastic portion near the connection point.

    • Don't pull the cable out by the wire or it may become damaged.

  5. HP Chromebook 11A G6 EE Battery Replacement: paso 5, imagen 1 de 3 HP Chromebook 11A G6 EE Battery Replacement: paso 5, imagen 2 de 3 HP Chromebook 11A G6 EE Battery Replacement: paso 5, imagen 3 de 3
    • Peel the tape off of the speaker cable connector.

    • Disconnect the speaker cable from the system board. Pull the cable straight out of the connector by the black plastic portion near the connection point. Disconnect the speaker cable from the system board.

    • To avoid damage, don't pull on the wires.

  6. HP Chromebook 11A G6 EE Battery Replacement: paso 6, imagen 1 de 3 HP Chromebook 11A G6 EE Battery Replacement: paso 6, imagen 2 de 3 HP Chromebook 11A G6 EE Battery Replacement: paso 6, imagen 3 de 3
    • Remove two 3.5 mm screws that secure the speakers to the bottom cover using a Phillips #1 screwdriver.

    • Gently pull the speakers out but be mindful of the wires connecting them.

  7. HP Chromebook 11A G6 EE Battery Replacement, Battery: paso 7, imagen 1 de 2 HP Chromebook 11A G6 EE Battery Replacement, Battery: paso 7, imagen 2 de 2
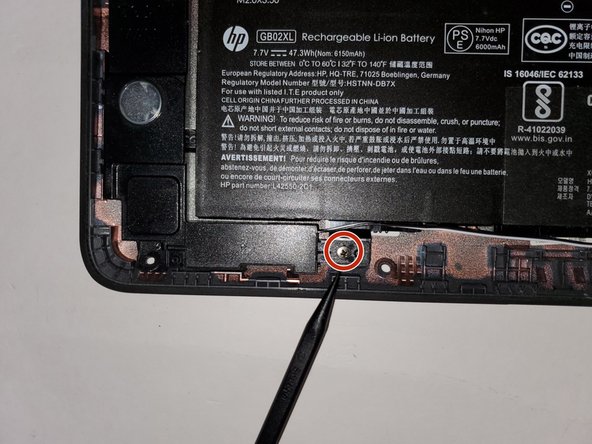
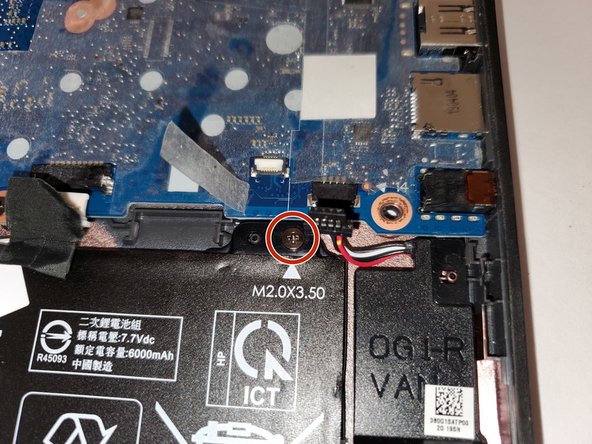
    • Remove the two 3.5 mm screws at the top of the battery using a Phillips #1 screwdriver.

  8. HP Chromebook 11A G6 EE Battery Replacement: paso 8, imagen 1 de 2 HP Chromebook 11A G6 EE Battery Replacement: paso 8, imagen 2 de 2
    • Lift out and remove the battery.

Conclusión

To reassemble your device, follow these instructions in reverse order.

Una persona más ha completado esta guía.

William S

Miembro Desde 09/25/22

575 Reputación

5 Guías creadas

0 comentarios

Agregar Comentario

Ver Estadísticas:

Ultimas 24 horas: 0

Ultimos 7 días: 1

Ultimos 30 días: 7

Todo El Tiempo: 229