Saltar al contenido principal

Google Pixel XL Charging Assembly Replacement

Guía Archivada
Esta guía se mantiene únicamente para fines históricos. Utiliza la última versión de la guía para llevar a cabo tu reparación.

Qué necesitas

  1. Google Pixel XL Charging Assembly Replacement, Charging Assembly: paso 1, imagen 1 de 2 Google Pixel XL Charging Assembly Replacement, Charging Assembly: paso 1, imagen 2 de 2
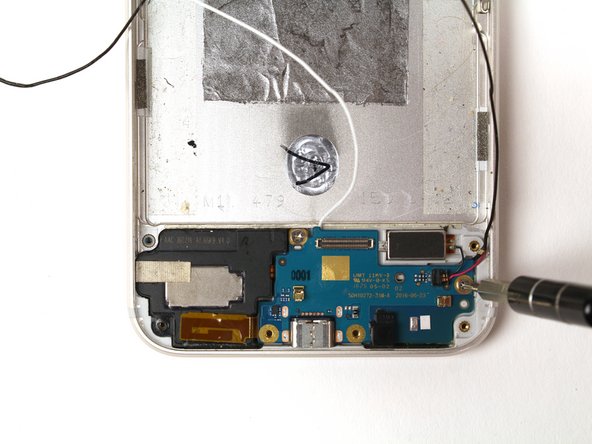
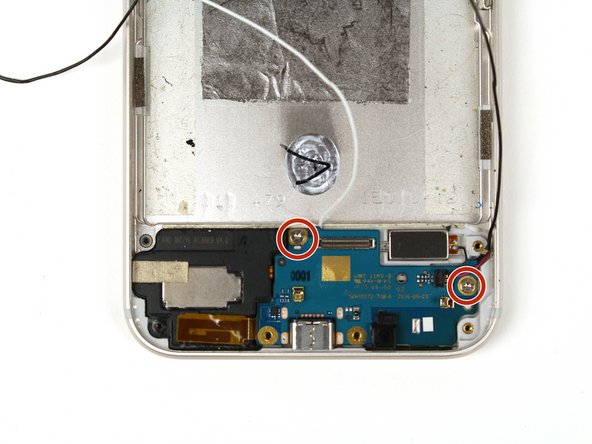
    • Using a T5 Torx screwdriver, unscrew the two 3 mm screws from the daughterboard.

  2. Google Pixel XL Charging Assembly Replacement: paso 2, imagen 1 de 2 Google Pixel XL Charging Assembly Replacement: paso 2, imagen 2 de 2
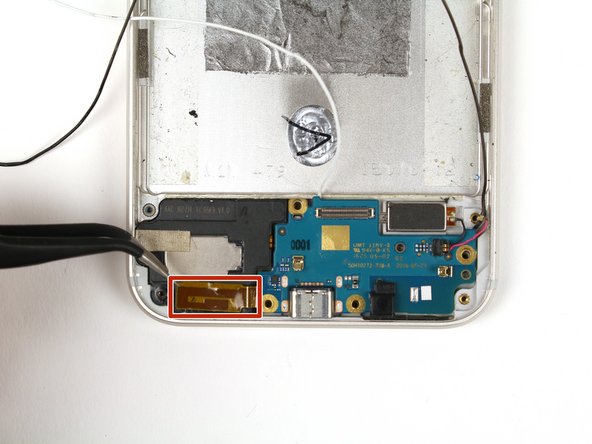
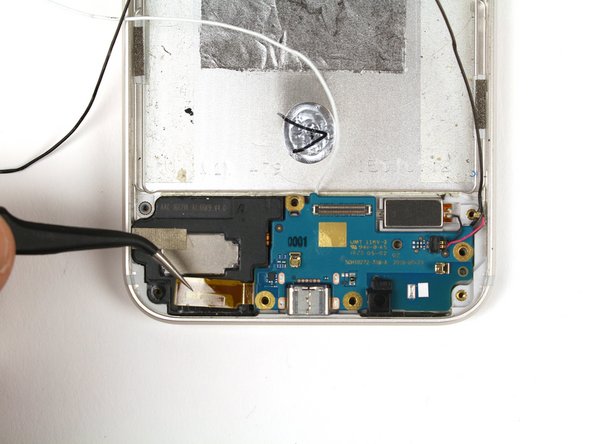
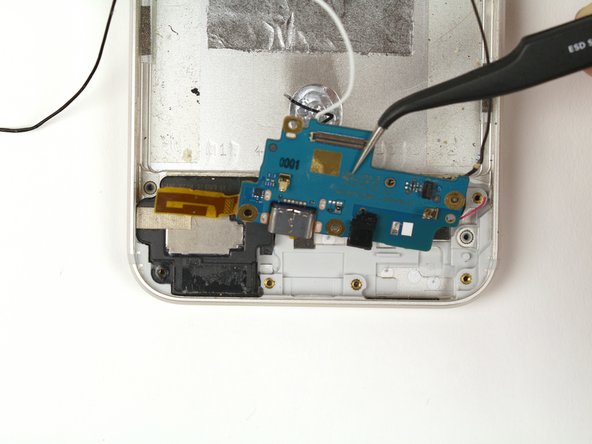
    • Using a pair of precision tweezers, carefully peel the orange tape from the frame.

  3. Google Pixel XL Charging Assembly Replacement: paso 3, imagen 1 de 2 Google Pixel XL Charging Assembly Replacement: paso 3, imagen 2 de 2
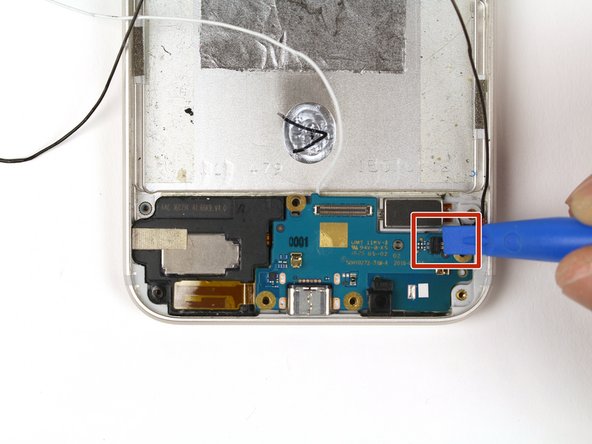
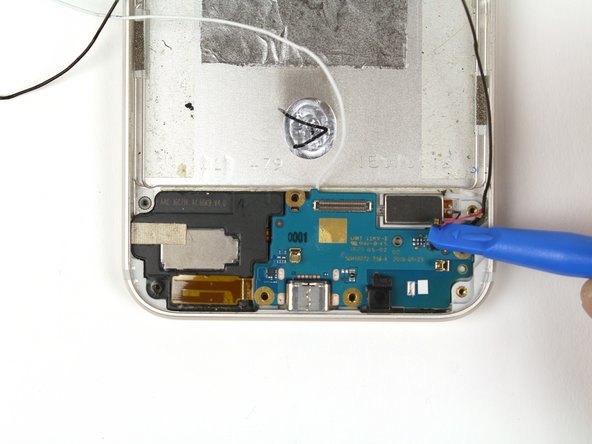
    • Using a blue plastic opening tool, detach the connector by gently pulling to the right.

    • Applying too much force may result in damaging the black connector and/or the cable.

  4. Google Pixel XL Charging Assembly Replacement: paso 4, imagen 1 de 1
    • Gently lift the daughterboard out of the device.

    • To replace the charging assembly, you will need to replace the entire daughterboard.

Conclusión

To reassemble your device, follow these instructions in reverse order.
Julia List

Miembro Desde 04/21/15

5,604 Reputación

7 Guías creadas

0 comentarios

Agregar Comentario

Ver Estadísticas:

Ultimas 24 horas: 0

Ultimos 7 días: 0

Ultimos 30 días: 2

Todo El Tiempo: 33