Esta traducción podría no reflejar los cambios más recientes añadidos a la guía de referencia. Ayúdanos a actualizar la traducción o revisa la guía original.
Qué necesitas
-
-
Deslice la lengüeta en la parte posterior de su GoPro para abrir la tapa de la batería
-
-
-
Este paso está sin traducir. Ayuda a traducirlo
-
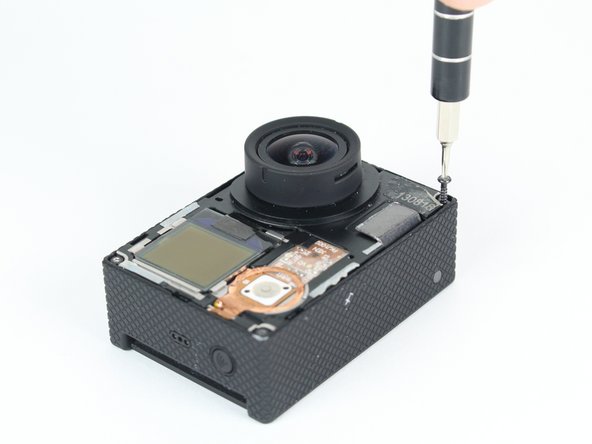
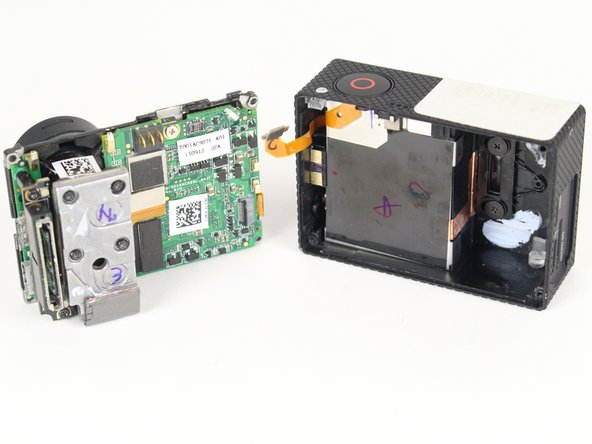
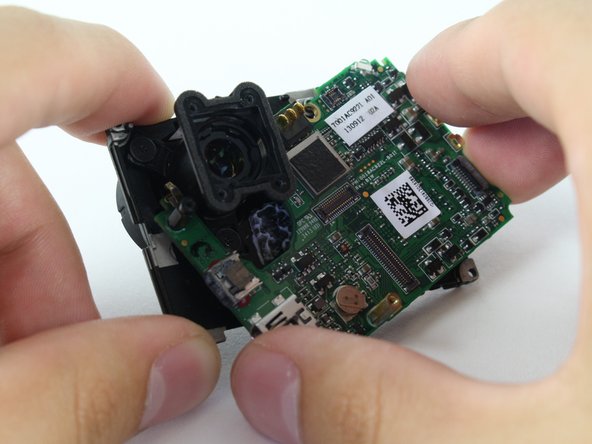
Use the spudger to gently pry off the connector of the housing to the motherboard.
-
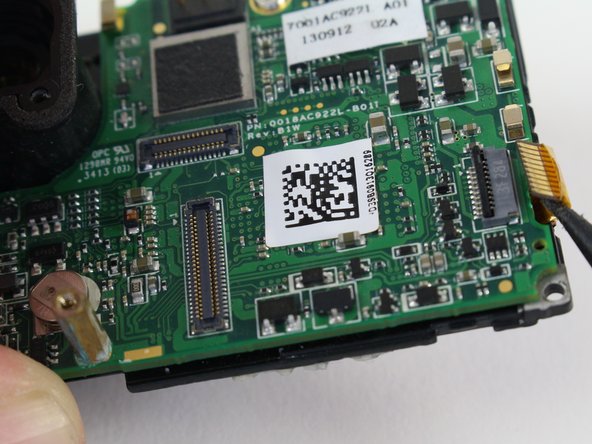
You should now have the motherboard assembly and the housing separated.
-
-
Este paso está sin traducir. Ayuda a traducirlo
-
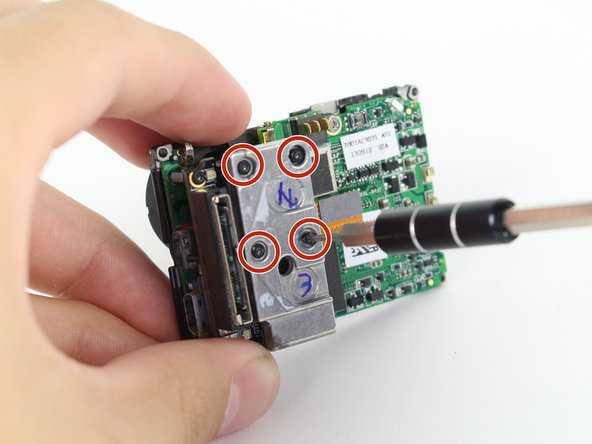
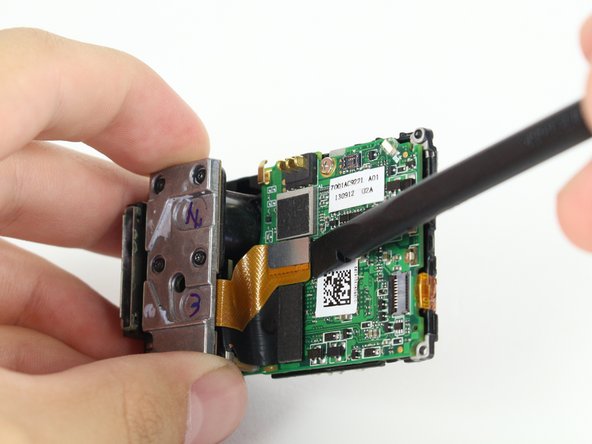
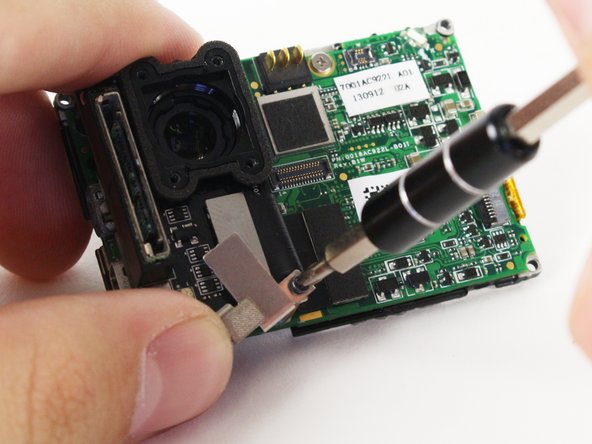
Use the spudger to remove the heat shield tape and detach the image sensor from the motherboard.
-
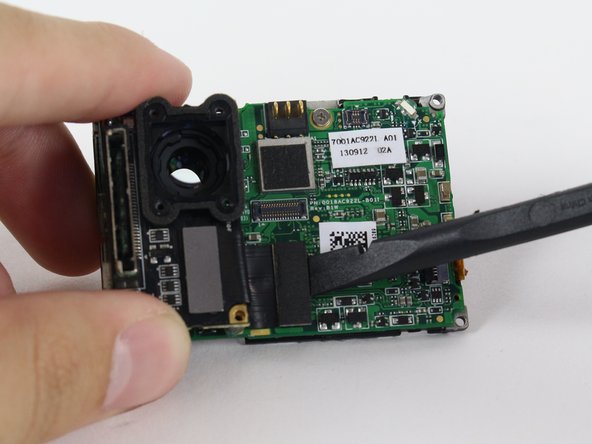
Using the T4 Torx toolbit, remove the 4 screws that connect the sensor to the lens.
-
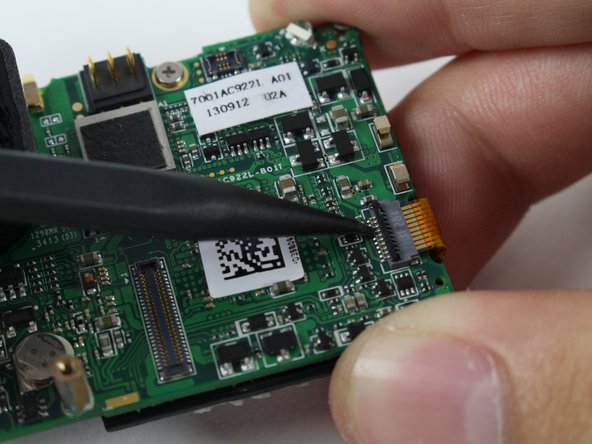
Remove the silver connector of the image sensor from the motherboard using the spudger to pry it off.
-
-
Este paso está sin traducir. Ayuda a traducirlo
-
The media adapter is attached to the motherboard via 3 screws:
-
x1 T4 Torx
-
x2 Phillips #00
-
With a little prying, use the spudger to detach the media adapter's connector from the motherboard.
-
-
Este paso está sin traducir. Ayuda a traducirlo
-
Use the spudger to lift the black tab up to unlock.
-
Then remove LCD screen connector by sliding out.
-
-
Este paso está sin traducir. Ayuda a traducirlo
-
Using the Phillips head bit, remove the silver screw near the top edge of the board.
-
Separate the LCD assembly by pulling it away from the motherboard.
-
-
Este paso está sin traducir. Ayuda a traducirlo
-
There are 3 Phillips #00 screws holding the lens onto the LCD housing that need to be removed.
-
-
Este paso está sin traducir. Ayuda a traducirlo
-
Carefully remove the camera lens from the LCD Housing.
-
You now have your GoPro's lens removed!
-


Cancelar: No complete esta guía.
7 personas más completaron esta guía.
Un agradecimiento especial a estos traductores:
23%


Estos traductores nos están ayudando a reparar el mundo! ¿Quieres contribuir?
Empezar a traducir ›
Equipo

Cal Poly, Team 24-7, Lancaster Spring 2015 Miembro de Cal Poly, Team 24-7, Lancaster Spring 2015
CPSU-LANCASTER-S15S24G7
3 Miembros
21 Guías creadas
5 comentarios
awesome guide thanks a bunch!
Thanks
Great job guys! Was successfully able to install the lens and put the camera back together to working order. Thanks for saving me $250
Thanks for not telling me to push on the display. When I pried off the front cover I broke the disply ribbon as the display was stuck to the front cover.
Please people for future check that the display is not stuck to the cover. The ribbon is so thin you dont even feel it tear.
Now i no display on me hero ...3. in tears...
How were you able to find replacement lenses in original quality?