Saltar al contenido principal

GoPro Hero 3 Silver Camera Lens Replacement

Qué necesitas

  1. GoPro Hero 3 Silver Camera Lens Replacement, Battery: paso 1, imagen 1 de 2 GoPro Hero 3 Silver Camera Lens Replacement, Battery: paso 1, imagen 2 de 2
    • Pull back on the tab on the back of GoPro to open the battery cover.

  2. GoPro Hero 3 Silver Camera Lens Replacement: paso 2, imagen 1 de 1
    • Pull the battery out using the tab.

  3. GoPro Hero 3 Silver Camera Lens Replacement, Camera Lens: paso 3, imagen 1 de 2 GoPro Hero 3 Silver Camera Lens Replacement, Camera Lens: paso 3, imagen 2 de 2
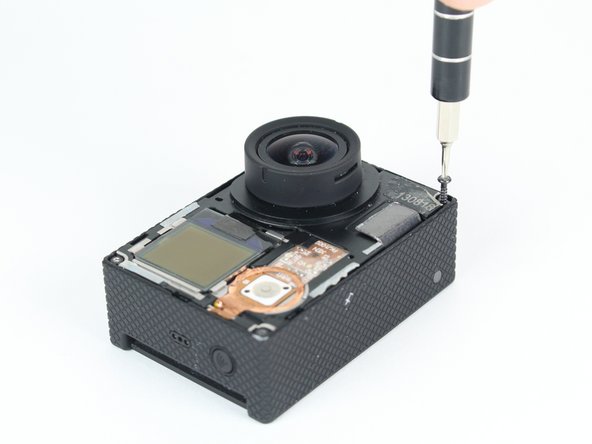
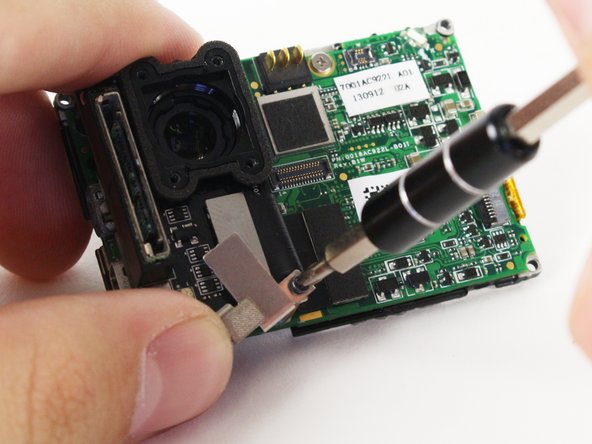
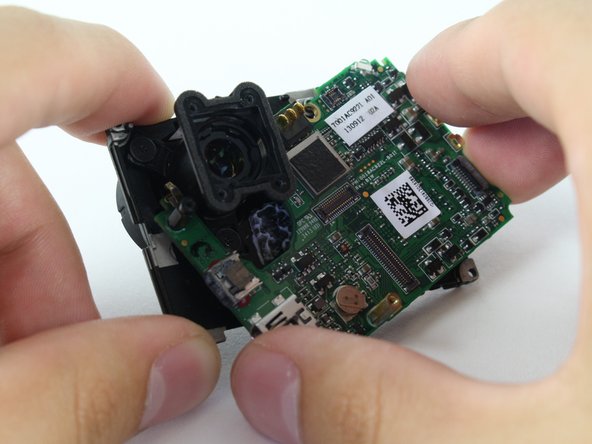
    • Use the plastic opening tool to remove the faceplate.

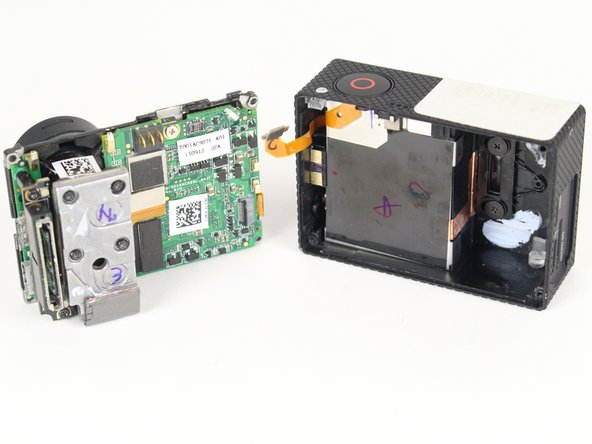
    • There is some adhesive and clips so be careful and the faceplate should pop right off.

  4. GoPro Hero 3 Silver Camera Lens Replacement: paso 4, imagen 1 de 2 GoPro Hero 3 Silver Camera Lens Replacement: paso 4, imagen 2 de 2
    • Now that the faceplate is off, it is time to remove the 4 screws on each corner.

    • Use the T4 tool bit from the iFixit toolkit in order to remove the 4 screws on each corner.

  5. GoPro Hero 3 Silver Camera Lens Replacement: paso 5, imagen 1 de 2 GoPro Hero 3 Silver Camera Lens Replacement: paso 5, imagen 2 de 2
    • Note: Make sure you remove the door cover of the USB, mini HDMI, and SD port before. Separating the motherboard will be easier.

    • Using the plastic opening tool, slowly pry open the motherboard assembly.

  6. GoPro Hero 3 Silver Camera Lens Replacement: paso 6, imagen 1 de 2 GoPro Hero 3 Silver Camera Lens Replacement: paso 6, imagen 2 de 2
    • Use the spudger to gently pry off the connector of the housing to the motherboard.

    • You should now have the motherboard assembly and the housing separated.

  7. GoPro Hero 3 Silver Camera Lens Replacement: paso 7, imagen 1 de 3 GoPro Hero 3 Silver Camera Lens Replacement: paso 7, imagen 2 de 3 GoPro Hero 3 Silver Camera Lens Replacement: paso 7, imagen 3 de 3
    • Use the spudger to remove the heat shield tape and detach the image sensor from the motherboard.

    • Using the T4 Torx toolbit, remove the 4 screws that connect the sensor to the lens.

    • Remove the silver connector of the image sensor from the motherboard using the spudger to pry it off.

  8. GoPro Hero 3 Silver Camera Lens Replacement: paso 8, imagen 1 de 3 GoPro Hero 3 Silver Camera Lens Replacement: paso 8, imagen 2 de 3 GoPro Hero 3 Silver Camera Lens Replacement: paso 8, imagen 3 de 3
    • The media adapter is attached to the motherboard via 3 screws:

    • x1 T4 Torx

    • x2 Phillips #00

    • There is a little silver bracket (in the yellow circle) that is held down by the Phillips #00 screw so be careful not to lose it.

    • With a little prying, use the spudger to detach the media adapter's connector from the motherboard.

  9. GoPro Hero 3 Silver Camera Lens Replacement: paso 9, imagen 1 de 3 GoPro Hero 3 Silver Camera Lens Replacement: paso 9, imagen 2 de 3 GoPro Hero 3 Silver Camera Lens Replacement: paso 9, imagen 3 de 3
    • Use the spudger to lift the black tab up to unlock.

    • Then remove LCD screen connector by sliding out.

  10. GoPro Hero 3 Silver Camera Lens Replacement: paso 10, imagen 1 de 3 GoPro Hero 3 Silver Camera Lens Replacement: paso 10, imagen 2 de 3 GoPro Hero 3 Silver Camera Lens Replacement: paso 10, imagen 3 de 3
    • Using the Phillips head bit, remove the silver screw near the top edge of the board.

    • Separate the LCD assembly by pulling it away from the motherboard.

  11. GoPro Hero 3 Silver Camera Lens Replacement: paso 11, imagen 1 de 2 GoPro Hero 3 Silver Camera Lens Replacement: paso 11, imagen 2 de 2
    • There are 3 Phillips #00 screws holding the lens onto the LCD housing that need to be removed.

    • Our screw on the top right is stripped, which is why it looks different. However, they will all look the same in your device.

  12. GoPro Hero 3 Silver Camera Lens Replacement: paso 12, imagen 1 de 2 GoPro Hero 3 Silver Camera Lens Replacement: paso 12, imagen 2 de 2
    • Carefully remove the camera lens from the LCD Housing.

    • You now have your GoPro's lens removed!

Conclusión

To reassemble your device, follow these instructions in reverse order.

7 personas más completaron esta guía.

Brian Alvarez

Miembro Desde 04/02/15

1,439 Reputación

6 Guías creadas

Equipo

Cal Poly, Team 24-7, Lancaster Spring 2015 Miembro de Cal Poly, Team 24-7, Lancaster Spring 2015

CPSU-LANCASTER-S15S24G7

3 Miembros

21 Guías creadas

5 comentarios

Great job guys! Was successfully able to install the lens and put the camera back together to working order. Thanks for saving me $250

Tyler Bandauski - Contestar

Thanks for not telling me to push on the display. When I pried off the front cover I broke the disply ribbon as the display was stuck to the front cover.

Please people for future check that the display is not stuck to the cover. The ribbon is so thin you dont even feel it tear.

Now i no display on me hero ...3. in tears...

merittravis - Contestar

How were you able to find replacement lenses in original quality?

Soren Kuula - Contestar

Agregar Comentario

Ver Estadísticas:

Ultimas 24 horas: 0

Ultimos 7 días: 3

Ultimos 30 días: 32

Todo El Tiempo: 13,920