Saltar al contenido principal

Esta guía ha sufrido modificaciones. Revisa la última versión sin revisar.

Galaxy Tab S 10.5 Speakers Replacement

Qué necesitas

  1. Galaxy Tab S 10.5 Speakers Replacement, Disassembling Galaxy Tab S 10.5 Back Cover: paso 1, imagen 1 de 2 Galaxy Tab S 10.5 Speakers Replacement, Disassembling Galaxy Tab S 10.5 Back Cover: paso 1, imagen 2 de 2
    • Place the plastic opening tool into the SD card slot or charge port.

    • Try in an upward motion until you see a separation between the tablet and back cover.

  2. Galaxy Tab S 10.5 Speakers Replacement: paso 2, imagen 1 de 1
    • Work around the entire device by sliding the plastic opening tool around the rim.

    • If this is the first time, it will be hard to separate the back cover from the tablet.

    • The clips are approximately 5 cm apart. While working around the device, the clips will make a dislocating sound when disconnected.

  3. Galaxy Tab S 10.5 Speakers Replacement: paso 3, imagen 1 de 1
    • Remove the back cover once all links have been separated.

    • Be careful when touching any of the internal components of the tablet.

  4. Galaxy Tab S 10.5 Speakers Replacement, Speakers: paso 4, imagen 1 de 3 Galaxy Tab S 10.5 Speakers Replacement, Speakers: paso 4, imagen 2 de 3 Galaxy Tab S 10.5 Speakers Replacement, Speakers: paso 4, imagen 3 de 3
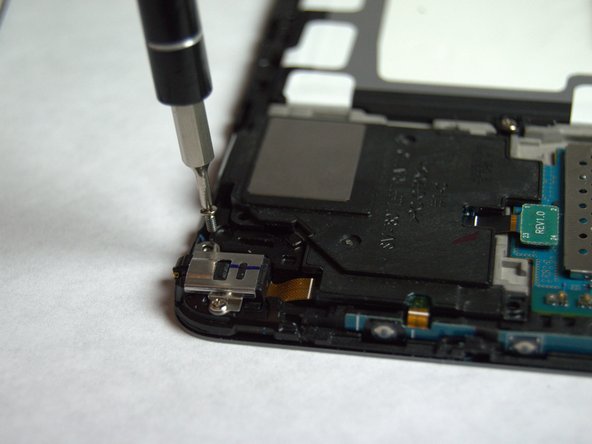
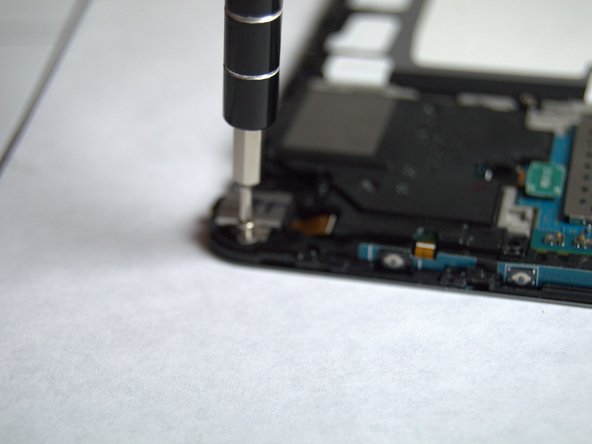
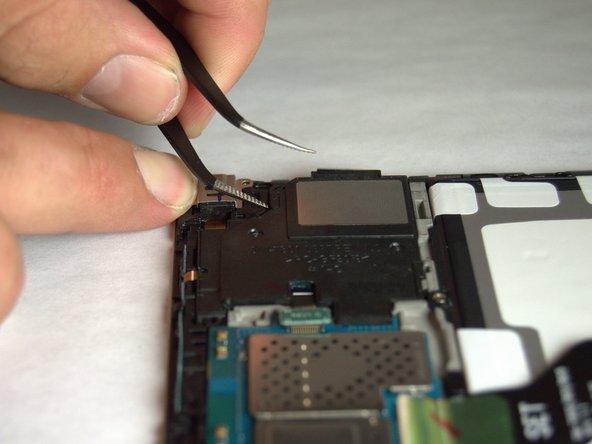
    • Starting with the right speaker, remove the 10 mm Phillips #000 screws.

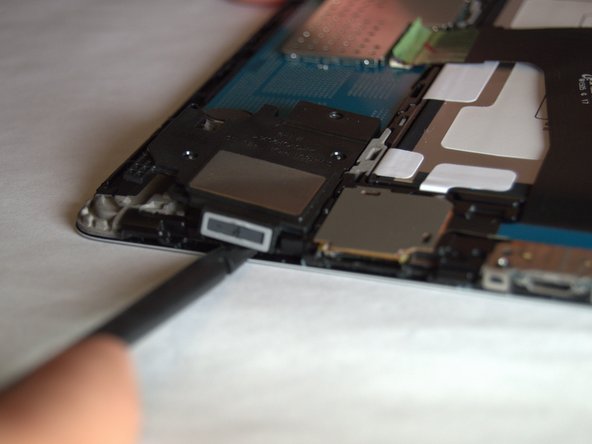
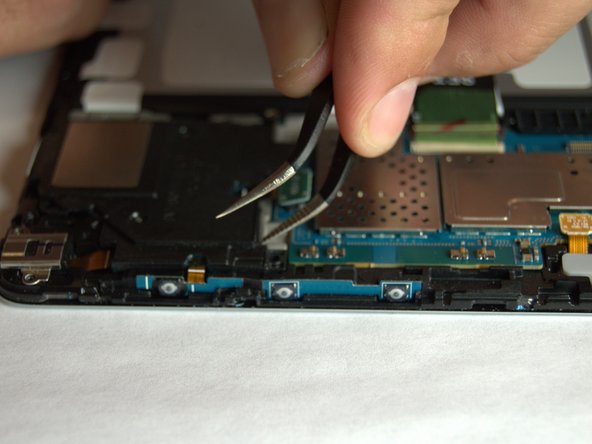
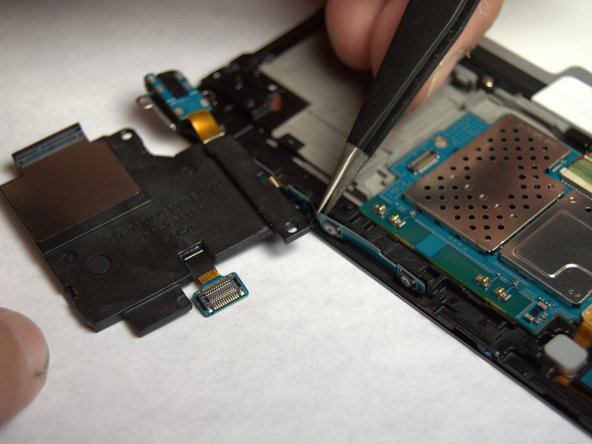
    • Use the spudger to begin pulling out the speaker.

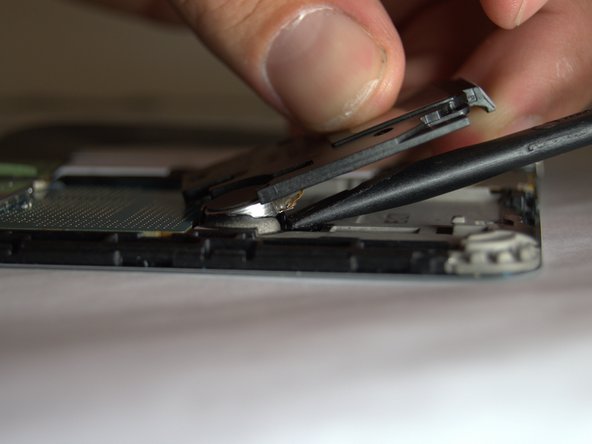
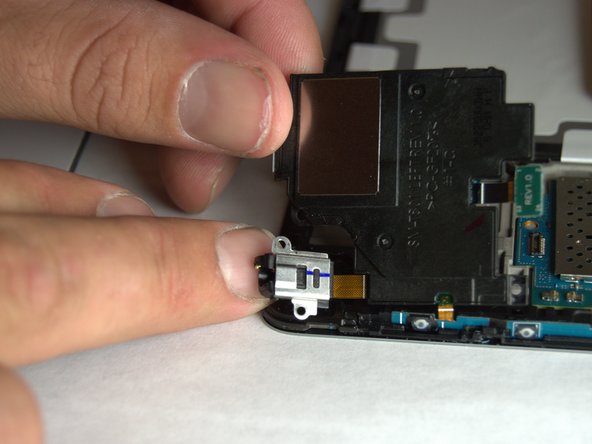
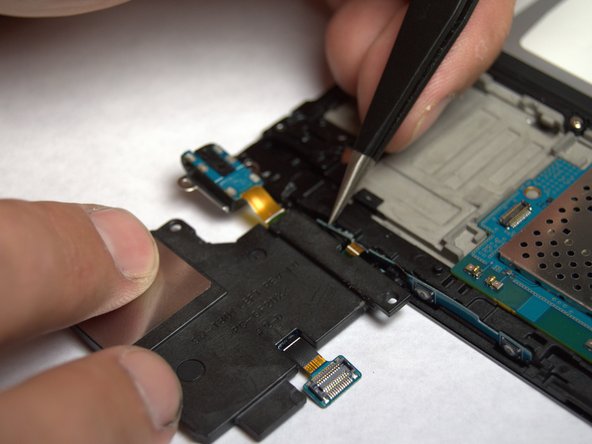
    • Wedge the spudger beneath the amplifier to remove it from the adhesive holding it down.

  5. Galaxy Tab S 10.5 Speakers Replacement: paso 5, imagen 1 de 3 Galaxy Tab S 10.5 Speakers Replacement: paso 5, imagen 2 de 3 Galaxy Tab S 10.5 Speakers Replacement: paso 5, imagen 3 de 3
    • Remove the two 10mm Phillips #000 screws that hold the left speaker.

  6. Galaxy Tab S 10.5 Speakers Replacement: paso 6, imagen 1 de 1
    • Take a pair of tweezers and disconnect the left battery.

  7. Galaxy Tab S 10.5 Speakers Replacement: paso 7, imagen 1 de 3 Galaxy Tab S 10.5 Speakers Replacement: paso 7, imagen 2 de 3 Galaxy Tab S 10.5 Speakers Replacement: paso 7, imagen 3 de 3
    • Use the same pair of tweezers to begin removing the left speaker.

    • There are three slots surrounding the speaker that can be used to remove it.

  8. Galaxy Tab S 10.5 Speakers Replacement: paso 8, imagen 1 de 2 Galaxy Tab S 10.5 Speakers Replacement: paso 8, imagen 2 de 2
    • Pull the speaker out and lay it to the side until the rest of the connections are disconnected.

  9. Galaxy Tab S 10.5 Speakers Replacement: paso 9, imagen 1 de 3 Galaxy Tab S 10.5 Speakers Replacement: paso 9, imagen 2 de 3 Galaxy Tab S 10.5 Speakers Replacement: paso 9, imagen 3 de 3
    • There are four slots that are located along the border that can be used to remove the strip that is glued to the side.

    • Wedge the tweezers in each slot to carefully remove the strip.

Conclusión

To reassemble your device, follow these instructions in reverse order.

4 personas más completaron esta guía.

Jordan Soto

Miembro Desde 08/26/15

3,249 Reputación

6 Guías creadas

Equipo

USF Tampa, Team 3-2, Eyestone Fall 2015 Miembro de USF Tampa, Team 3-2, Eyestone Fall 2015

USFT-EYESTONE-F15S3G2

3 Miembros

20 Guías creadas

3 comentarios

Thanks, but I have one big question. I removed the back cover, but I still have no idea how to remove the white plastic frame that covers the outer edge of the speakers. In your guide, it just seems to magically disappear.

fongs89 - Contestar

Absolutely right. See my comment above. Carefully prising with the right tools between the display and the frame - the bezel - and working around the outside of the display will eventually cause the bezel to come away from the display with the back cover attached. You can then access the parts you need to get to.

PhilipHN - Contestar

Suggestion….add the necessary step of removing the frame that covers the left speaker. If you follow the instructions in this guide, you will not be able to access and remove the left speaker, which is critical considering the on off and volume switches are integral to the speaker.

rwylieusa - Contestar

Agregar Comentario

Ver Estadísticas:

Ultimas 24 horas: 2

Ultimos 7 días: 5

Ultimos 30 días: 10

Todo El Tiempo: 4,467