Saltar al contenido principal

Full method - HP Touchsmart IQ506 CMOS Battery Replacement

Qué necesitas

  1. Full method - HP Touchsmart IQ506 CMOS Battery Replacement, Unplug the system: paso 1, imagen 1 de 2 Full method - HP Touchsmart IQ506 CMOS Battery Replacement, Unplug the system: paso 1, imagen 2 de 2
    • Unplug the system from the power brick.

  2. Full method - HP Touchsmart IQ506 CMOS Battery Replacement, Remove the Wireless keyboard receiver: paso 2, imagen 1 de 1
    • I did not get the original keyboard with my system and the receiver mine came with was broken. Since the HP OEM keyboard is end of life, I chose to install a USB hub because I cannot find a modern keyboard with a large receiver.

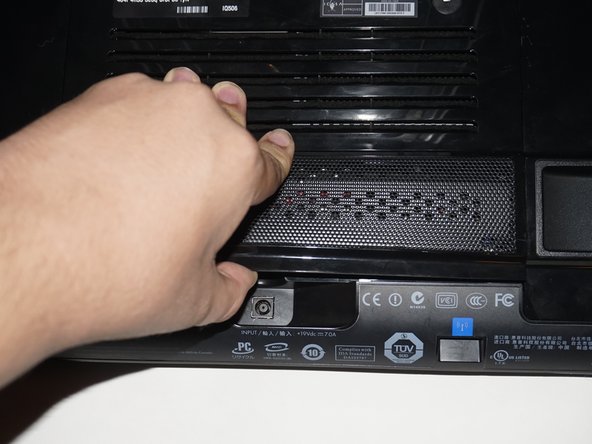
    • To remove the back cover from the system, the keyboard receiver must be removed. To do this, pull the tabs on the chassis. Once you do this, it should come out of the internal USB port and free the back cover for removal.

  3. Full method - HP Touchsmart IQ506 CMOS Battery Replacement, Remove the RAM door: paso 3, imagen 1 de 3 Full method - HP Touchsmart IQ506 CMOS Battery Replacement, Remove the RAM door: paso 3, imagen 2 de 3 Full method - HP Touchsmart IQ506 CMOS Battery Replacement, Remove the RAM door: paso 3, imagen 3 de 3
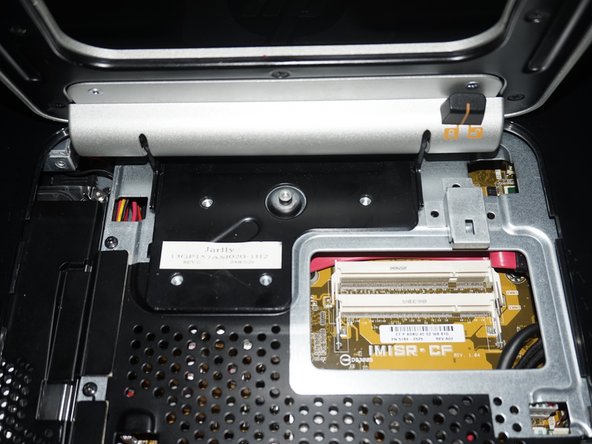
    • Remove the screw on the RAM door. Once you remove the screw, unclip the door.

  4. Full method - HP Touchsmart IQ506 CMOS Battery Replacement, Screwdriver placement tip: paso 4, imagen 1 de 1
    • The top hinge screws can be difficult to get to. If you are using the classic iFixit screwdriver handle, the best workaround to this problem is to put the extension on and twist this part to remove the top screws. This is not required for the bottom screws.

  5. Full method - HP Touchsmart IQ506 CMOS Battery Replacement, Remove the stand: paso 5, imagen 1 de 3 Full method - HP Touchsmart IQ506 CMOS Battery Replacement, Remove the stand: paso 5, imagen 2 de 3 Full method - HP Touchsmart IQ506 CMOS Battery Replacement, Remove the stand: paso 5, imagen 3 de 3
    • Some people may find it easier to remove the top screws from the stand first. These screws can be difficult to remove.

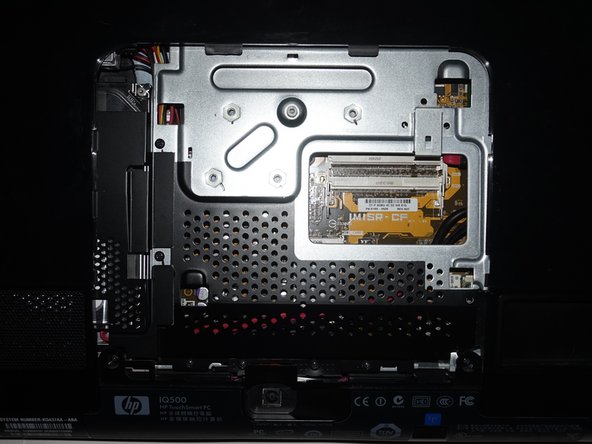
    • Remove the stand from the system. Use a Phillips #1 screwdriver to loosen the 4 screws.

  6. Full method - HP Touchsmart IQ506 CMOS Battery Replacement, Remove the I/O panel screws: paso 6, imagen 1 de 3 Full method - HP Touchsmart IQ506 CMOS Battery Replacement, Remove the I/O panel screws: paso 6, imagen 2 de 3 Full method - HP Touchsmart IQ506 CMOS Battery Replacement, Remove the I/O panel screws: paso 6, imagen 3 de 3
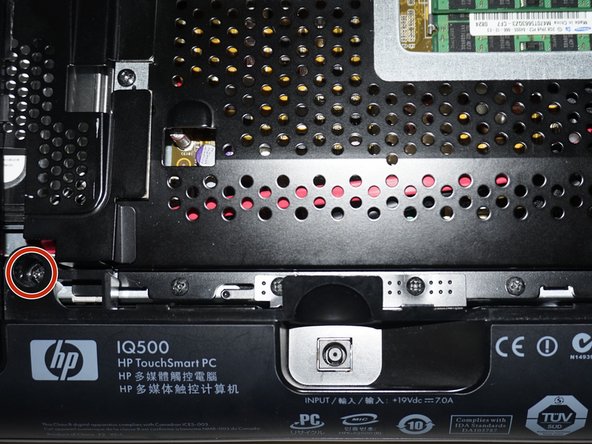
    • Remove the 3 screws in the I/O bay of the system.

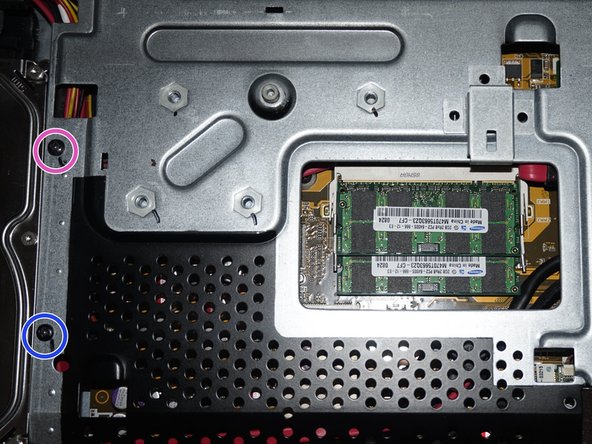
    • Remove the 2 screws from under the RAM panel. Note: On my system, I am missing one screw.

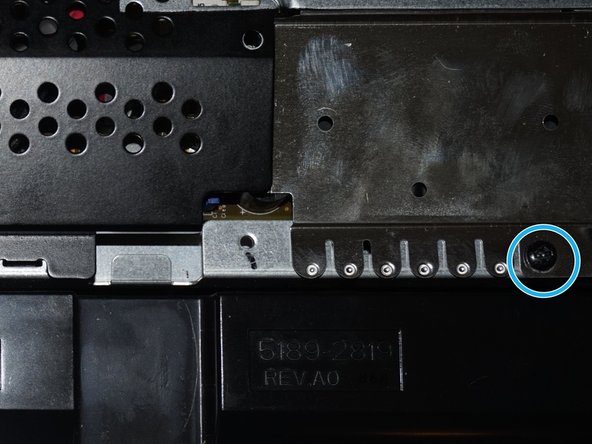
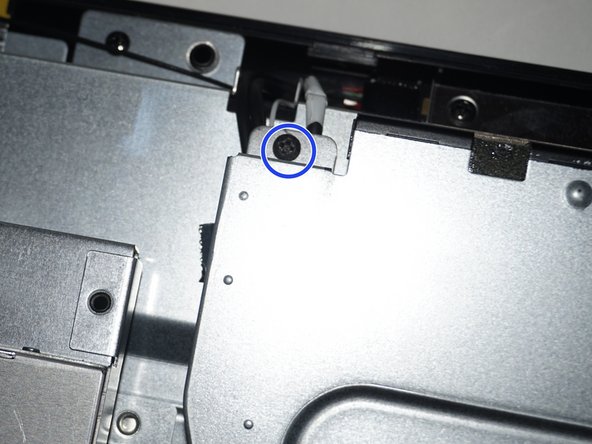
    • Remove the 2 screws from under the ODD cover. Note: If you are having trouble with this cover, use a spudger or plastic pry tool to remove it.

  7. Full method - HP Touchsmart IQ506 CMOS Battery Replacement, Remove the screws from the system 2: paso 7, imagen 1 de 2 Full method - HP Touchsmart IQ506 CMOS Battery Replacement, Remove the screws from the system 2: paso 7, imagen 2 de 2
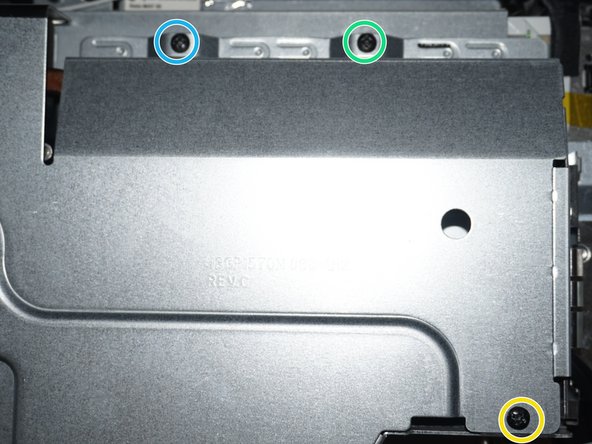
    • Remove the 2 screws by the feet on the system chassis.

  8. Full method - HP Touchsmart IQ506 CMOS Battery Replacement, Remove the back from the system: paso 8, imagen 1 de 1
    • If you are having a hard time removing the back of the system, a spudger can make this step easier.

    • Remove the back from the system. The quickest way to do this is to start from the bottom and then unsnap the sides.

  9. Full method - HP Touchsmart IQ506 CMOS Battery Replacement, Remove the motherboard shield: paso 9, imagen 1 de 3 Full method - HP Touchsmart IQ506 CMOS Battery Replacement, Remove the motherboard shield: paso 9, imagen 2 de 3 Full method - HP Touchsmart IQ506 CMOS Battery Replacement, Remove the motherboard shield: paso 9, imagen 3 de 3
    • The metal EMI shield over the power jack has to be removed to pull the motherboard shield off. This must be replaced when reassembling the system.

    • Remove the 7 screws to reveal the motherboard and other major components. Use a Phillips #1 screwdriver to do this.

  10. Full method - HP Touchsmart IQ506 CMOS Battery Replacement, Remove the motherboard shield 2: paso 10, imagen 1 de 3 Full method - HP Touchsmart IQ506 CMOS Battery Replacement, Remove the motherboard shield 2: paso 10, imagen 2 de 3 Full method - HP Touchsmart IQ506 CMOS Battery Replacement, Remove the motherboard shield 2: paso 10, imagen 3 de 3
    • Remove the 6 remaining screws from the motherboard shield. Use the same Phillips #1 screwdriver as you used the first time.

  11. Full method - HP Touchsmart IQ506 CMOS Battery Replacement, Remove the battery: paso 11, imagen 1 de 3 Full method - HP Touchsmart IQ506 CMOS Battery Replacement, Remove the battery: paso 11, imagen 2 de 3 Full method - HP Touchsmart IQ506 CMOS Battery Replacement, Remove the battery: paso 11, imagen 3 de 3
    • If you want to track when you replaced the battery, put a mark on the battery with the month and year so you know when it was replaced. If you cannot write on the battery, putting a hidden note under the memory panel is also an option.

    • Optional: Put a note on the RAM door out of sight or write when the battery was replaced on the new battery.

    • Push the tab on the battery in and then remove it. Put the new battery in the reverse way of removal. Once this is done, write when the battery was replaced (Example: 5/16) on the battery.

Conclusión

To reassemble your device, follow these instructions in reverse order.

Nick

Miembro Desde 11/10/09

88,899 Reputación

49 Guías creadas

Equipo

Master Techs Miembro de Master Techs

Community

322 Miembros

2,539 Guías creadas

0 comentarios

Agregar Comentario

Ver Estadísticas:

Ultimas 24 horas: 1

Ultimos 7 días: 3

Ultimos 30 días: 13

Todo El Tiempo: 1,933