Esta versión puede contener ediciones incorrectas. Cambie a la última instantánea verificada.
Qué necesitas
-
Este paso está sin traducir. Ayuda a traducirlo
-
Using a 1.5mm Hex Screwdriver, remove the two 3.0 mm hex screws on the front of the camera.
-
Using a Phillips #00 screwdriver, remove two 3.0 mm screws on the bottom of the front face.
-
-
Este paso está sin traducir. Ayuda a traducirlo
-
Using a Phillips #00 screwdriver, remove 3.0 mm screws on the bottom of the camera closer to the back.
-
Using Phillips #00 screwdriver remove two 3.0 mm screws on the back of the camera. This will remove the eyelet for the camera strap and the rear cover.
-
-
Este paso está sin traducir. Ayuda a traducirlo
-
Using a Phillips #00 screwdriver, remove the two 3.0 mm screws.
-
-
Este paso está sin traducir. Ayuda a traducirlo
-
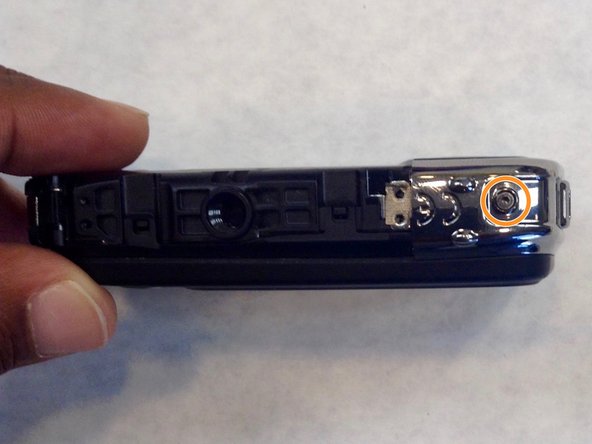
Using a 1.5mm Hex screwdriver, remove 3.0 mm hex screw on top edge of silver panel.
-
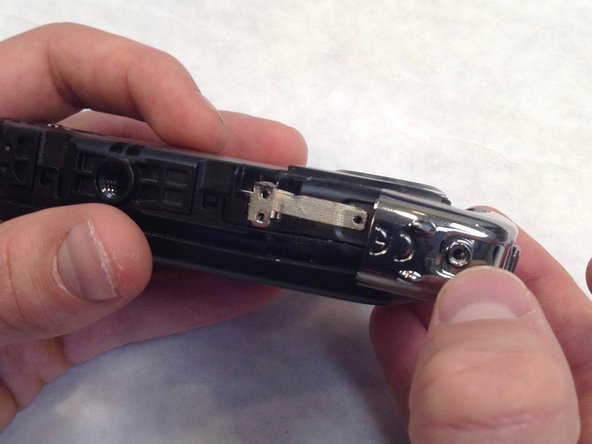
Using a Phillips #00 screwdriver, remove the 3.0 mm screw on bottom edge.
-
Once both screws are removed the silver side casing will slide off.
-
-
-
Este paso está sin traducir. Ayuda a traducirlo
-
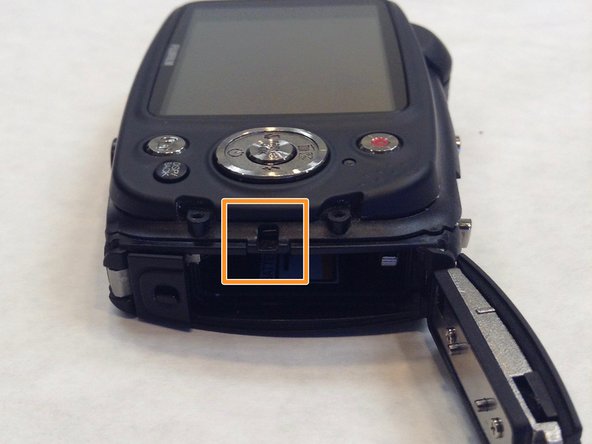
Unlatch the four clasps located on each side of the camera by hand.
-
The fourth clasp is concealed by the battery door. To reach the clasp see Fujifilm XP20 Battery Replacement for instructions.
-
-
Este paso está sin traducir. Ayuda a traducirlo
-
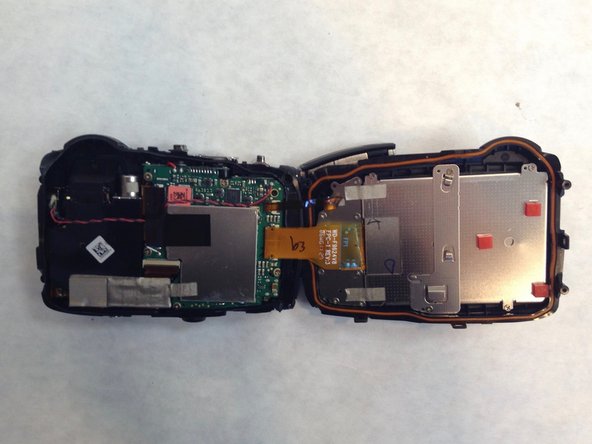
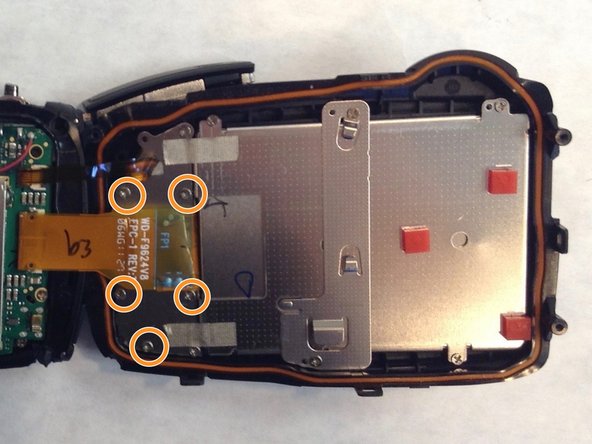
Using a Phillips #00 screwdriver, remove the seven 3.0 mm screws.
-
Remove the remaining five 3.0 mm screws which hold the rear case and the control panel together.
-
The rear panel is now free from the camera.
-
-
Este paso está sin traducir. Ayuda a traducirlo
-
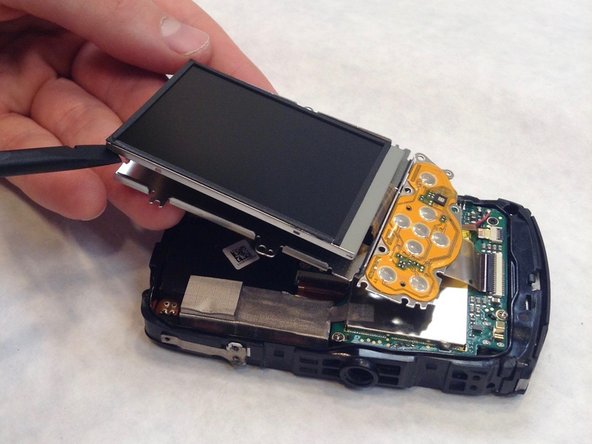
Take the spudger and wedge it in between the screen and the frame.
-
Slowly make your way around the screen with the spudger just enough to separate the screen from the frame.
-
-
Este paso está sin traducir. Ayuda a traducirlo
-
Take the spudger again and wedge it in the thinner frame to pry the LCD screen from the frame.
-
Make your way around with the spudger just enough to separate the screen and frame once again.
-
-
Este paso está sin traducir. Ayuda a traducirlo
-
Take the spudger and wedge it very carefully between the LCD screen and the very thin and fragile frame.
-
-
Este paso está sin traducir. Ayuda a traducirlo
-
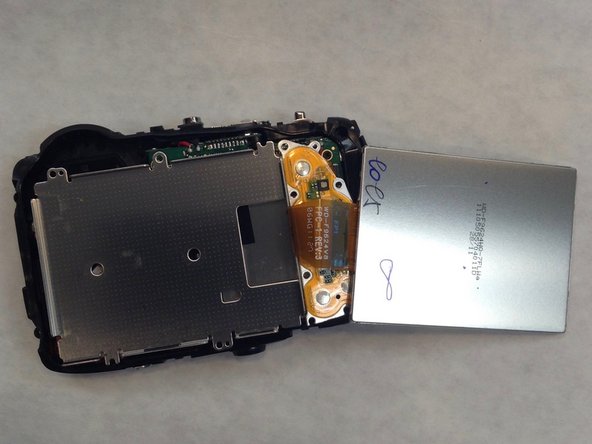
Detach the LCD screen from the motherboard by detaching the orange ribbon.
-


Equipo

IUPUI, Team 1-1, Wilson Fall 2016 Miembro de IUPUI, Team 1-1, Wilson Fall 2016
IUPUI-WILSON-F16S1G1
3 Miembros
6 Guías creadas