Esta versión puede contener ediciones incorrectas. Cambie a la última instantánea verificada.
Qué necesitas
-
Este paso está sin traducir. Ayuda a traducirlo
-
There are two screws on the side with the micro USB power port. Remove the two 2mm x 0.5mm screws with a Phillips #0 Screwdriver head.
-
-
Este paso está sin traducir. Ayuda a traducirlo
-
Pry off the plastic backing with the spudger and the plastic opening tools. Anything that can provide enough leverage and not conduct electricity will also work for this purpose.
-
-
-
Este paso está sin traducir. Ayuda a traducirlo
-
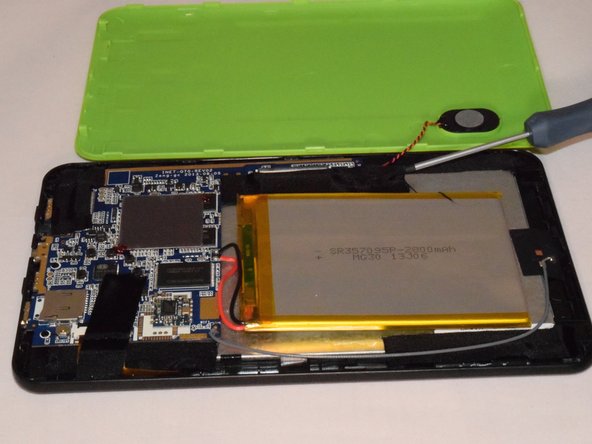
Once you pry off the plastic backing, you will expose the battery and the motherboard. Then remove the tape on the speaker wire.
-
-
Este paso está sin traducir. Ayuda a traducirlo
-
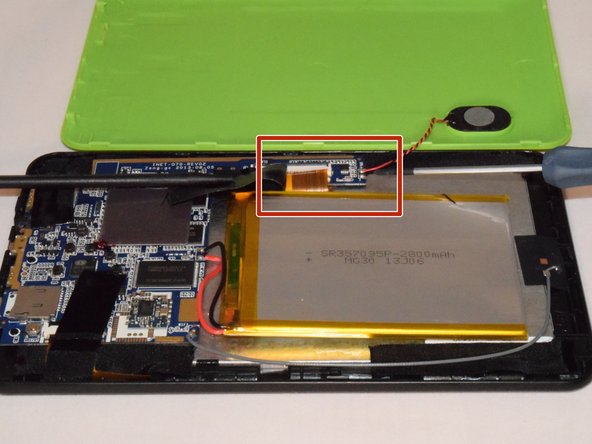
Carefully remove tapes holding speaker in place.
-
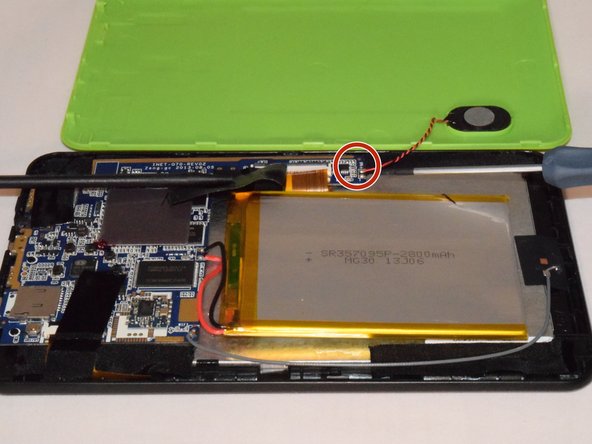
Disconnect the speaker wires from the motherboard.
-
-
Este paso está sin traducir. Ayuda a traducirlo
-
Pry the speaker out of the plastic casing to replace it with the new speaker using the spudger.
-
If replacing the speaker, you will need a soldering kit to reconnect the wires with the new speaker after disconnecting the old speaker.
-


Equipo

Eastern Washington University, Team 1-1, Rowley SU 2015 Miembro de Eastern Washington University, Team 1-1, Rowley SU 2015
EWU-ROWLEY-SU15S1G1
4 Miembros
10 Guías creadas