Saltar al contenido principal

Ecovacs Deebot 900 Vacuum Motor Replacement

Qué necesitas

  1. Ecovacs Deebot 900 Vacuum Motor Replacement, Battery: paso 1, imagen 1 de 1
    • Remove all the brushes from the Deebot.

  2. Ecovacs Deebot 900 Vacuum Motor Replacement: paso 2, imagen 1 de 1
    • Using a Phillips #0 screwdriver, remove the two 12.25 mm screws holding the battery cover in place.​

  3. Ecovacs Deebot 900 Vacuum Motor Replacement: paso 3, imagen 1 de 1
    • Remove the battery cover.

    Anyone know where I can buy the battery for the Deebot 900. Evovacs is saying they won’t/dont sell them.

    Mike - Contestar

  4. Ecovacs Deebot 900 Vacuum Motor Replacement: paso 4, imagen 1 de 1
    • Using the two white straps on the sides of the battery, gently remove the battery. ​

    • Be careful not to rip out the battery cable.

  5. Ecovacs Deebot 900 Vacuum Motor Replacement: paso 5, imagen 1 de 1
    • Carefully disconnect the battery cable by pulling near the connector at the bottom of the battery compartment.

    I have two issues with these instructions.

    Title is Ecovacs Deebot 900 Battery Replacement. The battery was never replaced the device was reassembled.

    For battery replacement you need a battery it would be nice to have the replacement battery part number as well.

    Rick Sargent - Contestar

    I’d like some more info on part numbers, too. I have a Deebot 901 with a battery that, already after 2 years, has deteriorated significantly. Deebot 901 is also called “DE5G.10” in Europe, and it’s existing Battery back has model number ZJ1517-HFR, on which I can find almost no info, let a lone a compatible part somewhere in The Netherlands.

    eymert -

  6. Ecovacs Deebot 900 Vacuum Motor Replacement, Front Bumper: paso 6, imagen 1 de 2 Ecovacs Deebot 900 Vacuum Motor Replacement, Front Bumper: paso 6, imagen 2 de 2
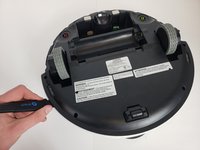
    • Using a Phillips #00 screwdriver, remove the eight screws on the bottom edge of the bumper. ​

  7. Ecovacs Deebot 900 Vacuum Motor Replacement: paso 7, imagen 1 de 1
    • Remove the black strip on the bottom of the bumper.

  8. Ecovacs Deebot 900 Vacuum Motor Replacement: paso 8, imagen 1 de 2 Ecovacs Deebot 900 Vacuum Motor Replacement: paso 8, imagen 2 de 2
    • Carefully lift up the bumper untill it pops out of place.​

  9. Ecovacs Deebot 900 Vacuum Motor Replacement: paso 9, imagen 1 de 2 Ecovacs Deebot 900 Vacuum Motor Replacement: paso 9, imagen 2 de 2
    • Disconnect the two cables connecting the bumper to the body of the Deebot.

    • Remove the front bumper from the device.

  10. Ecovacs Deebot 900 Vacuum Motor Replacement, Bottom Case: paso 10, imagen 1 de 2 Ecovacs Deebot 900 Vacuum Motor Replacement, Bottom Case: paso 10, imagen 2 de 2
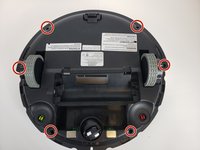
    • Using a Phillips #00 screwdriver, take out the six screws around the perimeter of the bottom case.

    This was actually to toughest part. I have a Deebot T9+ and it is slightly different (not much) and it is always a bit scary when you have to remove "plastic fixeners"

    RobinB - Contestar

  11. Ecovacs Deebot 900 Vacuum Motor Replacement: paso 11, imagen 1 de 2 Ecovacs Deebot 900 Vacuum Motor Replacement: paso 11, imagen 2 de 2
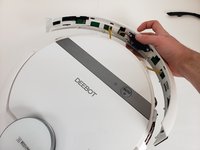
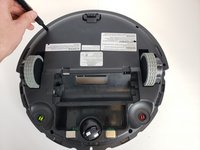
    • Insert a Jimmy into the seam and work all the way around the robot.

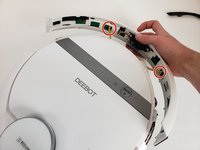
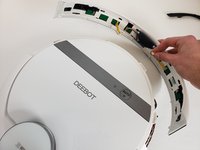
    • Disconnect the two cables and remove the bottom case from the device.

    Thank you for your work on this guide!

    Dominick Borrego - Contestar

    Im not able to remove the bottom case. I have a Deebot 711

    rocksmum - Contestar

    This step is difficult, but takes some time and patience, keep pulling. I managed to open it by pulling from the front part which was previously covered by the bumper

    Michele Pandini - Contestar

  12. Ecovacs Deebot 900 Vacuum Motor Replacement, Vacuum Motor: paso 12, imagen 1 de 1
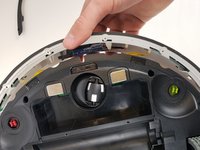
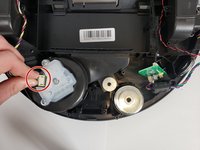
    • Using the Phillips #00 screwdriver, remove the three screws around the laser unit.

  13. Ecovacs Deebot 900 Vacuum Motor Replacement: paso 13, imagen 1 de 2 Ecovacs Deebot 900 Vacuum Motor Replacement: paso 13, imagen 2 de 2
    • Carefully lift the laser unit off of the motor assembly​.

  14. Ecovacs Deebot 900 Vacuum Motor Replacement: paso 14, imagen 1 de 1
    • Remove the single screw holding the motor assembly in place using the Phillips #00 screwdriver.

  15. Ecovacs Deebot 900 Vacuum Motor Replacement: paso 15, imagen 1 de 2 Ecovacs Deebot 900 Vacuum Motor Replacement: paso 15, imagen 2 de 2
    • Disconnect the ribbon cable holding the assembly in place.

    • Be careful not to damage the cable.

  16. Ecovacs Deebot 900 Vacuum Motor Replacement: paso 16, imagen 1 de 1
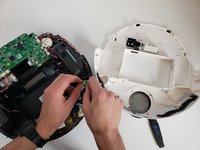
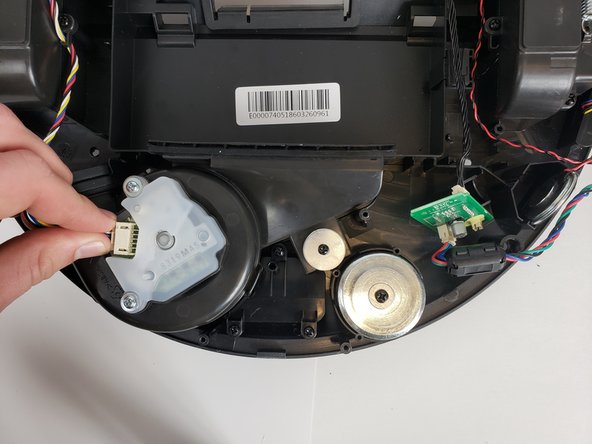
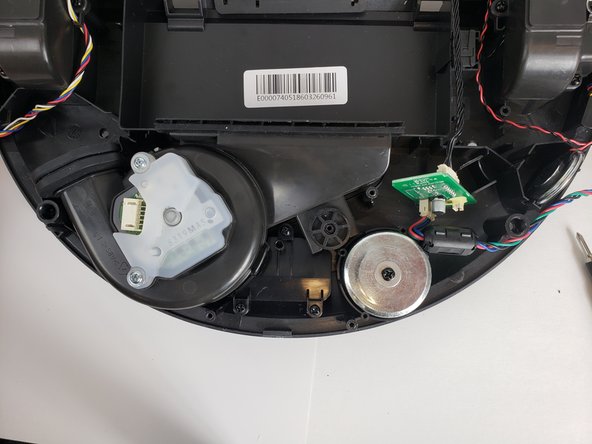
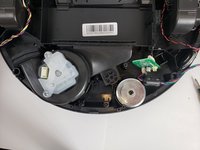
    • Lift and remove the motor assembly out of the Deebot.​

    Thats a great tutorial, but where can you buy parts ?

    Joseph Mathews - Contestar

Conclusión

To reassemble your device, follow these instructions in reverse order.

5 personas más completaron esta guía.

Un comentario

Where can you find a replacement vacuum motor for the zoom 930?

Aaron Commons - Contestar

Agregar Comentario

Ver Estadísticas:

Ultimas 24 horas: 3

Ultimos 7 días: 22

Ultimos 30 días: 87

Todo El Tiempo: 12,156