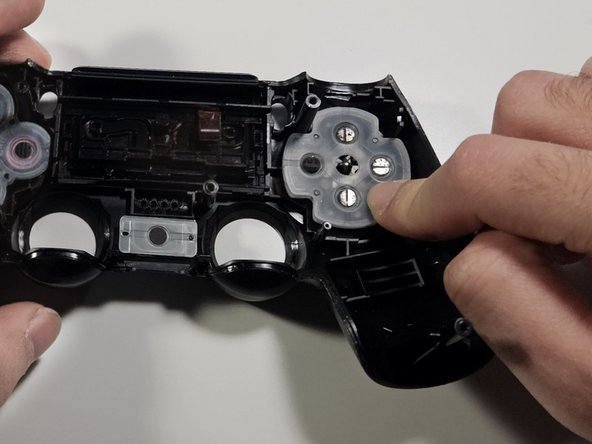
Saltar al contenido principal

DualShock 4 CUH-ZCT2U D-pad Gasket Replacement

Qué necesitas

  1. DualShock 4 CUH-ZCT2U D-pad Gasket Replacement, D-pad Gasket: paso 1, imagen 1 de 2 DualShock 4 CUH-ZCT2U D-pad Gasket Replacement, D-pad Gasket: paso 1, imagen 2 de 2
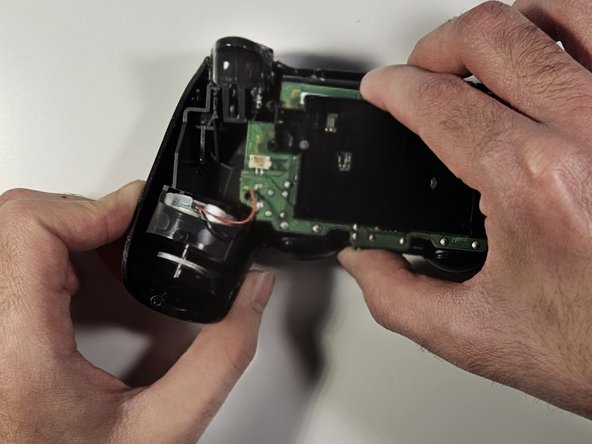
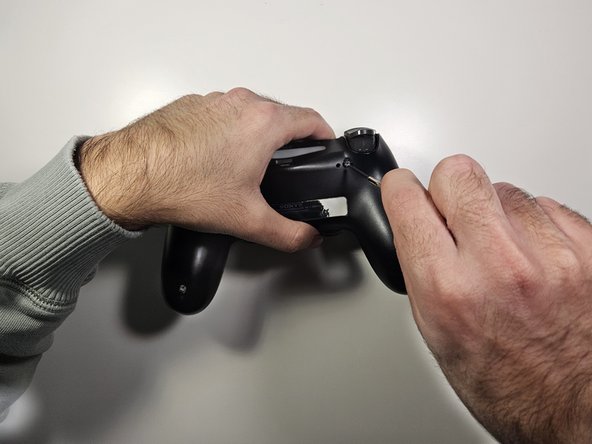
    • Use a Phillips #00 screwdriver to remove the four 6.0 mm-long screws on the back of the controller.

  2. DualShock 4 CUH-ZCT2U D-pad Gasket Replacement: paso 2, imagen 1 de 2 DualShock 4 CUH-ZCT2U D-pad Gasket Replacement: paso 2, imagen 2 de 2
    • Four fragile plastic clips hold the front and back case together. You can see their locations more clearly in this guide.

    • If you break these clips, the controller will still work.

    • Insert the tip of an opening tool or spudger into the seam of the device and gently release the clips around the perimeter of the controller to separate the front and back sections.

  3. DualShock 4 CUH-ZCT2U D-pad Gasket Replacement: paso 3, imagen 1 de 3 DualShock 4 CUH-ZCT2U D-pad Gasket Replacement: paso 3, imagen 2 de 3 DualShock 4 CUH-ZCT2U D-pad Gasket Replacement: paso 3, imagen 3 de 3
    • Use your fingers to gently pull the ribbon cable straight out of its connector on the motherboard.

    • Since this cable's pull tab is too small to grab with your fingers or tweezers, grab the cable itself. Otherwise utilize pull tabs whenever possible.

    • Do not remove the entire socket from the motherboard, just the ribbon cable. The blue part of the cable should be visible if done correctly.

    • During reassembly, grab the ribbon cable by the blue tab and gently press the cable straight into the connector. Push the blue tab rather than the ribbon cable itself.

  4. DualShock 4 CUH-ZCT2U D-pad Gasket Replacement: paso 4, imagen 1 de 3 DualShock 4 CUH-ZCT2U D-pad Gasket Replacement: paso 4, imagen 2 de 3 DualShock 4 CUH-ZCT2U D-pad Gasket Replacement: paso 4, imagen 3 de 3
    • Use a pair of tweezers or your fingers to pull the battery's power connector straight up from the motherboard.

  5. DualShock 4 CUH-ZCT2U D-pad Gasket Replacement: paso 5, imagen 1 de 3 DualShock 4 CUH-ZCT2U D-pad Gasket Replacement: paso 5, imagen 2 de 3 DualShock 4 CUH-ZCT2U D-pad Gasket Replacement: paso 5, imagen 3 de 3
    • Use a spudger to disconnect the red cable from the motherboard under the black plastic the battery was lying on.

    • Carefully pull apart the front of the controller (the part with the silicon Dpad visible) from the back half.

    • Tweezers were used in the image. However, using metal tools on the internals of your controller can damage them so it is best to avoid using them for prying.

  6. DualShock 4 CUH-ZCT2U D-pad Gasket Replacement: paso 6, imagen 1 de 2 DualShock 4 CUH-ZCT2U D-pad Gasket Replacement: paso 6, imagen 2 de 2
    • Pull off the old silicone pads.

    • Place the new silicone rubber pads on top of the four arrow keys with the flat side up.

    • The orientation does not matter.

  7. DualShock 4 CUH-ZCT2U D-pad Gasket Replacement: paso 7, imagen 1 de 3 DualShock 4 CUH-ZCT2U D-pad Gasket Replacement: paso 7, imagen 2 de 3 DualShock 4 CUH-ZCT2U D-pad Gasket Replacement: paso 7, imagen 3 de 3
    • To reassemble, follow these instructions in reverse order.

Conclusión

To reassemble your device, follow these instructions in reverse order.

Una persona más ha completado esta guía.

Ryan Zareh

Miembro Desde 01/09/24

175 Reputación

1 Guía escrita

Equipo

0 comentarios

Agregar Comentario

Ver Estadísticas:

Ultimas 24 horas: 4

Ultimos 7 días: 19

Ultimos 30 días: 130

Todo El Tiempo: 208