Saltar al contenido principal

DualShock 4 Buttons Replacement

Qué necesitas

  1. DualShock 4 Buttons Replacement, Controller: paso 1, imagen 1 de 1
    • Using the Phillips #00 Screwdriver, remove the four 6.0 mm screws securing the rear cover to the controller.

    • Be careful loosening the screws, using the wrong sized screwdriver, or letting the screwdriver slip can permanently damage the screw heads, making removal extremely difficult.

  2. DualShock 4 Buttons Replacement: paso 2, imagen 1 de 3 DualShock 4 Buttons Replacement: paso 2, imagen 2 de 3 DualShock 4 Buttons Replacement: paso 2, imagen 3 de 3
    • Four fragile plastic clips hold the casing together. You can see their locations more clearly in this guide.

    • The clips help hold the seams together. If you break these clips, the controller will still work.

    • Beginning with the left handle:

    • Pinch the left handle of the controller to introduce an opening.

    • Wedge a plastic opening tool into the opening and slide it up towards the joystick.

    • Pull down on tool to pry open the casing.

    • Repeat these steps for the right handle.

  3. DualShock 4 Buttons Replacement: paso 3, imagen 1 de 3 DualShock 4 Buttons Replacement: paso 3, imagen 2 de 3 DualShock 4 Buttons Replacement: paso 3, imagen 3 de 3
    • Wedge a plastic opening tool into the case-splittings and pull down to crack open the casing near the following buttons:

    • Share button

    • Options button

    • Split the plastic covers of the controller apart, taking note that they will still be attached by circuit board ribbons.

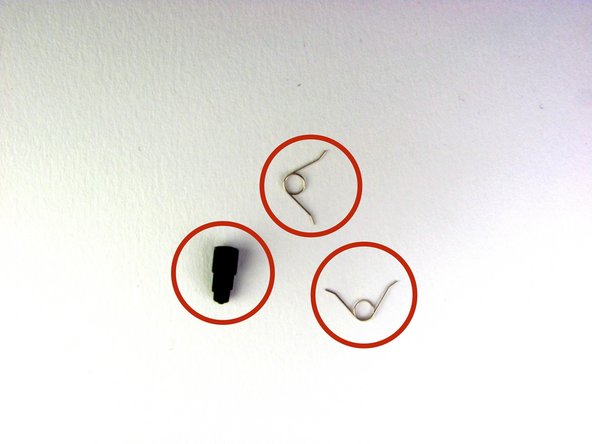
    • Three small pieces are often released from the framework. To prevent loss, maintain a controlled work field.

    • 2 Trigger Springs

    • 1 Grey Reset Button Extension

  4. DualShock 4 Buttons Replacement, Disconnect the battery: paso 4, imagen 1 de 2 DualShock 4 Buttons Replacement, Disconnect the battery: paso 4, imagen 2 de 2
    • Use tweezers or your fingers to grab and disconnect the head of the battery cable from the motherboard.

    • Only pull on the head of the connector—don't pull on the cable itself.

  5. DualShock 4 Buttons Replacement, Remove the battery: paso 5, imagen 1 de 1
    • Remove the battery.

  6. DualShock 4 Buttons Replacement, Disassembling DualShock 4 Motherboard Assembly: paso 6, imagen 1 de 1
    • Remove the single 6.0 mm Phillips screw found below the battery retainer with the Phillips #00 Screwdriver.

    • Do not forcefully loosen the screw, as it may amount to permanent damage of the threads, making removal impossible.

  7. DualShock 4 Buttons Replacement: paso 7, imagen 1 de 2 DualShock 4 Buttons Replacement: paso 7, imagen 2 de 2
    • Gently detach the touchpad ribbon connected to the motherboard using the blunt forceps. The touchpad ribbon is connected to the motherboard by a connector that flips to tighten and loosen. During reassembly, to reattach the ribbon, the plastic tray will need to be gently removed from the motherboard and the flip-lock flipped up.

  8. DualShock 4 Buttons Replacement: paso 8, imagen 1 de 2 DualShock 4 Buttons Replacement: paso 8, imagen 2 de 2
    • Carefully dislodge the motherboard assembly from the front cover.

    • Vibration motors are loosely attached to the motherboard assembly. Provide support at the two ends to ease the separation.

    • When removing the motherboard assembly, try not to tilt the front cover upside down as the buttons and their covers may fall out.

  9. DualShock 4 Buttons Replacement, Disassembly Complete: paso 9, imagen 1 de 3 DualShock 4 Buttons Replacement, Disassembly Complete: paso 9, imagen 2 de 3 DualShock 4 Buttons Replacement, Disassembly Complete: paso 9, imagen 3 de 3
    • Successful disassembly of the controller will result in the following three parts, respectively:

    • Motherboard Assembly

    • Front Cover

    • Rear Cover

  10. DualShock 4 Buttons Replacement, Buttons: paso 10, imagen 1 de 3 DualShock 4 Buttons Replacement, Buttons: paso 10, imagen 2 de 3 DualShock 4 Buttons Replacement, Buttons: paso 10, imagen 3 de 3
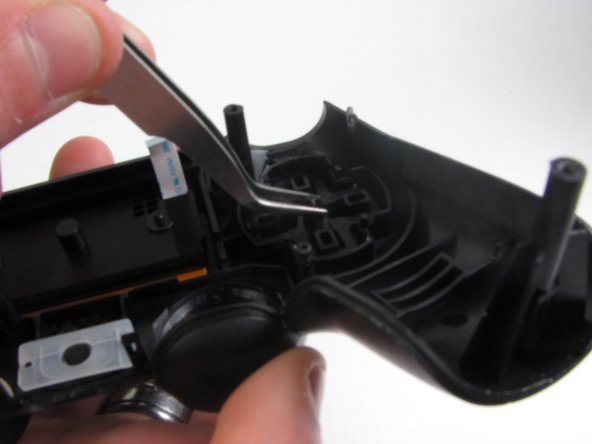
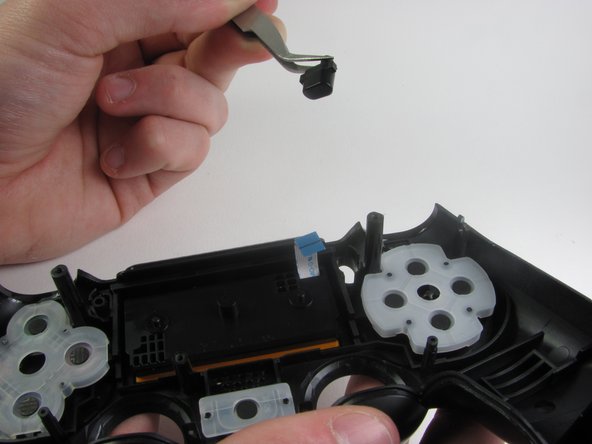
    • Remove the rubber covering concealing the buttons with your fingers.

    • Use the metal tweezers to then remove the button from its slot.

  11. DualShock 4 Buttons Replacement: paso 11, imagen 1 de 3 DualShock 4 Buttons Replacement: paso 11, imagen 2 de 3 DualShock 4 Buttons Replacement: paso 11, imagen 3 de 3
    • To remove the arrow key buttons, use the same process you used for the control buttons by removing the rubber cover and pulling the button out with metal tweezers.

  12. DualShock 4 Buttons Replacement: paso 12, imagen 1 de 2 DualShock 4 Buttons Replacement: paso 12, imagen 2 de 2
    • For the share and options buttons, use the metal tweezers to grasp and remove them.

  13. DualShock 4 Buttons Replacement: paso 13, imagen 1 de 2 DualShock 4 Buttons Replacement: paso 13, imagen 2 de 2
    • In order to remove the PS button on the controller, you must first remove the rubber cover with your fingers.

    • Then using the metal tweezers, remove the PS button.

Conclusión

To reassemble your device, follow these instructions in reverse order.

119 personas más completaron esta guía.

Mark

Miembro Desde 01/21/14

7,719 Reputación

7 Guías creadas

Equipo

Cal Poly, Team 6-21, Maness Winter 2014 Miembro de Cal Poly, Team 6-21, Maness Winter 2014

CPSU-MANESS-W14S6G21

4 Miembros

40 Guías creadas

23 comentarios

I pulled out my touch pad along with the motherboard when it was still attached how can I put this back in

Landen Nipper - Contestar

Pull out the ribbon the way the tutorial says and then you can place the touchpad back correctly. It needs to be put in from the inside of the controller, not the outside.

Luis Rodriguez -

where is how replace L2/R2? D=

ps4 - Contestar

This guide could be enhanced by showing the L1/L2, R1/R2 button cluster in some photos. I needed to replace the silicone grommet underneath the buttons due to Sony's design flaw of having R2/L2 press on the silicone with a blade shaped extension.

Joseph Bruni - Contestar

What to do If after cleaning some buttons no longer work? I was very careful when disassembling and reassembling the remote.

Amanda G Clark - Contestar

You might wanna make sure that flimsy plastic lining the buttons push is in its proper place. Sometimes it moves and if it doesn't line up just right it won't work.

Luis Rodriguez -

I took the "caveman" approach to this tutorial because I spilled soda near the controller and the circle button was sticky. It was an emergency operation done with a Phillips one size too large, a pocket knife for a spudger, and my cigar fingers for forceps. I must say, after some initial confusion, this tutorial helped me put it back together easily without breaking anything (a minor miracle all on its own). Thank for this.

Luis Rodriguez - Contestar

I need help. The up and right direction on the d-pad are not functioning. I took controller apart and made sure everything was clean and unfortunately did not fix problem. My question is has anyone else had this issue and if I buy a new silicon part for the d-pad will that fix it?

Borg914 - Contestar

My R2 button is constant being pressed. Even after I opened it and cleaned it. Please help me with this??

I connected it to pc and even removed the R2 button while checking for the buttons on pc,and button 8 (I.e R2 button on controller) shows as pressed all the time even when it's not there.

Obaid Haideri - Contestar

The “up" button on my d-pad has not been working recently so I followed the tutorial (helpful by the way), found no obvious problems, put it all back together, but the button still will not work. Any tips?

Fragasha - Contestar

Are the contacts lining up right? That might be the problem.

Luis Rodriguez -

how to clean the green circuit board because ps button is unresponsive? the true circuit button how to clean or repair it? cause mine is not responding in the motherboard assembly

ruzzyricor - Contestar

My vibration motor has fallen out and the wires are disconnected, how can I fix it?

Morris Vahla - Contestar

After I did this my right dpad button stopped functioning, is there a way to fix this?

maltamirano26 - Contestar

Where can I buy Grey Reset Button Extension

mcj0064 - Contestar

This is the original model. How about an update since there have been about 3 new assemblies and a new version of the DS4?

Eli Hanson - Contestar

Here is a solution to a broken R2 button. Really simple fix.

https://youtu.be/Lx3La8a169Q

Alex Manzano - Contestar

My PS4 is registering R2 button input without me pressing anything on the Dualshock 4. How can I fix it? This is only apparent when I play games… For example, when I play Spiderman where R2 is used for sprinting and web swinging, Spiderman will alternate between running and jogging, without me actually providing any kind of input via R2.

vinaymenon64 - Contestar

I have a triangle button sticking when i play a combat game it just happen the other day.

It seems stuck down in the controler it still work but it hard to press down when i need to use it.

What do you think the problem is?

jac02874 - Contestar

After reassembling the controller won’t connect to the ps4. It will connect to the iPhone though.. what can I do?

ren smith - Contestar

Le bouton carré ne fonctionne pas, que dois-je faire ?

adel25001 - Contestar

As of March 14, 2023, this guide has been updated! Comments regarding step procedures may no longer be relevant.

Clay Eickemeyer - Contestar

Agregar Comentario

Ver Estadísticas:

Ultimas 24 horas: 23

Ultimos 7 días: 213

Ultimos 30 días: 1,114

Todo El Tiempo: 256,376