Saltar al contenido principal

Dremel 7300 MiniMite Cordless Shaft Lock Assembly Replacement

Qué necesitas

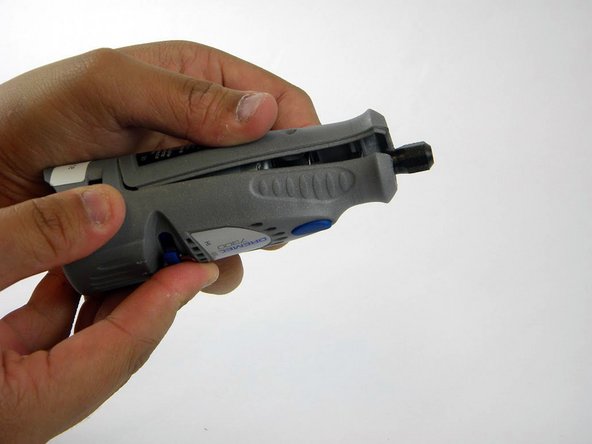
  1. Dremel 7300 MiniMite Cordless Shaft Lock Assembly Replacement, Battery: paso 1, imagen 1 de 3 Dremel 7300 MiniMite Cordless Shaft Lock Assembly Replacement, Battery: paso 1, imagen 2 de 3 Dremel 7300 MiniMite Cordless Shaft Lock Assembly Replacement, Battery: paso 1, imagen 3 de 3
    • Pull back on the release tabs to disconnect the battery pack from the housing.

    • When installing a new battery, you may need to charge it before using it.

  2. Dremel 7300 MiniMite Cordless Shaft Lock Assembly Replacement, Motor-Shaft Assembly: paso 2, imagen 1 de 3 Dremel 7300 MiniMite Cordless Shaft Lock Assembly Replacement, Motor-Shaft Assembly: paso 2, imagen 2 de 3 Dremel 7300 MiniMite Cordless Shaft Lock Assembly Replacement, Motor-Shaft Assembly: paso 2, imagen 3 de 3
    • Remove the two screws from the back of the device with the TR10 Torx Security screwdriver.

    • Make sure you have removed the battery before proceeding as accidentally powering-on the device while disassembling is dangerous due to the high-speed components inside.

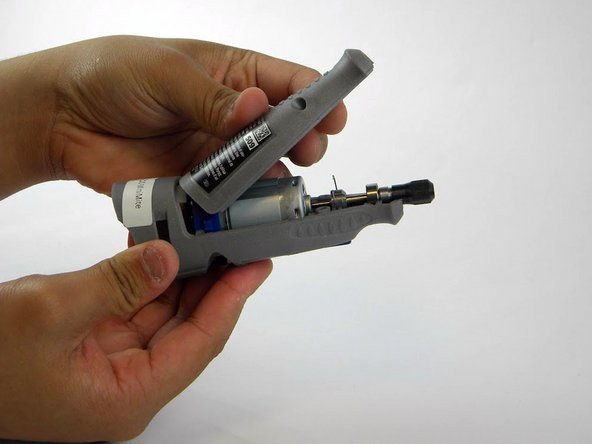
  3. Dremel 7300 MiniMite Cordless Shaft Lock Assembly Replacement: paso 3, imagen 1 de 3 Dremel 7300 MiniMite Cordless Shaft Lock Assembly Replacement: paso 3, imagen 2 de 3 Dremel 7300 MiniMite Cordless Shaft Lock Assembly Replacement: paso 3, imagen 3 de 3
    • Lift off the unscrewed plastic cover at an angle, away from the tip of the device.

    • Gently lift the cover. It won't take much force to remove it.

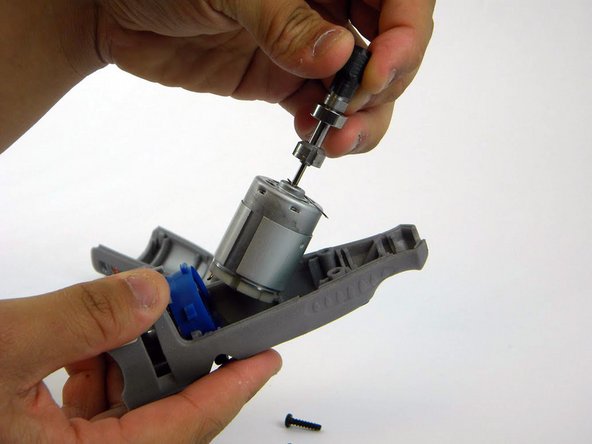
  4. Dremel 7300 MiniMite Cordless Shaft Lock Assembly Replacement: paso 4, imagen 1 de 3 Dremel 7300 MiniMite Cordless Shaft Lock Assembly Replacement: paso 4, imagen 2 de 3 Dremel 7300 MiniMite Cordless Shaft Lock Assembly Replacement: paso 4, imagen 3 de 3
    • Lift the tip of the motor-shaft assembly gently, then pull the assembly out.

    • The blue battery contact and the spring for the shaft lock button may pop out when you remove the motor-shaft assembly. Make sure to keep track of these pieces, as they are very small.

  5. Dremel 7300 MiniMite Cordless Shaft Lock Assembly Replacement, Shaft Lock Assembly: paso 5, imagen 1 de 1
    • There are two pieces that make up the shaft lock assembly:

    • The key.

    • The wire ring.

    • The key holds the wire ring in place, and the wire ring secures the motor shaft.

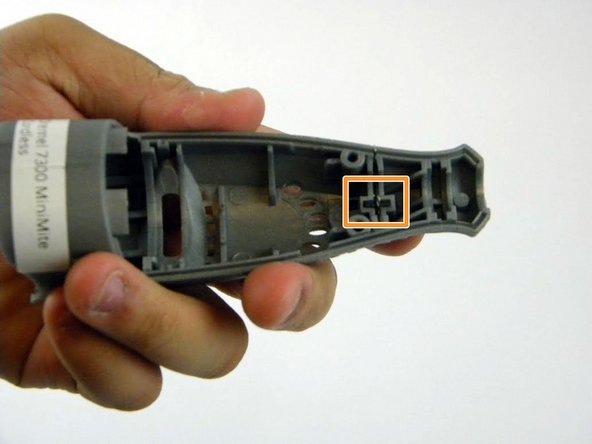
  6. Dremel 7300 MiniMite Cordless Shaft Lock Assembly Replacement: paso 6, imagen 1 de 3 Dremel 7300 MiniMite Cordless Shaft Lock Assembly Replacement: paso 6, imagen 2 de 3 Dremel 7300 MiniMite Cordless Shaft Lock Assembly Replacement: paso 6, imagen 3 de 3
    • Remove the wire ring from the device.

    • The wire ring may have come out when the motor-shaft assembly was removed.

    • Remove the key from its slot.

  7. Dremel 7300 MiniMite Cordless Shaft Lock Assembly Replacement: paso 7, imagen 1 de 2 Dremel 7300 MiniMite Cordless Shaft Lock Assembly Replacement: paso 7, imagen 2 de 2
    • Ensure that the shaft lock assembly fits together properly when reassembling the device.

    • The notch in the wire ring should fit on the key as pictured.

Conclusión

To reassemble your device, follow these instructions in reverse order.

3 personas más completaron esta guía.

Kat

Miembro Desde 02/10/16

840 Reputación

3 Guías creadas

Equipo

USF Tampa, Team 3-4, Sullivan Spring 2016 Miembro de USF Tampa, Team 3-4, Sullivan Spring 2016

USFT-SULLIVAN-S16S3G4

4 Miembros

4 Guías creadas

0 comentarios

Agregar Comentario

Ver Estadísticas:

Ultimas 24 horas: 0

Ultimos 7 días: 3

Ultimos 30 días: 15

Todo El Tiempo: 1,776