Saltar al contenido principal

Disconnecting Microphone from Motherboard

Qué necesitas

  1. Disconnecting Microphone from Motherboard, Front and Back Cover: paso 1, imagen 1 de 2 Disconnecting Microphone from Motherboard, Front and Back Cover: paso 1, imagen 2 de 2
    • Remove the two 8 mm Phillips #0 screws on the back cover.

    • The motherboard connects the two covers together. DO NOT separate the two yet.

    • There is a button that loosens as the Phillips screws are removed. Don't be alarmed if it falls out.

  2. Disconnecting Microphone from Motherboard: paso 2, imagen 1 de 2 Disconnecting Microphone from Motherboard: paso 2, imagen 2 de 2
    • Remove the four 6mm Phillips #0 screws connecting the motherboard and front cover.

    • DO NOT detach the wire connecting the motherboard to the front cover.

  3. Disconnecting Microphone from Motherboard, Microphone Connection: paso 3, imagen 1 de 2 Disconnecting Microphone from Motherboard, Microphone Connection: paso 3, imagen 2 de 2
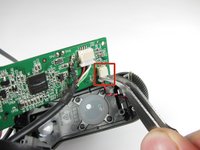
    • Grasp the white wire connector between the tabs and the socket.

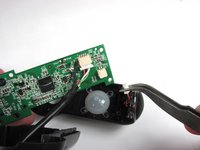
    • Wiggle the connector back and forth to remove the front cover from the motherboard.

Conclusión

To reassemble your device, follow these instructions in reverse order.

Equipo

Cal Poly, Team 12-34, Amido Spring 2013 Miembro de Cal Poly, Team 12-34, Amido Spring 2013

CPSU-AMIDO-S13S12G34

4 Miembros

16 Guías creadas

Un comentario

This guide doesn’t show a motherboard and is a copy of this other guide (for a webcam):

Logitech Webcam Pro 9000 Microphone Replacement

Maximilian Cohan - Contestar

Agregar Comentario

Ver Estadísticas:

Ultimas 24 horas: 3

Ultimos 7 días: 11

Ultimos 30 días: 15

Todo El Tiempo: 1,629