Saltar al contenido principal

Dewalt Nailers DCN660D1 2018 Driver Blade Replacement

Qué necesitas

  1. Dewalt Nailers DCN660D1 2018 Driver Blade Replacement, Remove the battery: paso 1, imagen 1 de 3 Dewalt Nailers DCN660D1 2018 Driver Blade Replacement, Remove the battery: paso 1, imagen 2 de 3 Dewalt Nailers DCN660D1 2018 Driver Blade Replacement, Remove the battery: paso 1, imagen 3 de 3
    • Before you begin the repair, remove the battery from the device.

  2. Dewalt Nailers DCN660D1 2018 Driver Blade Replacement, Loosen the outer housing: paso 2, imagen 1 de 1
    • Use a T10 driver to remove the ten screws securing the outer housing.

    • Some of these screws are deeply recessed. You can use a flathead screwdriver to loosen these screws.

  3. Dewalt Nailers DCN660D1 2018 Driver Blade Replacement, Remove the right housing: paso 3, imagen 1 de 2 Dewalt Nailers DCN660D1 2018 Driver Blade Replacement, Remove the right housing: paso 3, imagen 2 de 2
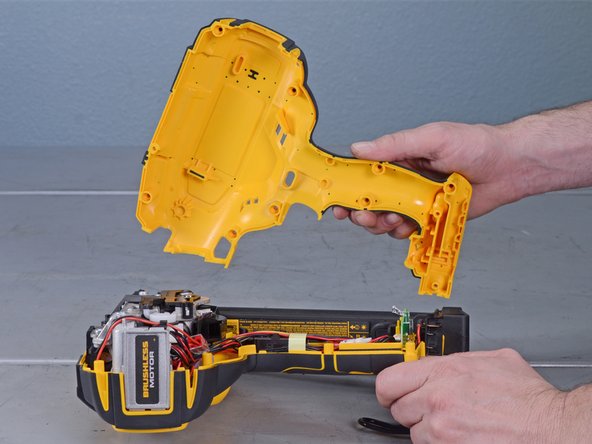
    • Lay the device on its left side (with the belt hook).

    • Lift and remove the right housing from the device.

  4. Dewalt Nailers DCN660D1 2018 Driver Blade Replacement, Loosen the internal parts: paso 4, imagen 1 de 2 Dewalt Nailers DCN660D1 2018 Driver Blade Replacement, Loosen the internal parts: paso 4, imagen 2 de 2
    • Remove the lock button from its recess.

    • During reassembly, make sure that the button is properly seated and engages the trigger.

  5. Dewalt Nailers DCN660D1 2018 Driver Blade Replacement: paso 5, imagen 1 de 2 Dewalt Nailers DCN660D1 2018 Driver Blade Replacement: paso 5, imagen 2 de 2
    • Slide the battery connector out of its recess.

  6. Dewalt Nailers DCN660D1 2018 Driver Blade Replacement: paso 6, imagen 1 de 3 Dewalt Nailers DCN660D1 2018 Driver Blade Replacement: paso 6, imagen 2 de 3 Dewalt Nailers DCN660D1 2018 Driver Blade Replacement: paso 6, imagen 3 de 3
    • Remove the switch board from its housing recess.

    • Remove the two spring clips from the housing.

  7. Dewalt Nailers DCN660D1 2018 Driver Blade Replacement, Reassembly tip: paso 7, imagen 1 de 3 Dewalt Nailers DCN660D1 2018 Driver Blade Replacement, Reassembly tip: paso 7, imagen 2 de 3 Dewalt Nailers DCN660D1 2018 Driver Blade Replacement, Reassembly tip: paso 7, imagen 3 de 3
    • During reassembly, use these photos to help you align all the loose parts back into the housing.

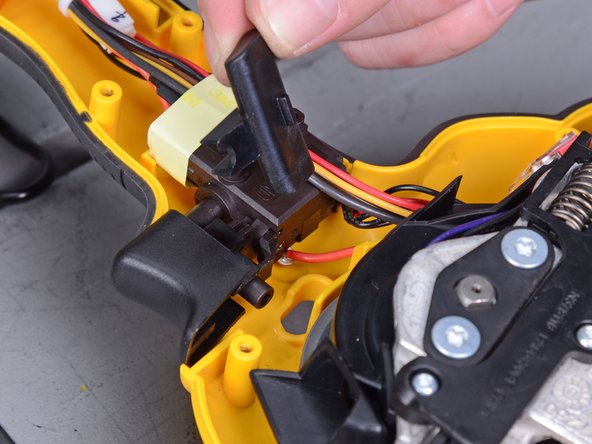
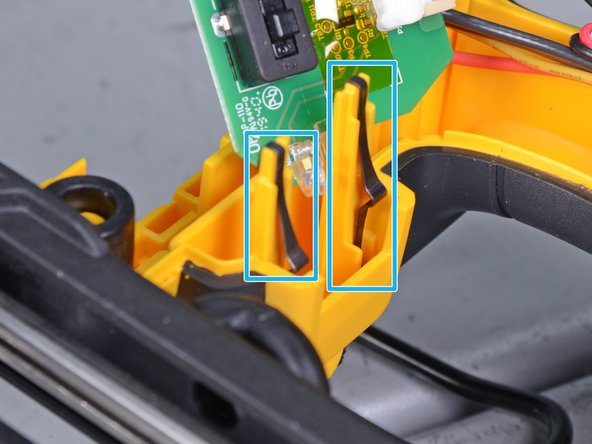
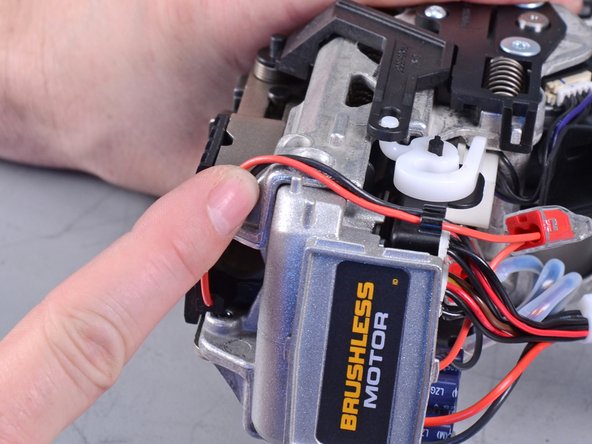
    • Be sure to route the wires through the yellow groove.

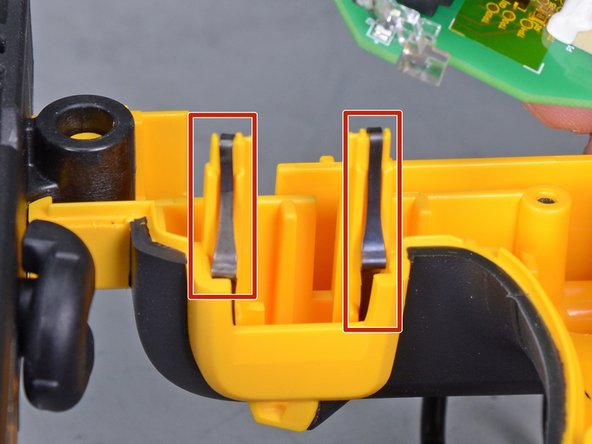
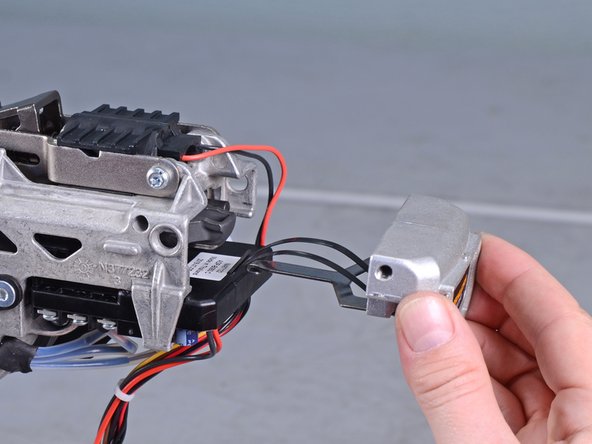
    • Be sure to reattach the spring clips.

  8. Dewalt Nailers DCN660D1 2018 Driver Blade Replacement, Remove the left housing: paso 8, imagen 1 de 3 Dewalt Nailers DCN660D1 2018 Driver Blade Replacement, Remove the left housing: paso 8, imagen 2 de 3 Dewalt Nailers DCN660D1 2018 Driver Blade Replacement, Remove the left housing: paso 8, imagen 3 de 3
    • Carefully flip the device over.

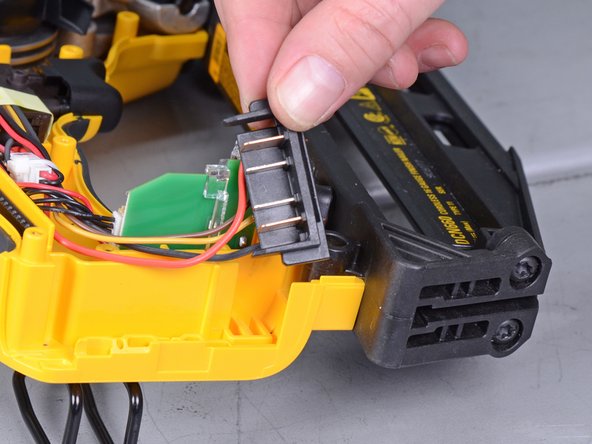
    • Remove the left housing from the device.

  9. Dewalt Nailers DCN660D1 2018 Driver Blade Replacement: paso 9, imagen 1 de 3 Dewalt Nailers DCN660D1 2018 Driver Blade Replacement: paso 9, imagen 2 de 3 Dewalt Nailers DCN660D1 2018 Driver Blade Replacement: paso 9, imagen 3 de 3
    • The spring under the release button has a tendency to fly out. Be careful not to lose the spring.

    • Carefully remove the release button from the device.

    • Remove the button spring from the device.

  10. Dewalt Nailers DCN660D1 2018 Driver Blade Replacement, Remove the back support: paso 10, imagen 1 de 2 Dewalt Nailers DCN660D1 2018 Driver Blade Replacement, Remove the back support: paso 10, imagen 2 de 2
    • Use a T25 driver to remove the two screws (one on either side) securing the back support .

  11. Dewalt Nailers DCN660D1 2018 Driver Blade Replacement: paso 11, imagen 1 de 2 Dewalt Nailers DCN660D1 2018 Driver Blade Replacement: paso 11, imagen 2 de 2
    • Loosen the two solenoid wires from the back support.

  12. Dewalt Nailers DCN660D1 2018 Driver Blade Replacement: paso 12, imagen 1 de 2 Dewalt Nailers DCN660D1 2018 Driver Blade Replacement: paso 12, imagen 2 de 2
    • Pull the back support straight out of the device.

  13. Dewalt Nailers DCN660D1 2018 Driver Blade Replacement, Remove the driver assembly: paso 13, imagen 1 de 3 Dewalt Nailers DCN660D1 2018 Driver Blade Replacement, Remove the driver assembly: paso 13, imagen 2 de 3 Dewalt Nailers DCN660D1 2018 Driver Blade Replacement, Remove the driver assembly: paso 13, imagen 3 de 3
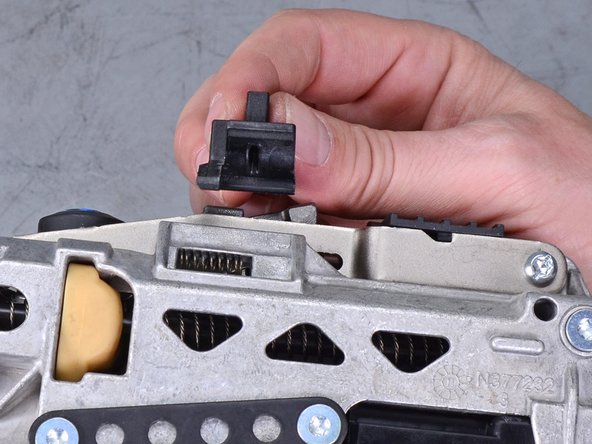
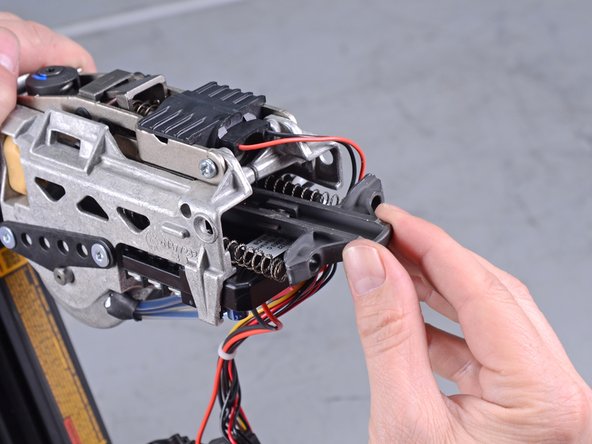
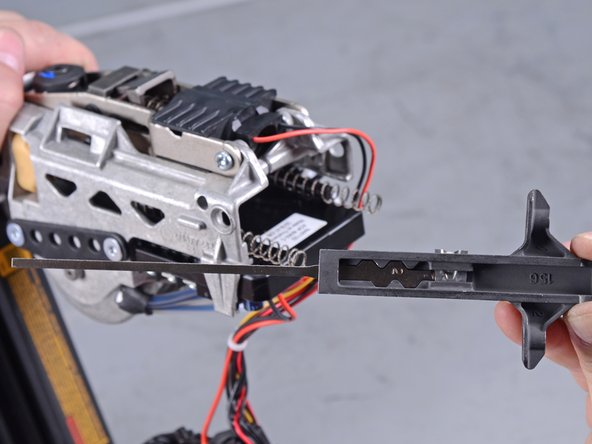
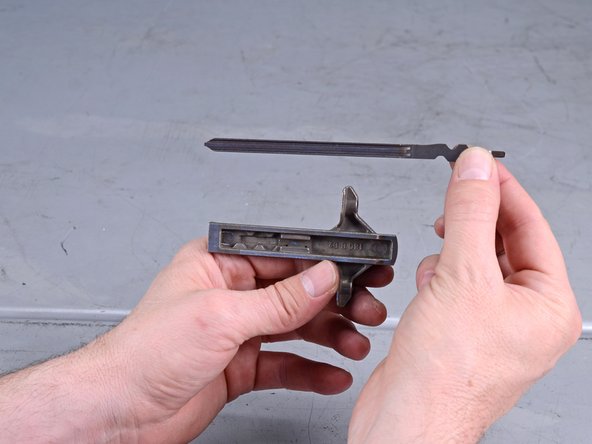
    • Grasp the driver assembly by its back and pull it straight out of the device.

    • If you are having trouble pulling the driver assembly out, proceed to the next step.

  14. Dewalt Nailers DCN660D1 2018 Driver Blade Replacement: paso 14, imagen 1 de 2 Dewalt Nailers DCN660D1 2018 Driver Blade Replacement: paso 14, imagen 2 de 2
    • If you have trouble pulling the driver assembly out:

    • Insert a flathead screwdriver into the casing seam above the driver assembly.

    • Slightly pry the housing apart to widen the space for the driver assembly to slide out.

  15. Dewalt Nailers DCN660D1 2018 Driver Blade Replacement, Remove the blade: paso 15, imagen 1 de 3 Dewalt Nailers DCN660D1 2018 Driver Blade Replacement, Remove the blade: paso 15, imagen 2 de 3 Dewalt Nailers DCN660D1 2018 Driver Blade Replacement, Remove the blade: paso 15, imagen 3 de 3
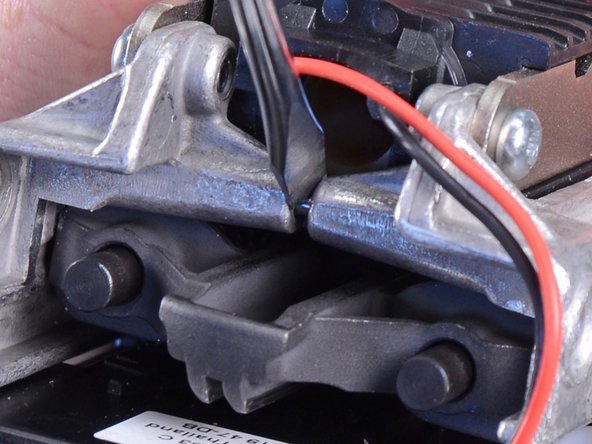
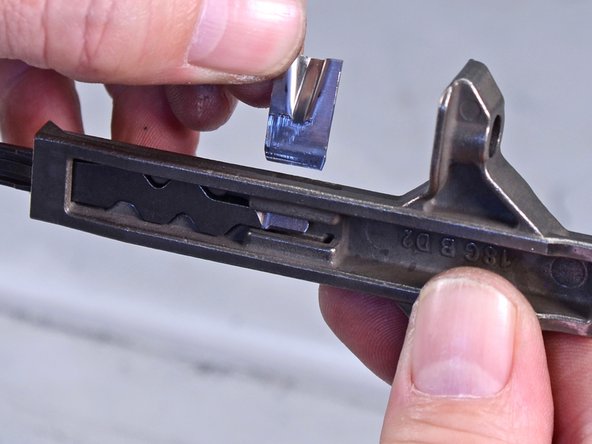
    • Use pliers or a flathead screwdriver to straighten the retaining clip securing the blade.

  16. Dewalt Nailers DCN660D1 2018 Driver Blade Replacement: paso 16, imagen 1 de 2 Dewalt Nailers DCN660D1 2018 Driver Blade Replacement: paso 16, imagen 2 de 2
    • Remove the retaining clip from the driver assembly.

  17. Dewalt Nailers DCN660D1 2018 Driver Blade Replacement: paso 17, imagen 1 de 3 Dewalt Nailers DCN660D1 2018 Driver Blade Replacement: paso 17, imagen 2 de 3 Dewalt Nailers DCN660D1 2018 Driver Blade Replacement: paso 17, imagen 3 de 3
    • Slide the blade out of the driver assembly's slot, and remove it from the assembly.

  18. Dewalt Nailers DCN660D1 2018 Driver Blade Replacement, Install a replacement blade: paso 18, imagen 1 de 3 Dewalt Nailers DCN660D1 2018 Driver Blade Replacement, Install a replacement blade: paso 18, imagen 2 de 3 Dewalt Nailers DCN660D1 2018 Driver Blade Replacement, Install a replacement blade: paso 18, imagen 3 de 3
    • The next two steps show how to install a replacement blade into the driver assembly.

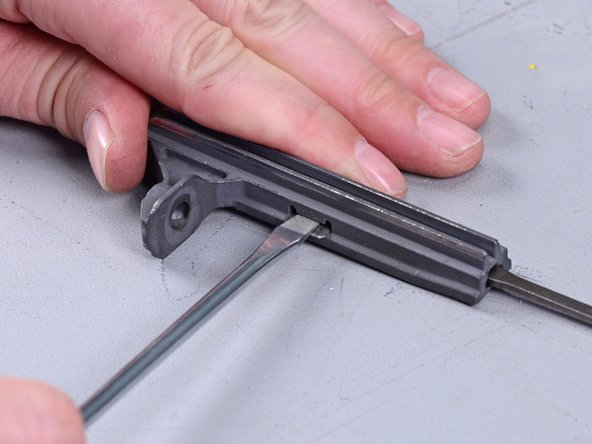
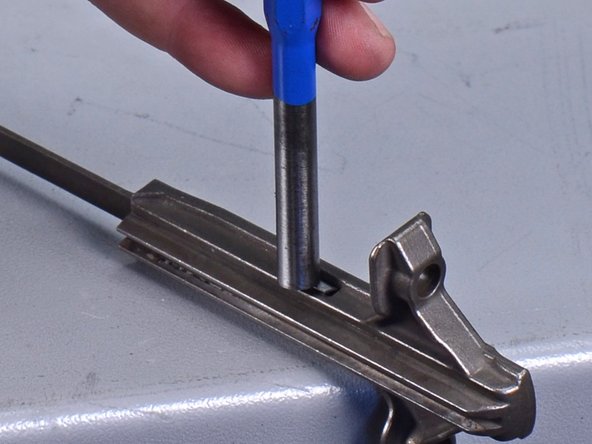
    • Slide the blade through the slot in the driver assembly and set it into the wavy groove.

    • If the blade does not sit snugly in the groove, flip the blade over and try again.

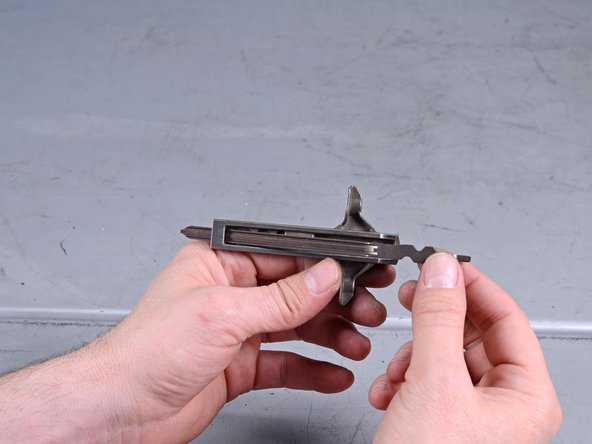
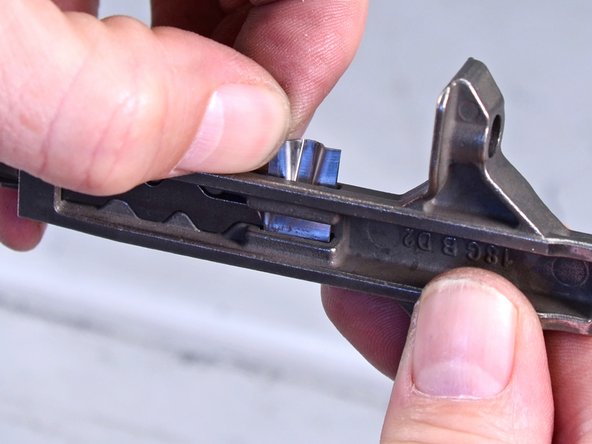
    • Insert the retaining clip oriented as shown in the photos into the driver assembly.

  19. Dewalt Nailers DCN660D1 2018 Driver Blade Replacement: paso 19, imagen 1 de 2 Dewalt Nailers DCN660D1 2018 Driver Blade Replacement: paso 19, imagen 2 de 2
    • Use pliers or a hammer and punch to bend the protruding end of the clip over in order to secure the blade.

Conclusión

To reassemble your device, follow these instructions in reverse order.

3 personas más completaron esta guía.

Arthur Shi

Miembro Desde 01/03/18

256,469 Reputación

529 Guías creadas

Equipo

iFixit Miembro de iFixit

Staff

140 Miembros

17,685 Guías creadas

3 comentarios

This is helpful, should any oil be used during reassembly of the driver unit? Thanks.

John Andersen - Contestar

Thanks! That was very clear and concise. Nail gun resurrected :)

Khan - Contestar

Thanks for this guide! I was able to get it apart and diagnose the problem on my own, but %#*@ if I could have got it back together without this. Nail gun saved!

Dang Warden - Contestar

Agregar Comentario

Ver Estadísticas:

Ultimas 24 horas: 1

Ultimos 7 días: 3

Ultimos 30 días: 41

Todo El Tiempo: 3,281