Saltar al contenido principal

Dewalt Nailers DCN21PL 2018 Solenoid Assembly Replacement

Qué necesitas

  1. Dewalt Nailers DCN21PL 2018 Solenoid Assembly Replacement, Remove the battery: paso 1, imagen 1 de 2 Dewalt Nailers DCN21PL 2018 Solenoid Assembly Replacement, Remove the battery: paso 1, imagen 2 de 2
    • Before you begin the repair, remove the battery from the device.

  2. Dewalt Nailers DCN21PL 2018 Solenoid Assembly Replacement, Remove casing screws: paso 2, imagen 1 de 2 Dewalt Nailers DCN21PL 2018 Solenoid Assembly Replacement, Remove casing screws: paso 2, imagen 2 de 2
    • Use a T10 driver to remove the four screws securing the bottom half of the casing.

    • Remove the four T10 screws securing the top half of the casing.

  3. Dewalt Nailers DCN21PL 2018 Solenoid Assembly Replacement, Remove the magazine: paso 3, imagen 1 de 1
    • Use a T10 driver to remove the screw securing the magazine to the base.

  4. Dewalt Nailers DCN21PL 2018 Solenoid Assembly Replacement: paso 4, imagen 1 de 2 Dewalt Nailers DCN21PL 2018 Solenoid Assembly Replacement: paso 4, imagen 2 de 2
    • Pull the magazine down and away to unlatch and release it from the nailer.

  5. Dewalt Nailers DCN21PL 2018 Solenoid Assembly Replacement, Remove framing hook: paso 5, imagen 1 de 3 Dewalt Nailers DCN21PL 2018 Solenoid Assembly Replacement, Remove framing hook: paso 5, imagen 2 de 3 Dewalt Nailers DCN21PL 2018 Solenoid Assembly Replacement, Remove framing hook: paso 5, imagen 3 de 3
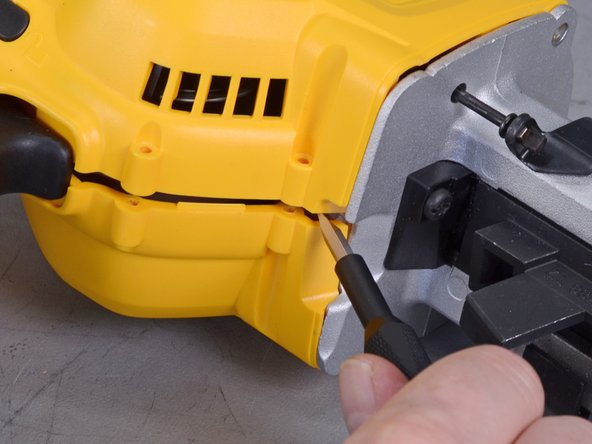
    • Use a T15 driver to remove the framing hook retaining screw.

    • Remove the hook.

  6. Dewalt Nailers DCN21PL 2018 Solenoid Assembly Replacement, Remove hook clamp: paso 6, imagen 1 de 1
    • This step may require a lot of force.

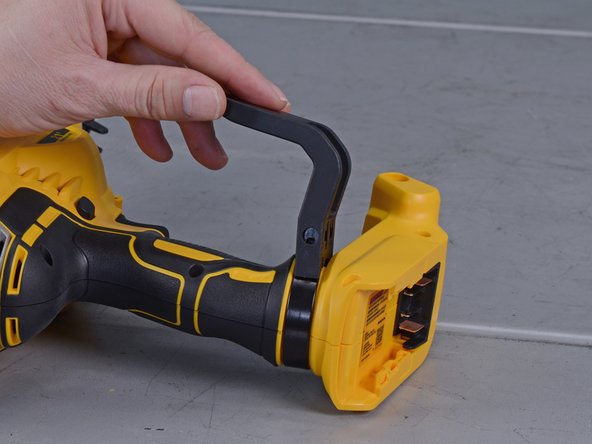
    • Use your two thumbs to firmly spread the metal hook clamp apart while slowly pushing it forward off the handle.

    • When this clamp is being removed, it has a tendency to launch off of the handle after you release tension.

  7. Dewalt Nailers DCN21PL 2018 Solenoid Assembly Replacement: paso 7, imagen 1 de 2 Dewalt Nailers DCN21PL 2018 Solenoid Assembly Replacement: paso 7, imagen 2 de 2
    • Use a sharp blade to slice the label underneath the battery mount to disconnect the two halves of the case.

    • Always cut away from you or others around you.

  8. Dewalt Nailers DCN21PL 2018 Solenoid Assembly Replacement: paso 8, imagen 1 de 1
    • Use a T20 driver to remove the two screws securing the two halves of the case to the front assembly.

  9. Dewalt Nailers DCN21PL 2018 Solenoid Assembly Replacement, Remove return system: paso 9, imagen 1 de 2 Dewalt Nailers DCN21PL 2018 Solenoid Assembly Replacement, Remove return system: paso 9, imagen 2 de 2
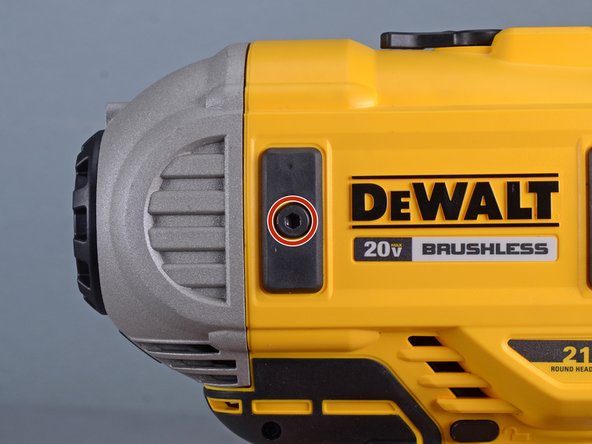
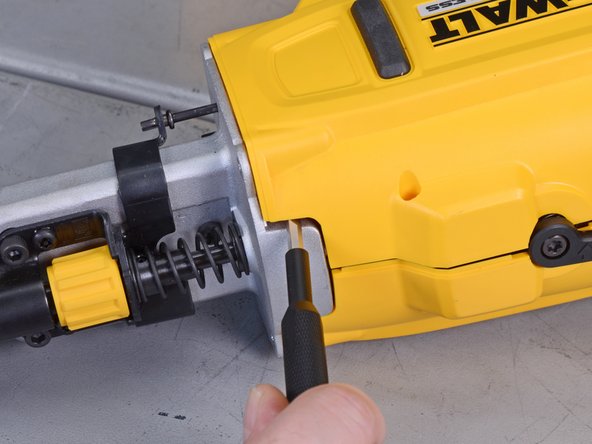
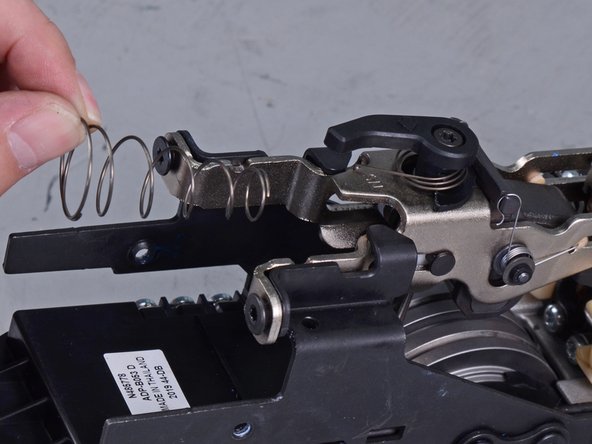
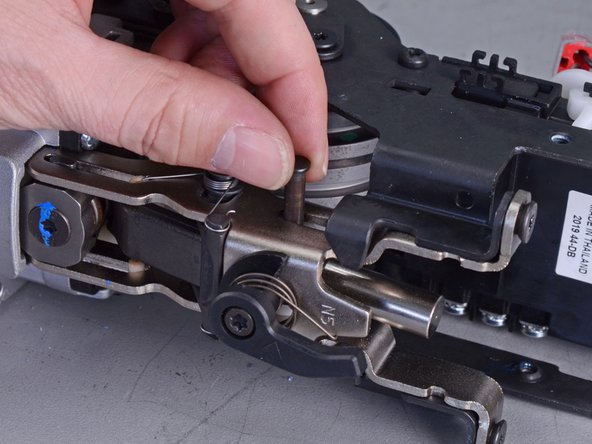
    • Use the provided 3.5 mm hex key to remove the two return system bolts on either side of the nailer.

  10. Dewalt Nailers DCN21PL 2018 Solenoid Assembly Replacement: paso 10, imagen 1 de 3 Dewalt Nailers DCN21PL 2018 Solenoid Assembly Replacement: paso 10, imagen 2 de 3 Dewalt Nailers DCN21PL 2018 Solenoid Assembly Replacement: paso 10, imagen 3 de 3
    • Grab the end cap and slide the return system assembly out of the back of the nailer to remove it.

  11. Dewalt Nailers DCN21PL 2018 Solenoid Assembly Replacement: paso 11, imagen 1 de 2 Dewalt Nailers DCN21PL 2018 Solenoid Assembly Replacement: paso 11, imagen 2 de 2
    • Use a small flathead screwdriver in the gap between the two halves of the casing near the trigger to pry the two halves apart.

  12. Dewalt Nailers DCN21PL 2018 Solenoid Assembly Replacement: paso 12, imagen 1 de 2 Dewalt Nailers DCN21PL 2018 Solenoid Assembly Replacement: paso 12, imagen 2 de 2
    • Use a small flathead screwdriver near the top seam to continue prying the case apart .

  13. Dewalt Nailers DCN21PL 2018 Solenoid Assembly Replacement, Remove right half of case: paso 13, imagen 1 de 2 Dewalt Nailers DCN21PL 2018 Solenoid Assembly Replacement, Remove right half of case: paso 13, imagen 2 de 2
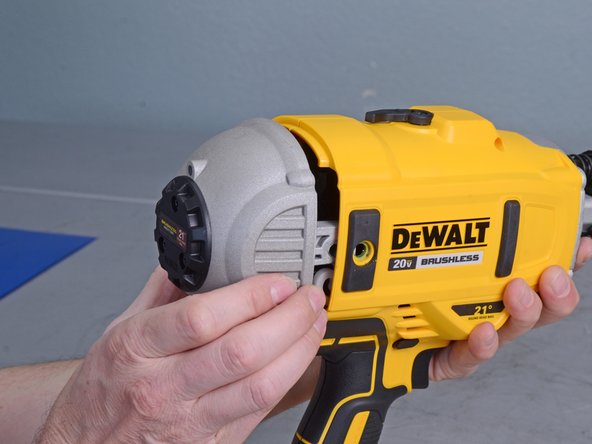
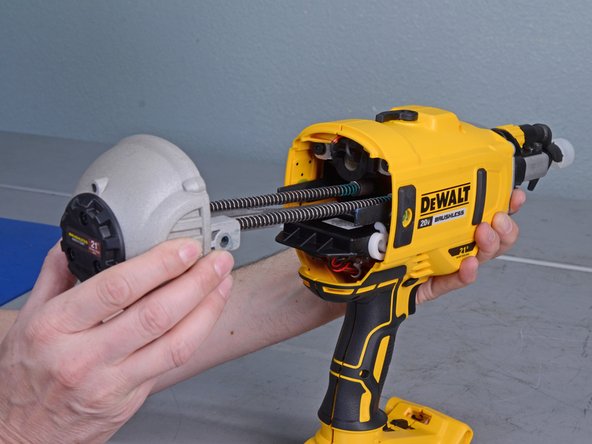
    • Once loose, lift up to remove the right half of the clamshell case.

  14. Dewalt Nailers DCN21PL 2018 Solenoid Assembly Replacement, Remove lens cover: paso 14, imagen 1 de 2 Dewalt Nailers DCN21PL 2018 Solenoid Assembly Replacement, Remove lens cover: paso 14, imagen 2 de 2
    • Remove the plastic lens cover.

  15. Dewalt Nailers DCN21PL 2018 Solenoid Assembly Replacement, Remove board and switches: paso 15, imagen 1 de 3 Dewalt Nailers DCN21PL 2018 Solenoid Assembly Replacement, Remove board and switches: paso 15, imagen 2 de 3 Dewalt Nailers DCN21PL 2018 Solenoid Assembly Replacement, Remove board and switches: paso 15, imagen 3 de 3
    • The two switches and four detent springs are only held in place by the plastic casing, so they may fall out when you remove the board—this is fine.

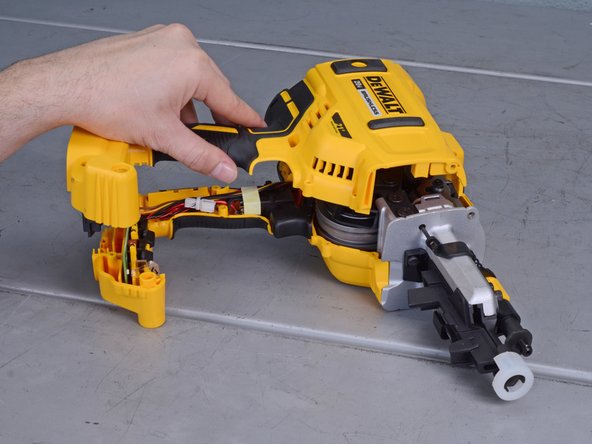
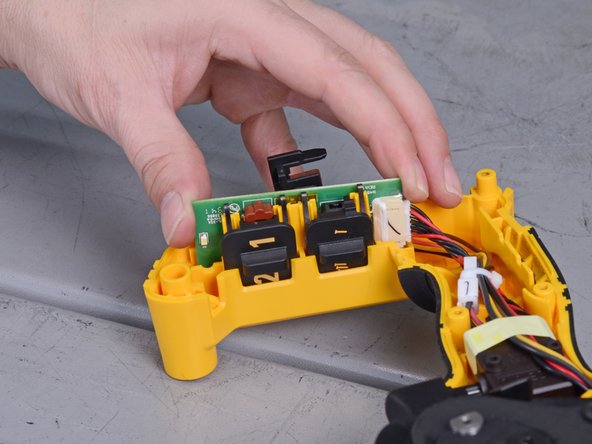
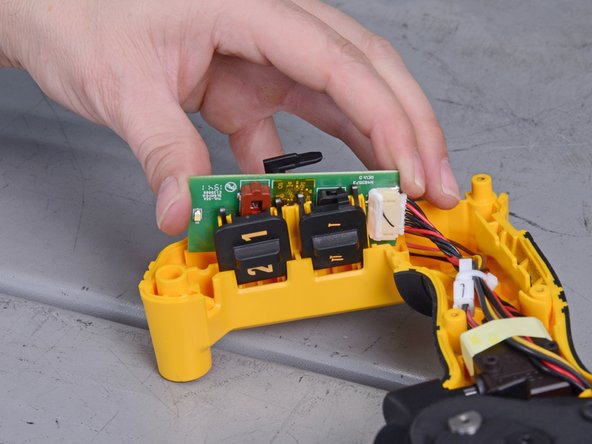
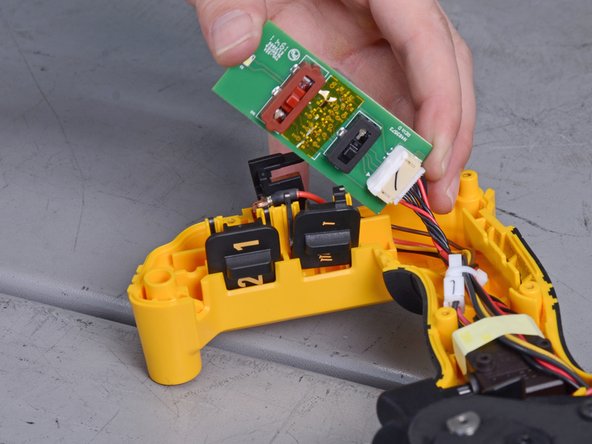
    • Grasp either side of the main circuit board and slowly pull it up and out of the slot in the casing.

    • Reassembly tip: note the correct location and orientation of the two switches and their detent springs.

  16. Dewalt Nailers DCN21PL 2018 Solenoid Assembly Replacement, Remove trigger lock: paso 16, imagen 1 de 2 Dewalt Nailers DCN21PL 2018 Solenoid Assembly Replacement, Remove trigger lock: paso 16, imagen 2 de 2
    • Pull up on the trigger lock to remove.

  17. Dewalt Nailers DCN21PL 2018 Solenoid Assembly Replacement, Remove left half of case: paso 17, imagen 1 de 2 Dewalt Nailers DCN21PL 2018 Solenoid Assembly Replacement, Remove left half of case: paso 17, imagen 2 de 2
    • Flip the nailer over.

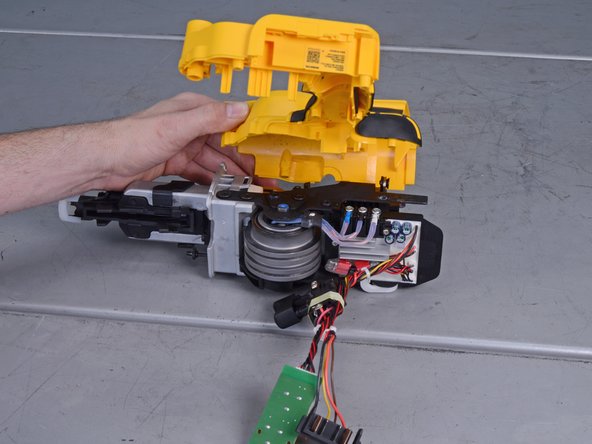
    • Remove the remaining clamshell casing.

  18. Dewalt Nailers DCN21PL 2018 Solenoid Assembly Replacement, Remove solenoid wires: paso 18, imagen 1 de 2 Dewalt Nailers DCN21PL 2018 Solenoid Assembly Replacement, Remove solenoid wires: paso 18, imagen 2 de 2
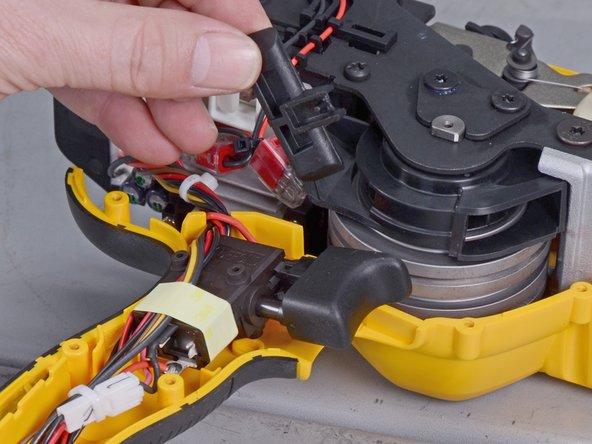
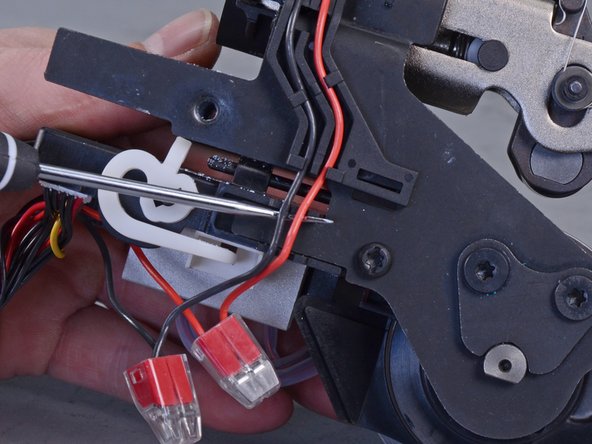
    • Carefully use a pick tool to release the black and red wires from their routing guide on the nailer.

  19. Dewalt Nailers DCN21PL 2018 Solenoid Assembly Replacement: paso 19, imagen 1 de 2 Dewalt Nailers DCN21PL 2018 Solenoid Assembly Replacement: paso 19, imagen 2 de 2
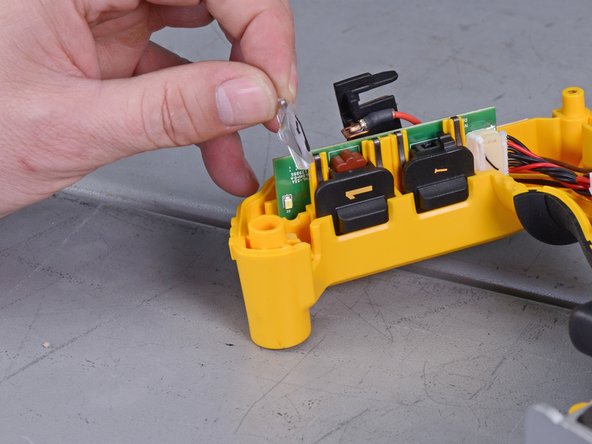
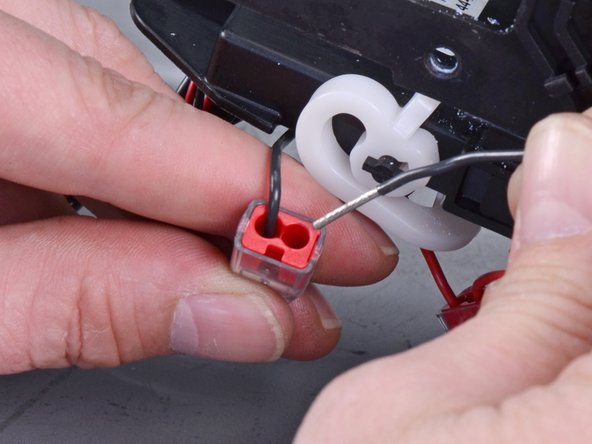
    • Insert the point of a pick tool into the push-in connector's inlet hole, which has the solenoid wire plugged into it.

    • With the pick tool still inserted, pull the red solenoid wire out of the push-in connector.

    • Make sure you choose the inlet that connects to the solenoid, not the main board.

    • Repeat this same process for the black wire and other push-in connector.

    • Fully remove both wires from the wire guide.

  20. Dewalt Nailers DCN21PL 2018 Solenoid Assembly Replacement, Remove wire guide: paso 20, imagen 1 de 3 Dewalt Nailers DCN21PL 2018 Solenoid Assembly Replacement, Remove wire guide: paso 20, imagen 2 de 3 Dewalt Nailers DCN21PL 2018 Solenoid Assembly Replacement, Remove wire guide: paso 20, imagen 3 de 3
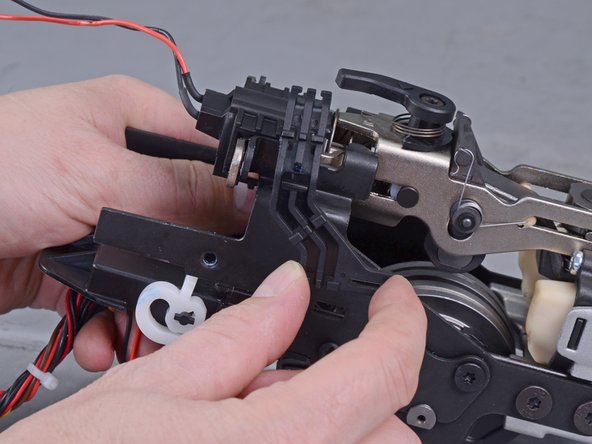
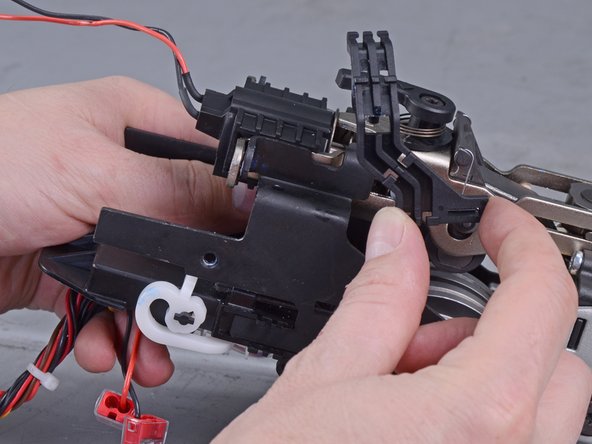
    • Pull out and up on the plastic wire guide to disconnect it from its clips.

    • Detach and remove the wire guide.

  21. Dewalt Nailers DCN21PL 2018 Solenoid Assembly Replacement, Remove solenoid body: paso 21, imagen 1 de 2 Dewalt Nailers DCN21PL 2018 Solenoid Assembly Replacement, Remove solenoid body: paso 21, imagen 2 de 2
    • This step may require a lot of force, as the solenoid is secured by a pressure fit.

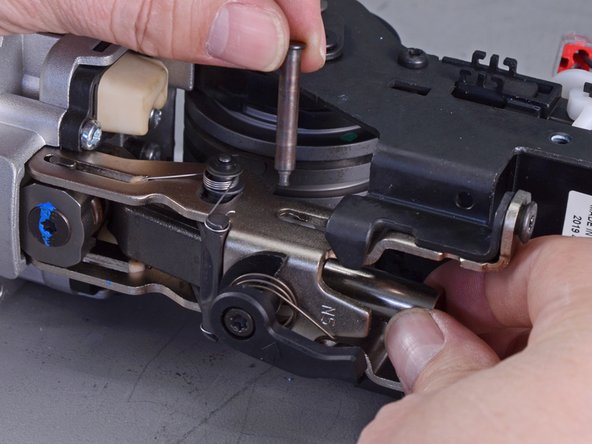
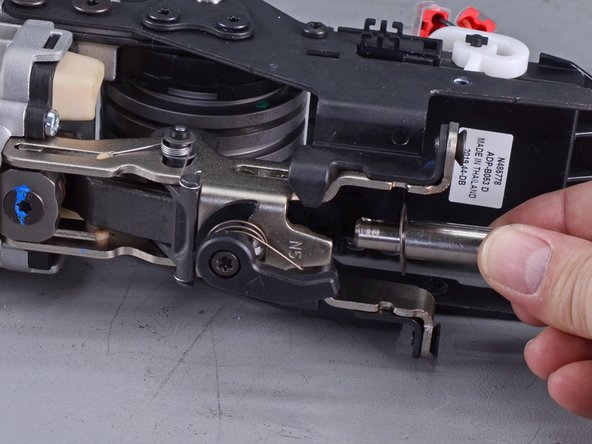
    • Pull directly back on the solenoid to remove it from the mount. You may have to "walk" the solenoid back and forth to slowly loosen it from the slots holding it in place.

  22. Dewalt Nailers DCN21PL 2018 Solenoid Assembly Replacement, Remove solenoid assembly components: paso 22, imagen 1 de 2 Dewalt Nailers DCN21PL 2018 Solenoid Assembly Replacement, Remove solenoid assembly components: paso 22, imagen 2 de 2
    • Remove the solenoid pin spring.

  23. Dewalt Nailers DCN21PL 2018 Solenoid Assembly Replacement: paso 23, imagen 1 de 2 Dewalt Nailers DCN21PL 2018 Solenoid Assembly Replacement: paso 23, imagen 2 de 2
    • Use as small flat head screwdriver to pry the rubber washer off the retaining pin.

  24. Dewalt Nailers DCN21PL 2018 Solenoid Assembly Replacement: paso 24, imagen 1 de 2 Dewalt Nailers DCN21PL 2018 Solenoid Assembly Replacement: paso 24, imagen 2 de 2
    • Remove the rubber washer from the retaining pin.

    • Remove the metal washer.

  25. Dewalt Nailers DCN21PL 2018 Solenoid Assembly Replacement: paso 25, imagen 1 de 3 Dewalt Nailers DCN21PL 2018 Solenoid Assembly Replacement: paso 25, imagen 2 de 3 Dewalt Nailers DCN21PL 2018 Solenoid Assembly Replacement: paso 25, imagen 3 de 3
    • Lay the nailer on its side with the flat side of the pin facing up. Pull the retaining pin directly up out of the slot to remove.

    • Use your opposite hand to hold the main solenoid plunger to prevent it from falling.

  26. Dewalt Nailers DCN21PL 2018 Solenoid Assembly Replacement: paso 26, imagen 1 de 2 Dewalt Nailers DCN21PL 2018 Solenoid Assembly Replacement: paso 26, imagen 2 de 2
    • Remove the solenoid plunger and small solenoid washer.

Conclusión

To reassemble your device, follow these instructions in reverse order.

Carsten Frauenheim

Miembro Desde 03/10/20

116,243 Reputación

339 Guías creadas

Equipo

iFixit Miembro de iFixit

Staff

137 Miembros

17,524 Guías creadas

0 comentarios

Agregar Comentario

Ver Estadísticas:

Ultimas 24 horas: 0

Ultimos 7 días: 3

Ultimos 30 días: 17

Todo El Tiempo: 924