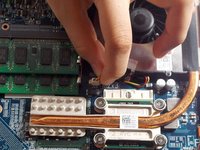
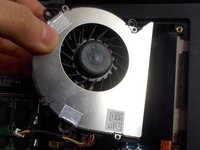
Saltar al contenido principal

Dell Vostro 1710 Heatsink Replacement

Qué necesitas

  1. Dell Vostro 1710 Heatsink Replacement, Battery: paso 1, imagen 1 de 2 Dell Vostro 1710 Heatsink Replacement, Battery: paso 1, imagen 2 de 2
    • Make certain that the power to your laptop is off.

    • Press and slide the two buttons outwards and away from the battery.

  2. Dell Vostro 1710 Heatsink Replacement: paso 2, imagen 1 de 1
    • Slide the battery away and parallel from the laptop.

  3. Dell Vostro 1710 Heatsink Replacement: paso 3, imagen 1 de 1
    • Remove the battery from the slot.

  4. Dell Vostro 1710 Heatsink Replacement, Back Panel: paso 4, imagen 1 de 2 Dell Vostro 1710 Heatsink Replacement, Back Panel: paso 4, imagen 2 de 2
    • Unscrew the eight 6mm screws with a Philips #1 screw driver.

  5. Dell Vostro 1710 Heatsink Replacement: paso 5, imagen 1 de 1
    • Lift back cover from the groove on the left side of the cover next to the symbol.

  6. Dell Vostro 1710 Heatsink Replacement, Fan: paso 6, imagen 1 de 2 Dell Vostro 1710 Heatsink Replacement, Fan: paso 6, imagen 2 de 2
    • Unclip the power supply by pulling the cable directly up and out of the socket.

  7. Dell Vostro 1710 Heatsink Replacement: paso 7, imagen 1 de 2 Dell Vostro 1710 Heatsink Replacement: paso 7, imagen 2 de 2
    • Remove the two 3mm screws located around the edge of the fan with a Philips #1 screw driver.

  8. Dell Vostro 1710 Heatsink Replacement: paso 8, imagen 1 de 2 Dell Vostro 1710 Heatsink Replacement: paso 8, imagen 2 de 2
    • Gently lift and pull to the left until the fan is free from the heatsink.

  9. Dell Vostro 1710 Heatsink Replacement, Heatsink: paso 9, imagen 1 de 2 Dell Vostro 1710 Heatsink Replacement, Heatsink: paso 9, imagen 2 de 2
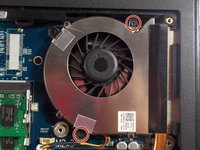
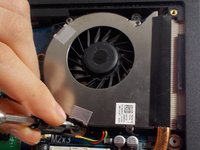
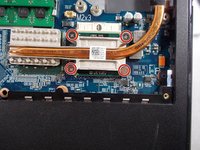
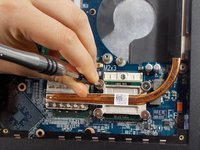
    • Unscrew the four 8mm screws using a Phillips #1 screwdriver until the heatsink is free.

    • The screws do not come out, only loosen.

  10. Dell Vostro 1710 Heatsink Replacement: paso 10, imagen 1 de 2 Dell Vostro 1710 Heatsink Replacement: paso 10, imagen 2 de 2
    • Lift up on the heatsink to remove it from the laptop.

Conclusión

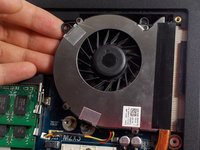
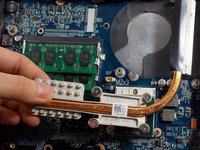
To reassemble your device, follow these instructions in reverse order.

Una persona más ha completado esta guía.

Tangxiao Sun

Miembro Desde 03/19/18

496 Reputación

4 Guías creadas

Equipo

0 comentarios

Agregar Comentario

Ver Estadísticas:

Ultimas 24 horas: 0

Ultimos 7 días: 4

Ultimos 30 días: 11

Todo El Tiempo: 273