Esta versión puede contener ediciones incorrectas. Cambie a la última instantánea verificada.
Qué necesitas
-
Este paso está sin traducir. Ayuda a traducirlo
-
Lay the laptop flat with the screen facing upward. This will allow you to have the most room while performing the keyboard replacement.
-
-
Este paso está sin traducir. Ayuda a traducirlo
-
Identify the plastic cover located directly below the screen.
-
Carefully remove the plastic cover by lifting both ends of the cover.
-
-
-
Este paso está sin traducir. Ayuda a traducirlo
-
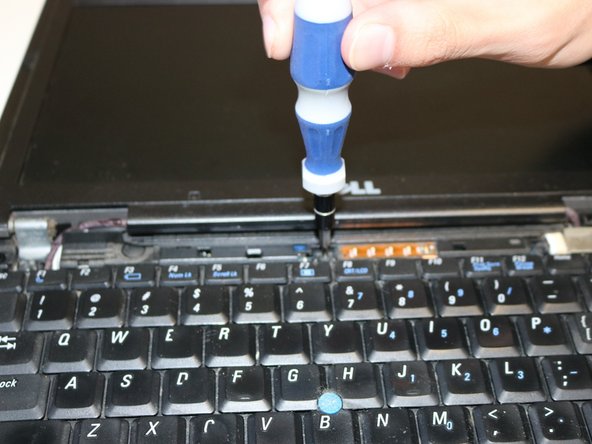
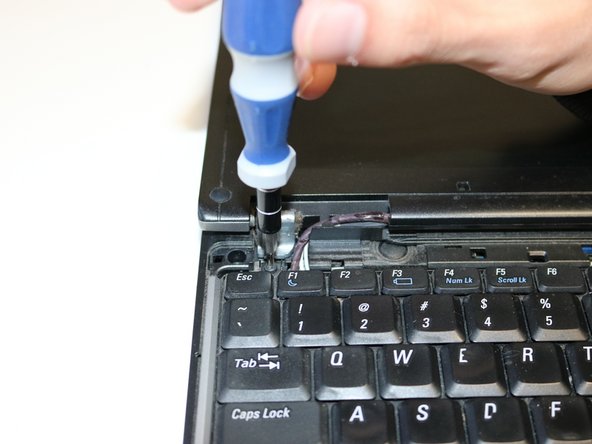
There are 3 screws that should be exposed now.
-
Use a Phillips 00 screwdriver to remove all 3 of the screws shown in the pictures.
-
-
Este paso está sin traducir. Ayuda a traducirlo
-
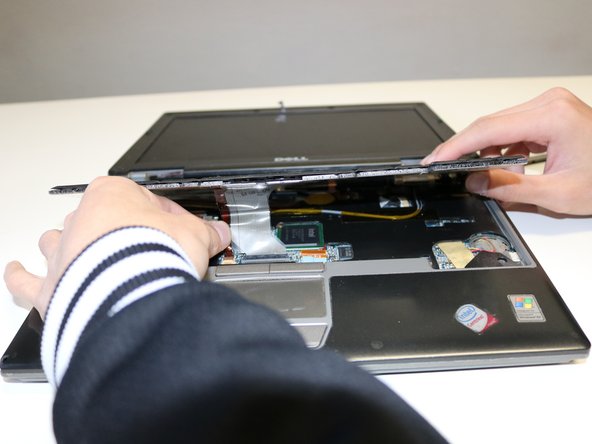
Gently lift the keyboard from the top.
-
At the bottom of the keyboard, there will be ribbons connecting it to the motherboard. Be sure not to tear the ribbons.
-
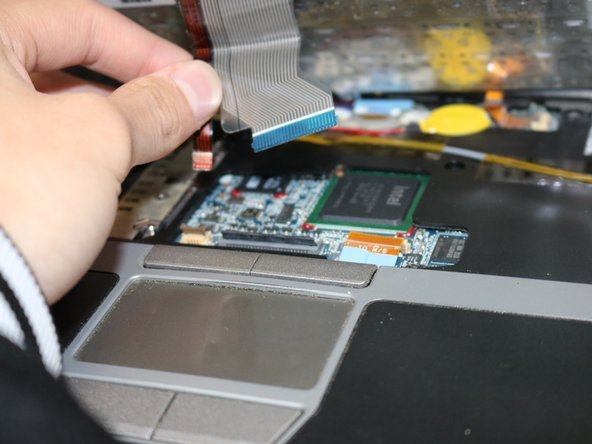
Lift the clamps that are holding the ribbons in place in order to remove them. You should be able to remove the keyboard at this point.
-


Cancelar: No complete esta guía.
Una persona más ha completado esta guía.
Equipo

University of North Texas, Team S2-G1, Riccardelli Fall 2018 Miembro de University of North Texas, Team S2-G1, Riccardelli Fall 2018
UNT-RICCARDELLI-F18S2G1
3 Miembros
4 Guías creadas