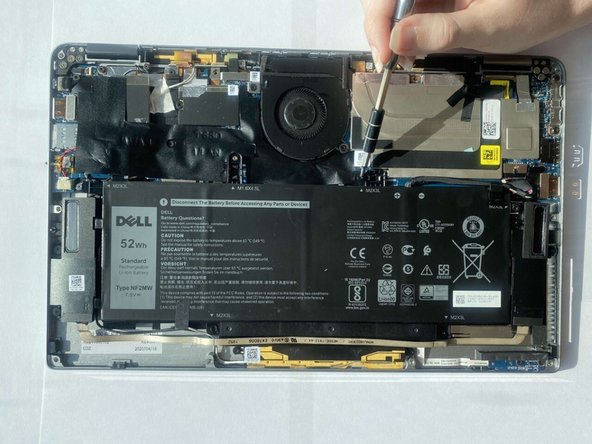
Saltar al contenido principal

Dell Latitude 9410 2-in-1 Battery Replacement

Qué necesitas

  1. Dell Latitude 9410 2-in-1 Battery Replacement, Base Panel: paso 1, imagen 1 de 1
    • Ensure that the laptop is unplugged and powered off before beginning.

    • Place the laptop upside down on a flat surface.

  2. Dell Latitude 9410 2-in-1 Battery Replacement: paso 2, imagen 1 de 2 Dell Latitude 9410 2-in-1 Battery Replacement: paso 2, imagen 2 de 2
    • Use a Phillips #00 screwdriver to loosen the ten captive screws.

    • The screws are permanently fastened to the base panel; do not attempt to remove them.

  3. Dell Latitude 9410 2-in-1 Battery Replacement: paso 3, imagen 1 de 3 Dell Latitude 9410 2-in-1 Battery Replacement: paso 3, imagen 2 de 3 Dell Latitude 9410 2-in-1 Battery Replacement: paso 3, imagen 3 de 3
    • Carefully lift off the back panel.

  4. Dell Latitude 9410 2-in-1 Battery Replacement, Battery: paso 4, imagen 1 de 2 Dell Latitude 9410 2-in-1 Battery Replacement, Battery: paso 4, imagen 2 de 2
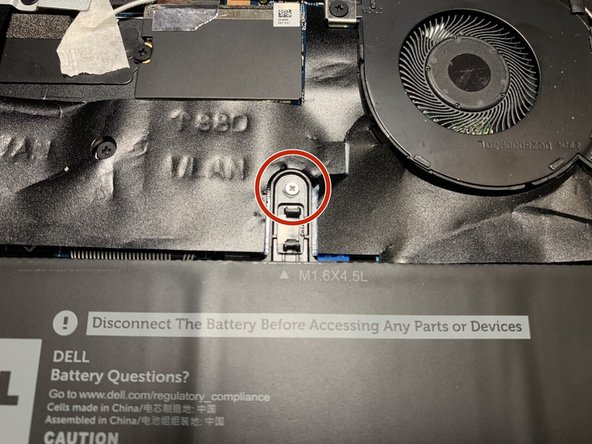
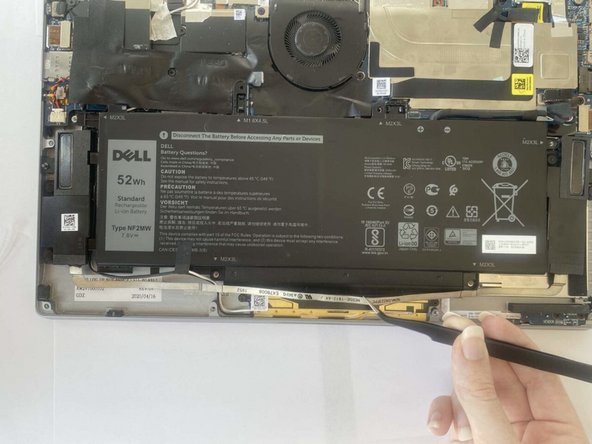
    • Use a Philips #00 screwdriver to remove the five 3mm screws that secure the battery.

  5. Dell Latitude 9410 2-in-1 Battery Replacement: paso 5, imagen 1 de 3 Dell Latitude 9410 2-in-1 Battery Replacement: paso 5, imagen 2 de 3 Dell Latitude 9410 2-in-1 Battery Replacement: paso 5, imagen 3 de 3
    • Use a Philips #00 screwdriver to remove one 4.5 mm screw.

  6. Dell Latitude 9410 2-in-1 Battery Replacement: paso 6, imagen 1 de 2 Dell Latitude 9410 2-in-1 Battery Replacement: paso 6, imagen 2 de 2
    • Grip the battery cable near the plug and pull it straight out, in the direction of the cable.

  7. Dell Latitude 9410 2-in-1 Battery Replacement: paso 7, imagen 1 de 2 Dell Latitude 9410 2-in-1 Battery Replacement: paso 7, imagen 2 de 2
    • Use tweezers to gently move the speaker ribbon cable away from the bottom of the battery.

    • The ribbon cable is thin and fragile; handle it carefully.

    • The ribbon cable only needs to be moved so that the battery can be removed; do not completely remove the ribbon cable.

  8. Dell Latitude 9410 2-in-1 Battery Replacement: paso 8, imagen 1 de 2 Dell Latitude 9410 2-in-1 Battery Replacement: paso 8, imagen 2 de 2
    • Lift the battery out with two hands.

Conclusión

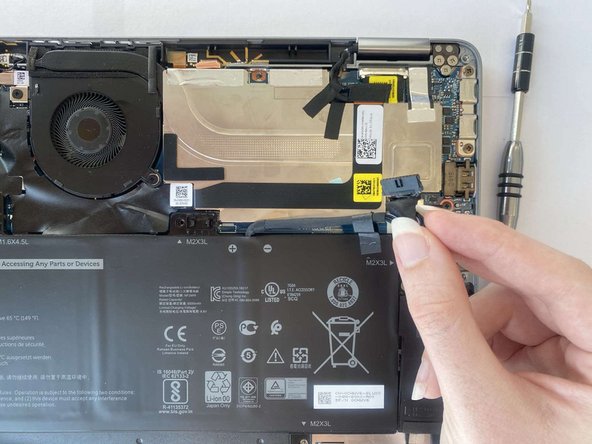
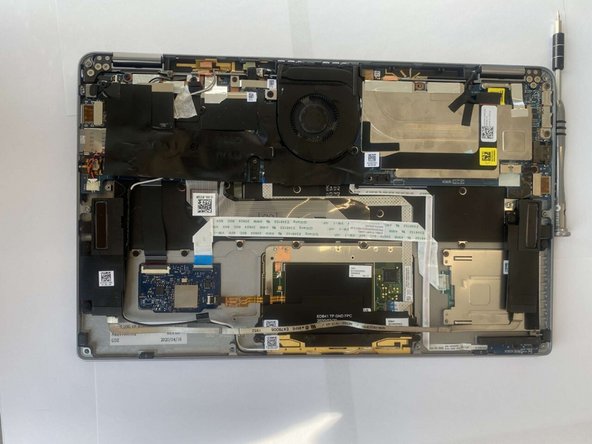
To reassemble your device, follow these instructions in reverse order.

Una persona más ha completado esta guía.

2 comentarios

This is a fantastic guide. Thanks for posting it.

EAR - Contestar

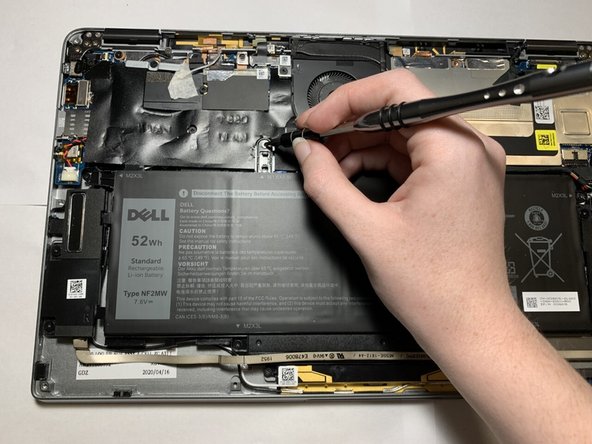
Just one question about the speaker ribbon glued to the battery (Step 7). I can't remove the ribbon from my battery. The glue is very strong. I've pulled firmly, and I'm worried about breaking the cable. Any ideas about how to loosen the glue without damaging the computer, perhaps by applying heat or some sort of solvent?

EAR - Contestar

Agregar Comentario

Ver Estadísticas:

Ultimas 24 horas: 3

Ultimos 7 días: 20

Ultimos 30 días: 44

Todo El Tiempo: 867