Introducción
In this guide, we will go about replacing the screen assembly on the Dell 3400. This computer has many plastic snaps, so please be gentle during the entire repair.
Qué necesitas
-
-
Begin by removing all 9 screws from the bottom of the laptop. These screws are safety screws so once they are loose, they wont fall out.
-
To remove bottom cover, pull up on the back of the cover to loosen snaps. Once they have become unsnapped, pull up on the right side and detach then the left side and detach. Once this is done, the lid should be able to pull off. Take care to pull it from around the ports.
-
-
-
This is an important step! Disconnect the battery to avoid the risk of electric shock.
-
-
-
-
Pull back any tape and gently lift the plastic tab holding the display ribbon in place. Gently pull the ribbon from the socket.
-
-
-
Remove the screw holding the card and plastic guard in place.
-
Gently remove disconnect both the black and white wires
-
Remove Card
-
-
-
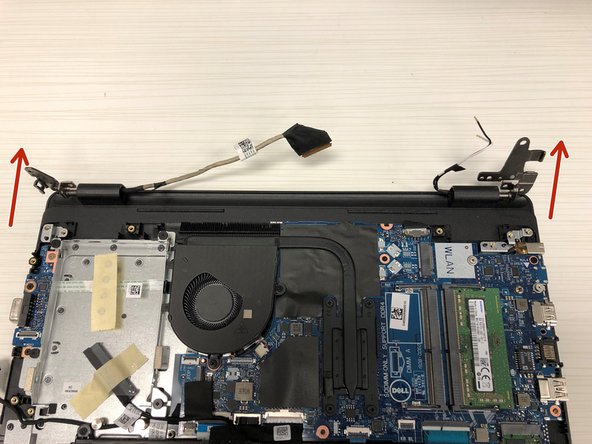
Remove the screws in both the right and left hinges.
-
Lift hinges up and pull the lid out from under laptop.
-
-
-
If everything has gone smoothly, you will have been able to separate the screen assembly from the base.
-


To reassemble your device, follow these instructions in reverse order.
To reassemble your device, follow these instructions in reverse order.
Cancelar: No complete esta guía.
Una persona más ha completado esta guía.
