Introducción
A number of things may be wrong with your Contixo V8 (model number V8X) if it's slow to respond; you can troubleshoot what's wrong with the device here. A possible issue is a malfunctioning motherboard; this guide will walk you through how to replace it.
You will need two iFixit plastic opening tools, a Phillips size #000 screwdriver, and a soldering iron or gun with a small tip. Please see this guide for information on soldering and desoldering connections within your device.
A plastic spudger would also be useful, but is optional; the iFixit opening tools would work in its place. You may also want to consider using an anti-static wrist strap and anti-static mat when desoldering the battery to free it from the motherboard; see this guide for information on how to use these items.
Qué necesitas
-
-
Find the edge of the tablet, where the front panel meets the sides. Use the plastic opening tools to pry the panels apart.
-
Lift the face of the tablet.
-
-
-
-
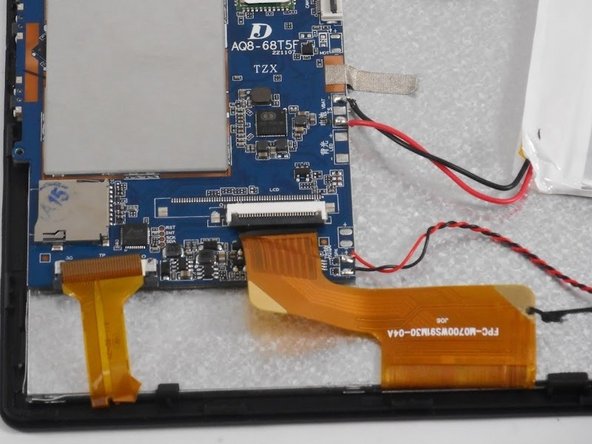
The cable marked in red is locked into place by two dark pull tabs; pull each away from the cream connection port towards the edge of the tablet. Gently remove the cable once the tabs are in the open position.
-
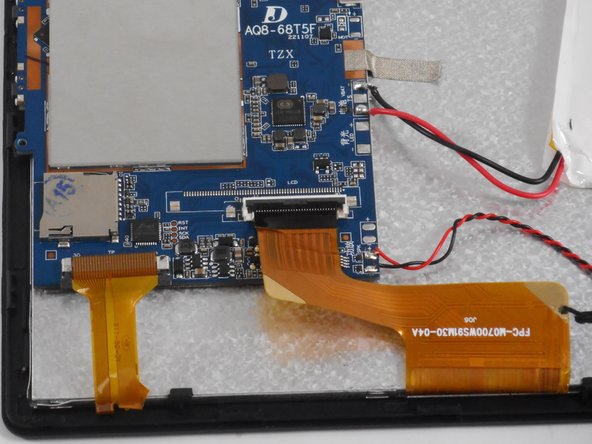
The cables marked in orange are known as zero-insert force cables. To remove the connection, flip up the dark tab and gently pull the ribbon away.
-
-
-
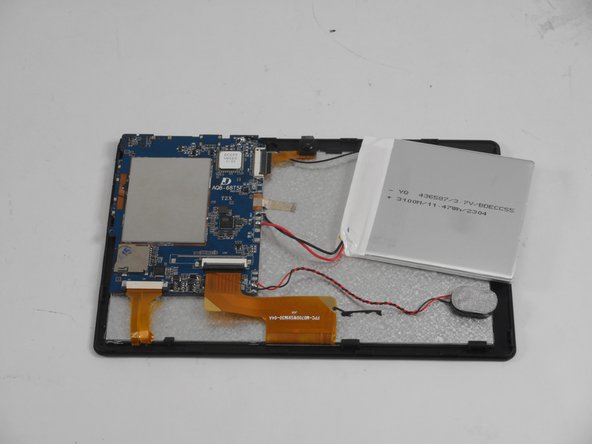
Use the spudger tool to break the adhesive holding the battery down and lift it off of the base of the tablet. One of the blue iFixit opening tools can also be used in place of the spudger.
-
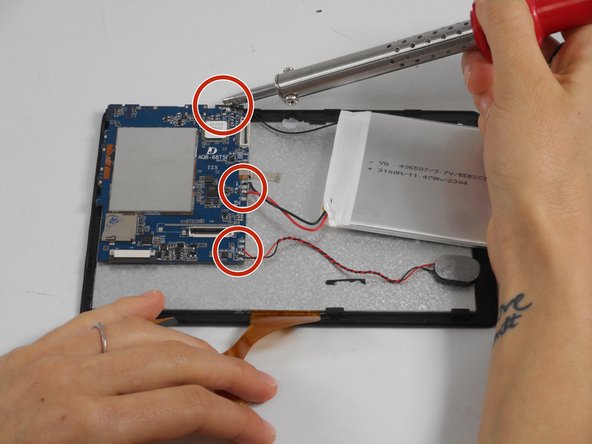
Press the soldering tip to the 3 connection points to detach the motherboard and the battery. See this guide for information and tips on soldering and desoldering.
-


To reassemble your device, follow these instructions in reverse order.
To reassemble your device, follow these instructions in reverse order.
Cancelar: No complete esta guía.
Una persona más ha completado esta guía.

Equipo

University of New Orleans, Team 3-2, McDonald Fall 2023 Miembro de University of New Orleans, Team 3-2, McDonald Fall 2023
UNO-MCDONALD-F23S3G2
3 Miembros
4 Guías creadas