Saltar al contenido principal

Changing the thermostatic cartridge - Thermostatic Bath NF SIRYO CHROME

Qué necesitas

  1. Changing the thermostatic cartridge - Thermostatic Bath NF SIRYO CHROME, Required tools: paso 1, imagen 1 de 1
    • 24mm wrench

    • 21mm wrench

    • Flathead screwdriver

    • Phillips screwdriver

  2. Changing the thermostatic cartridge - Thermostatic Bath NF SIRYO CHROME, Access to the inverter: paso 2, imagen 1 de 3 Changing the thermostatic cartridge - Thermostatic Bath NF SIRYO CHROME, Access to the inverter: paso 2, imagen 2 de 3 Changing the thermostatic cartridge - Thermostatic Bath NF SIRYO CHROME, Access to the inverter: paso 2, imagen 3 de 3
    • ATTENTION: Before any disassembly of the inverter, remember to close the water supply from the meter.

    • Check that the position of the reverse handle is on 'OFF'

    • Using a small flat screwdriver, unclip the access cover to the screw that holds it in place.

    • Using a Phillips screwdriver, unscrew the fixing screw of the handle.

  3. Changing the thermostatic cartridge - Thermostatic Bath NF SIRYO CHROME, Removal of the handle of the inverter: paso 3, imagen 1 de 2 Changing the thermostatic cartridge - Thermostatic Bath NF SIRYO CHROME, Removal of the handle of the inverter: paso 3, imagen 2 de 2
    • Unscrew the handle.

  4. Changing the thermostatic cartridge - Thermostatic Bath NF SIRYO CHROME, Disassembly of the inverter: paso 4, imagen 1 de 2 Changing the thermostatic cartridge - Thermostatic Bath NF SIRYO CHROME, Disassembly of the inverter: paso 4, imagen 2 de 2
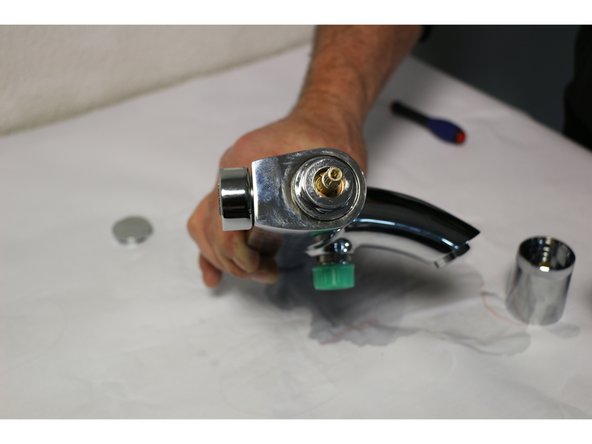
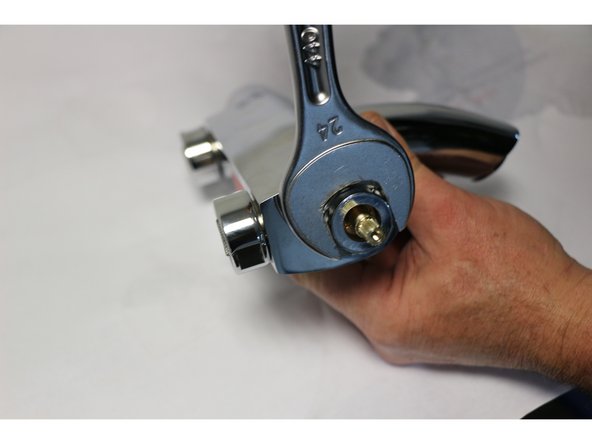
    • Using a 24 flat wrench, unscrew the nut counterclockwise.

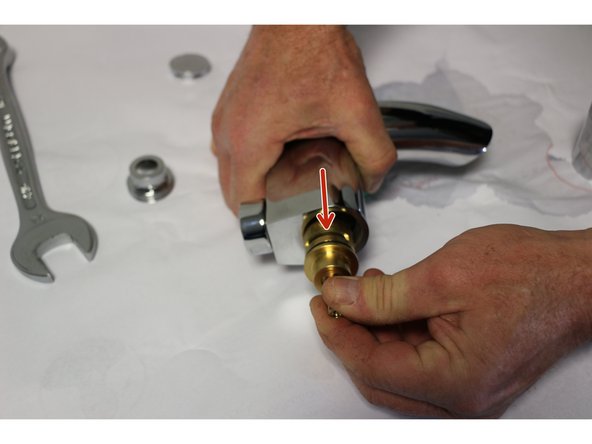
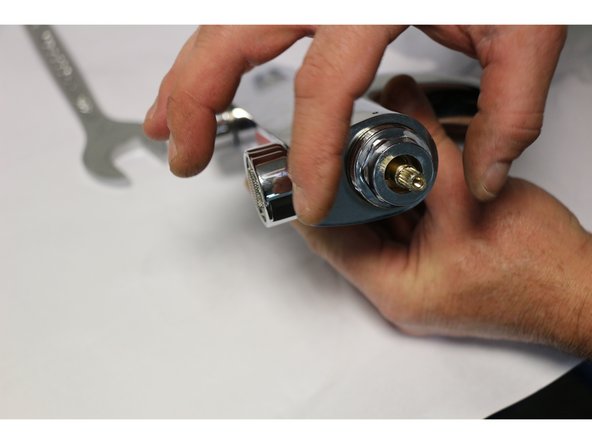
    • Remove the inverter.

  5. Changing the thermostatic cartridge - Thermostatic Bath NF SIRYO CHROME, Replacement of the inverter: paso 5, imagen 1 de 3 Changing the thermostatic cartridge - Thermostatic Bath NF SIRYO CHROME, Replacement of the inverter: paso 5, imagen 2 de 3 Changing the thermostatic cartridge - Thermostatic Bath NF SIRYO CHROME, Replacement of the inverter: paso 5, imagen 3 de 3
    • Replacing the inverter

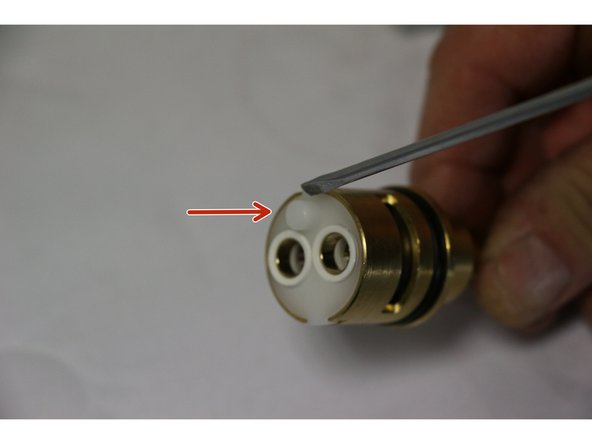
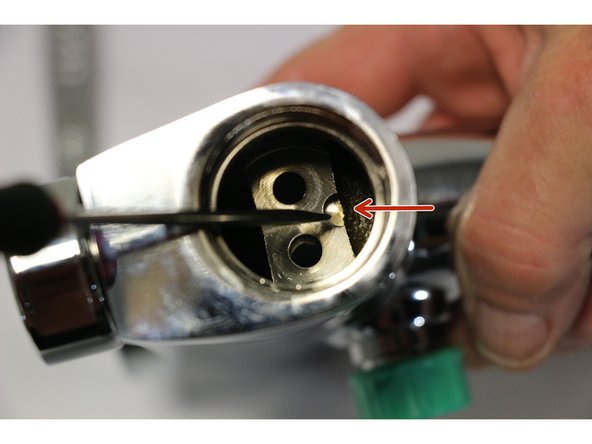
    • Please make sure to properly align the pin of the diverter with the notch indicated by the arrow in the body of the faucet.

  6. Changing the thermostatic cartridge - Thermostatic Bath NF SIRYO CHROME, Reassembly: paso 6, imagen 1 de 3 Changing the thermostatic cartridge - Thermostatic Bath NF SIRYO CHROME, Reassembly: paso 6, imagen 2 de 3 Changing the thermostatic cartridge - Thermostatic Bath NF SIRYO CHROME, Reassembly: paso 6, imagen 3 de 3
    • Insert the diverter into the body of the faucet.

    • Hand-tighten the inverter mounting nut clockwise.

    • Finish tightening using the 24mm wrench.

  7. Changing the thermostatic cartridge - Thermostatic Bath NF SIRYO CHROME, Putting the handle back in place: paso 7, imagen 1 de 3 Changing the thermostatic cartridge - Thermostatic Bath NF SIRYO CHROME, Putting the handle back in place: paso 7, imagen 2 de 3 Changing the thermostatic cartridge - Thermostatic Bath NF SIRYO CHROME, Putting the handle back in place: paso 7, imagen 3 de 3
    • Align the reference point of the faucet body with the "OFF" marking on the handle.

    • Tighten the fixing screw of the handle using a Phillips screwdriver in a clockwise direction.

    • Put the cover back in place.

Linea de Meta

2 personas más completaron esta guía.

Un agradecimiento especial a estos traductores:

fr en

100%

Estos traductores nos están ayudando a reparar el mundo! ¿Quieres contribuir?
Empezar a traducir ›

iRobot

Miembro Desde 09/24/09

1 Reputación

636 Guías creadas

0 comentarios

Agregar Comentario

Ver Estadísticas:

Ultimas 24 horas: 1

Ultimos 7 días: 7

Ultimos 30 días: 23

Todo El Tiempo: 447