Esta versión puede contener ediciones incorrectas. Cambie a la última instantánea verificada.
Qué necesitas
-
Este paso está sin traducir. Ayuda a traducirlo
-
(Picture 2, view from rear bumper) Open the trunk and remove the trunk's carpeting by simply reaching underneath and pulling up. The tools needed for changing a spare tire are located underneath the carpeting. Take out the following tools:
-
The jack, which is used to lift the car (top of picture 3)
-
The jack handle driver and its extension rod, which are used to turn the clasp (middle of picture 3)
-
A lug wrench, which is used to release lug nuts on the hubcap (bottom of picture 3)
-
-
Este paso está sin traducir. Ayuda a traducirlo
-
Place the jack in the proper location on the axle between either the front or rear tires, depending on which tire is flat.
-
In this case, the rear driver's side tire was the "flat tire" so the jack will be placed on the axle between the rear tires on the driver's side of the Jeep.
-
-
-
Este paso está sin traducir. Ayuda a traducirlo
-
On the end of the jack is a rotatable clasp. Spin that clasp counter-clockwise using the jack handle driver and extension rod. The jack will begin to rise.
-
Continue spinning the clasp counter-clockwise until the vehicle is lifted enough so that your wheel is no longer on the ground.
-
-
Este paso está sin traducir. Ayuda a traducirlo
-
Use the lug wrench in a star pattern to properly loosen the lug nuts. Refer to picture 1 regarding the loosening pattern.
-
To physically loosen the lug nuts, use the lug wrench and push down very hard in a counter-clockwise direction.
-
-
Este paso está sin traducir. Ayuda a traducirlo
-
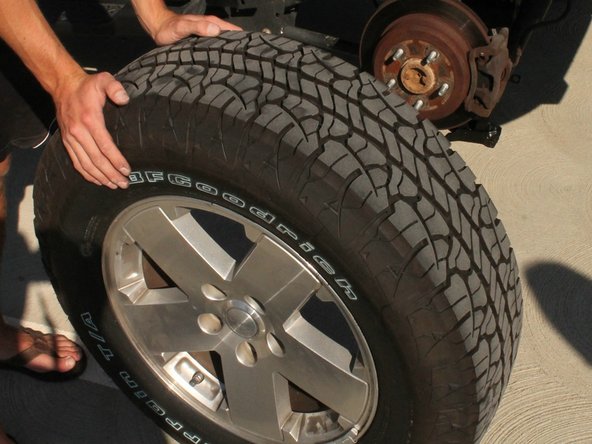
Take all 5 lug nuts off and remove the wheel by pulling it straight away from the vehicle.
-
-
Este paso está sin traducir. Ayuda a traducirlo
-
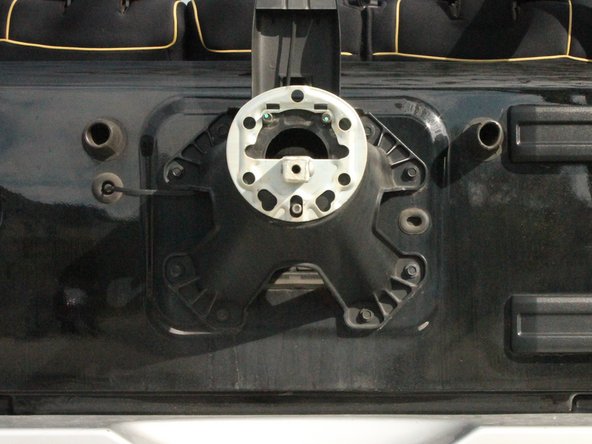
Locate the spare tire on the back of the Jeep.
-
Push hard in a counter-clockwise motion to remove the three lug nuts using the lug wrench.
-
Pull spare wheel straight off of the back of the Jeep (picture 2 has wheel off).
-


Cancelar: No complete esta guía.
3 personas más completaron esta guía.
Equipo

Cal Poly, Team 7-51, Forte Fall 2012 Miembro de Cal Poly, Team 7-51, Forte Fall 2012
CPSU-FORTE-F12S7G51
5 Miembros
9 Guías creadas