Saltar al contenido principal

Esta guía ha sufrido modificaciones. Revisa la última versión sin revisar.

Audiovox CDM-8900 Logic Board Replacement

Qué necesitas

  1. Audiovox CDM-8900 Logic Board Replacement, Battery: paso 1, imagen 1 de 2 Audiovox CDM-8900 Logic Board Replacement, Battery: paso 1, imagen 2 de 2
    • Hold the phone in one hand, slide the latch up, and pull the battery up to remove it.

  2. Audiovox CDM-8900 Logic Board Replacement, Antenna: paso 2, imagen 1 de 3 Audiovox CDM-8900 Logic Board Replacement, Antenna: paso 2, imagen 2 de 3 Audiovox CDM-8900 Logic Board Replacement, Antenna: paso 2, imagen 3 de 3
    • Grasp the antenna at its base and twist to unscrew.

    • Remove the antenna along with its plastic casing from inside the battery housing. Keep the antenna in the plastic casing for reassembly.

  3. Audiovox CDM-8900 Logic Board Replacement, Motherboard: paso 3, imagen 1 de 3 Audiovox CDM-8900 Logic Board Replacement, Motherboard: paso 3, imagen 2 de 3 Audiovox CDM-8900 Logic Board Replacement, Motherboard: paso 3, imagen 3 de 3
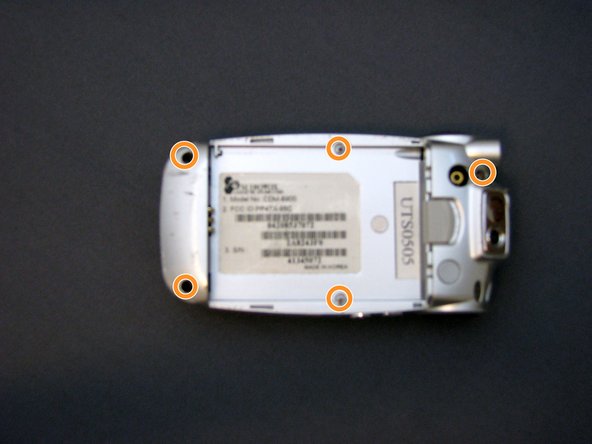
    • Remove the small rubber insert from the top of the phone to access the top screw.

    • Warning: Screws are very small and may be difficult to see while unscrewing.

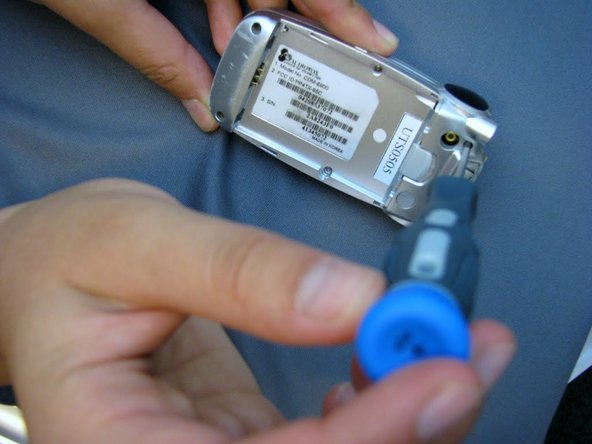
    • Unscrew all five (5) screws on the back of the cell phone with a Phillips #00 Screwdriver.

    • If screws do not slide out after unscrewing, gently flip and tap the phone in hand until the screws come loose.

  4. Audiovox CDM-8900 Logic Board Replacement: paso 4, imagen 1 de 3 Audiovox CDM-8900 Logic Board Replacement: paso 4, imagen 2 de 3 Audiovox CDM-8900 Logic Board Replacement: paso 4, imagen 3 de 3
    • Wedge the phone plate toward you, using the leverage from the plastic iFixit Opening Tool.

    • The volume control button on the left side of the phone will loosen. Make sure to carefully reinsert it during reassembly.

    • Detach the motherboard from the LCD screen connector by gently detaching the small copper plate on the top right of the logic board (shown circled in blue).

  5. Audiovox CDM-8900 Logic Board Replacement: paso 5, imagen 1 de 3 Audiovox CDM-8900 Logic Board Replacement: paso 5, imagen 2 de 3 Audiovox CDM-8900 Logic Board Replacement: paso 5, imagen 3 de 3
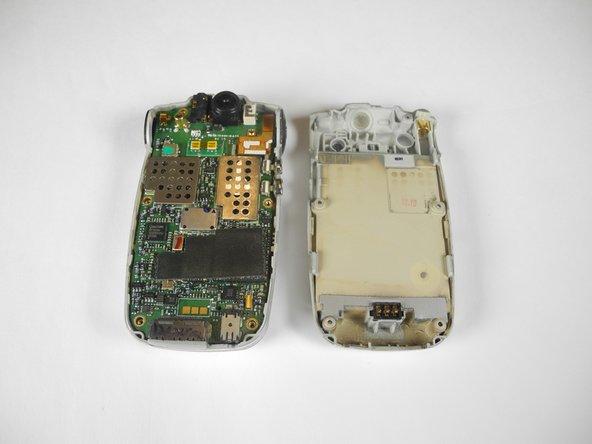
    • To release the motherboard, push the large "OK" button located on the other side of the phone.

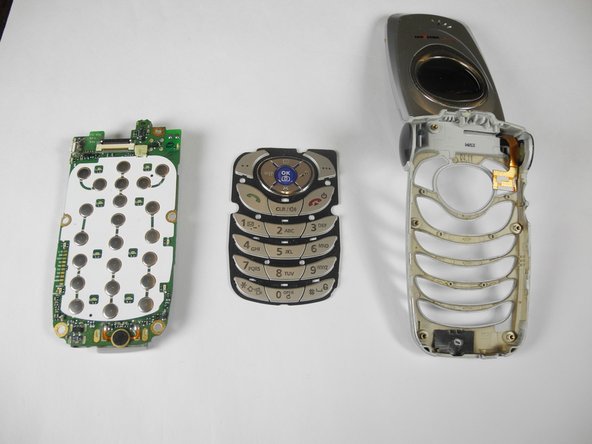
    • Before reassembly, make sure the keypad is lined up with the motherboard.

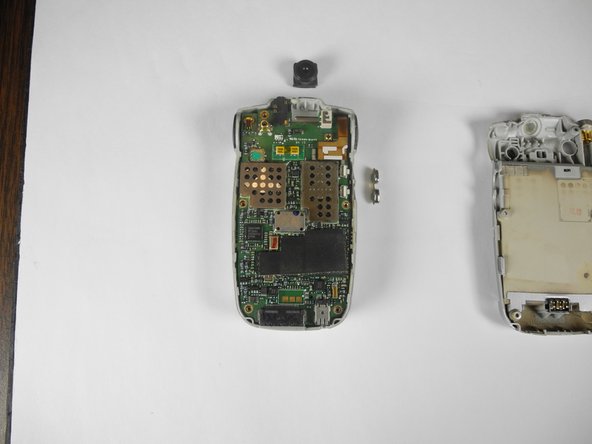
    • Before reassembly, be sure camera lens is properly aligned at the top of the logic board and the volume controls are in place.

Conclusión

To reassemble your device, follow these instructions in reverse order.

Una persona más ha completado esta guía.

Aaron Shaw

Miembro Desde 04/15/10

159 Reputación

6 Guías creadas

Equipo

Cal Poly, Team 28-31, Regan Spring 2010 Miembro de Cal Poly, Team 28-31, Regan Spring 2010

CPSU-REGAN-S10S28G31

4 Miembros

12 Guías creadas

0 comentarios

Agregar Comentario

Ver Estadísticas:

Ultimas 24 horas: 0

Ultimos 7 días: 2

Ultimos 30 días: 18

Todo El Tiempo: 2,815